
Photos of our workshops
Moderators: Head Monkey, kelvin, bigKam, skidesmond, chrismp

-
skidesmond
- Posts: 2337
- Joined: Tue Apr 07, 2009 3:26 pm
- Location: Western Mass, USA
- Contact:
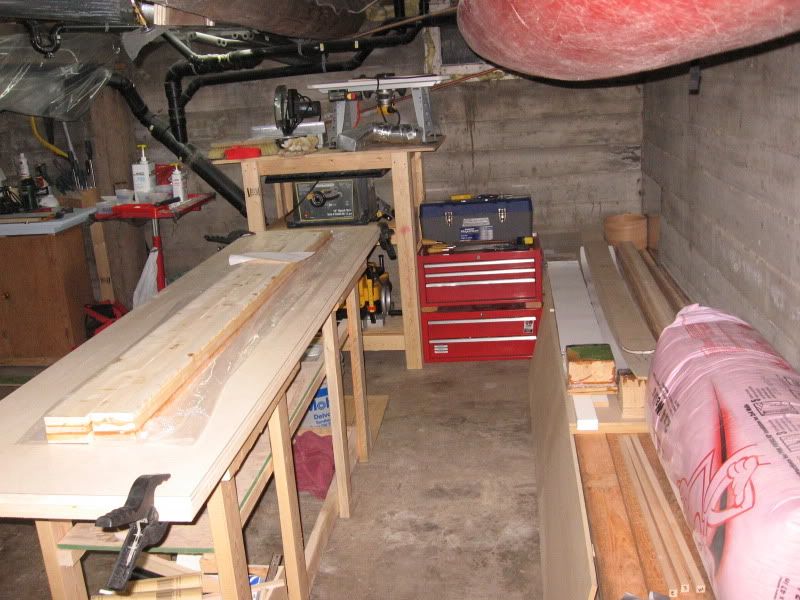
Maybe we can revive the thread. Here's some pics of what my shop looks like after I've been working in it for awhile. I also do wood working so the shop gets a lot of use as you can see. Yes it needs a good cleaning now that I'm going to building skis. The room is the basement of an addition we put on the house about 10 years ago. It's roughly 16 x 24.
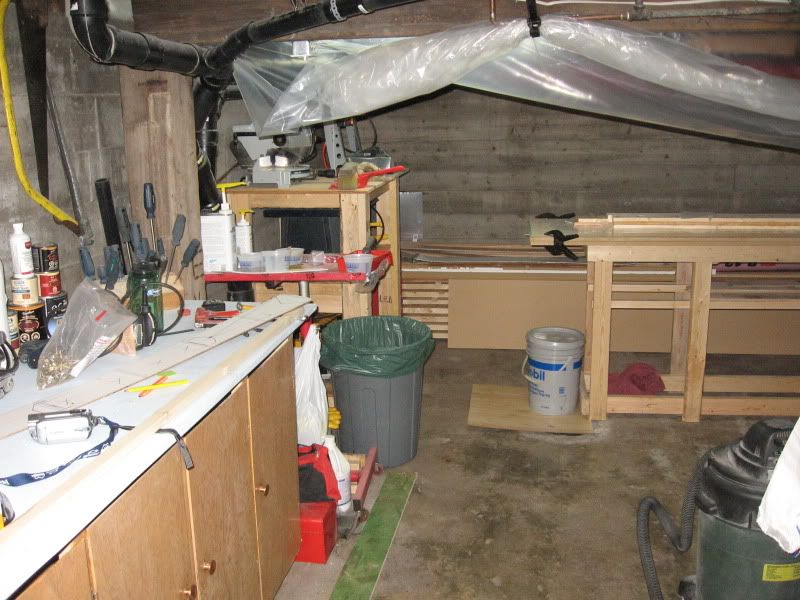
Here's what it looks like as you enter the room. The pics show the room as you look left to right.


As you can see there's not much room to layup skis at the moment. Buried behind the table saw is a new table on castors that I build for ski layup but currently has lumber stacked on it.

Behind the barrel of wood scraps are 2 large jewlery boxes in progress. They are just about done. Need to be urethaned and final assembly. I need to get them out there.

I'd like to get the ski press against a wall w/ a layup table near by. The air compressor is tucked away in another work table, as well as the planer and other power tools.
WEBBOY, maybe this is an example of what you don't want your shop to look like
I will post pics once it's better organized. Have fun and I want to warn you that you are about to embark on an big adventure!!
Here's what it looks like as you enter the room. The pics show the room as you look left to right.
As you can see there's not much room to layup skis at the moment. Buried behind the table saw is a new table on castors that I build for ski layup but currently has lumber stacked on it.
Behind the barrel of wood scraps are 2 large jewlery boxes in progress. They are just about done. Need to be urethaned and final assembly. I need to get them out there.
I'd like to get the ski press against a wall w/ a layup table near by. The air compressor is tucked away in another work table, as well as the planer and other power tools.
WEBBOY, maybe this is an example of what you don't want your shop to look like
I will post pics once it's better organized. Have fun and I want to warn you that you are about to embark on an big adventure!!
lol! well perhaps not, but still thanks for sharing.skidesmond wrote: WEBBOY, maybe this is an example of what you don't want your shop to look like
-
skidesmond
- Posts: 2337
- Joined: Tue Apr 07, 2009 3:26 pm
- Location: Western Mass, USA
- Contact:
The wood is OSB (oriented strand board) plywood in sheets of 3/4 x 4 x 8. Don't use partical board. No problems so far. I tested the deflection on it and it deflects under 1/8 inch (about 3 mm) which is acceptable for me. If I were to do it over, but still use wood beams, I'd use something like gluelams or lvl beams. I think that would have been easier to work with. In all it took 7 sheets of plywood. The entire press weight around 700 lbs.
Someone in the forum built a press using cloth/canvas material. I think they got good results.
Epoxy didn't arrive today so I'll be cleaning the shop tonight.
Have fun!
Someone in the forum built a press using cloth/canvas material. I think they got good results.
Epoxy didn't arrive today so I'll be cleaning the shop tonight.
Have fun!
I am building my press in my shop today. I got all of the materials all cut up. I am going to be angle grinding the edges (so I dont slice my hands open), sand it, primer it, paint it, drill it and assemble it all up and make a cinderblock stand for it so i dont have to bend over all the time while using it. So i will take some pics today as I am working and post them tonight. wish me luck
-
skidesmond
- Posts: 2337
- Joined: Tue Apr 07, 2009 3:26 pm
- Location: Western Mass, USA
- Contact:
Here's a quick peek in my workshop - this first picture shows the room where I assemble stuff - especially glueing up - I glue cores together or glue sidewalls on, do edges etc - it's not a 'clean room' but I try and keep the dust to a minimum. Also doubles as the materials store.

This next pic shows the workbench with pillar drill and bandsaw - I use this bench to store tools and build little gadgets etc.

And finally the main workshop where I build cores and where the press lives. You can just see the base grinder in the background, the thickness planer which is invaluable for making cores, and in the foreground a new addition - we built a simple router table which makes cutting out with templates much more stable. The main long table is bolted to the floor and that's what I use for the main build processes.

This next pic shows the workbench with pillar drill and bandsaw - I use this bench to store tools and build little gadgets etc.
And finally the main workshop where I build cores and where the press lives. You can just see the base grinder in the background, the thickness planer which is invaluable for making cores, and in the foreground a new addition - we built a simple router table which makes cutting out with templates much more stable. The main long table is bolted to the floor and that's what I use for the main build processes.
Your shop looks great dan. I wish I had that much room.
I spent most of my weekend moving lumber out of my small area.
Still have a small pile but got 95% of it out of the way.
The small pile that's left works great as a bench.
Seems like a good place to keep my molds etc.
If I could find a better place for my old kayak I wouldn't have to duck quite so much.
Built a shelf unit to store planer etc.
The area to the right of the bench was all piled high with wood.
now I can walk around my bench. YEA!!!
Yes, that's 2 new ski cores to be on the bench.
here's the view looking into the area
The bench on the left is my general workbench for everything from bending edges and waxing skis to repairing bikes, you name it.
Goes to show you don't need a huge shop to build skis.
But it would be nice
I've almost got my wife convinced we need a garage! Maybe next year.
Gonna have to be a big one 'cause she will want to park her car in there.
sam
You don't even have a legit signature, nothing to reveal who you are and what you do...
Best of luck to you. (uneva)
Best of luck to you. (uneva)
-
skidesmond
- Posts: 2337
- Joined: Tue Apr 07, 2009 3:26 pm
- Location: Western Mass, USA
- Contact:
I like the pics! A good organized shop doesn't really need to be big, but like you say it helps. I spent a good part of the weekend cleaning mine and I can actually walk in it with out tripping over stuff.
Now that my epoxy has arrived I'm bound and determine to get my first set of skis made by the end of the week. My problem is too many projects going at the same time and keeping it neat is a project all by itself. I'd love to take over more of the basement but I finished off the other part as a TV/hang-out room for the kids. And now they rarely use it. But it's nice to have the spare room.
As you can see my room is multi purpose too. All my work benches are on heavy duty wheels (400 and 500 lbs per wheel) so I move them around as out feed tables for the table saw or re-arrange them for cutting/supporting sheets of plywood. There's also storage for power tools, hand tools, etc., under the work benches. Try to get the most out of your work space. Figure out a consistent height for the tables that are comfortable to work at. All my work tables are about the same height and just a bit lower than my table saw to be used as in/out feed tables.
The bottoms of 2 of my benches are big torsion boxes. They are sturdy and can support a lot of weight. On top of the torsion box I attached simple cabinets w/ workbench tops on top of the cabinets.
SAMMER -build a 3 car garage, use 2 for ski building/workshop and 1 for the wife's car.
I am actually curious in seeing some of your guys' different ways to store your materials (shelves etc.) and your work benches. I have seen some of yours in this post but want to see some more and what works best for you guys. I am trying to think of some ways to store my materials so that they are easy to get to but also saving as much room as possible. I got some ideas, just wanted to know if you favor something specific.

Figured I'd resurrect this thread.
I keep all my big equipment on one side and all the small stuff and storage on the other.


The bench along the back was is part of a bowling alley which is pure awesome. The press isn't done yet but when it is, it'll have to go into another room which is currently full of crap. The bench on the left rolls out so I can do edges, sidewalls or whatever.

I keep all my big equipment on one side and all the small stuff and storage on the other.
The bench along the back was is part of a bowling alley which is pure awesome. The press isn't done yet but when it is, it'll have to go into another room which is currently full of crap. The bench on the left rolls out so I can do edges, sidewalls or whatever.