

Yep. Zero camber to start with. The press will have more mdf layers below the molds when I get finished with it hopefully this weekend. The first sets of skis are pretty fat ( original plan was to have them for our trip to japan in February, but that didn't happen!) powder skis. I figured zero camber would be slightly easier for the first go. I plan on building a camber block when I have time. Realistically I should build some skis that are actually suited to Australian conditions (about 90mm waist maximum prob apart from occasional really good days).
For a camber mold I have been considering how accurate a job the planer method of core profiling does. I was thinking of setting the crib up to make a symmetric camber curve then run some 25mm mdf through until the curve is complete (maybe 18mm if 25 can't bend). Otherwise will look into doing it the 22 cross section method or maybe 10 ribs with a thick mdf top.
Thanks all for the encouragement.
Getting started!
Moderators: Head Monkey, kelvin, bigKam, skidesmond, chrismp
-
skidesmond
- Posts: 2337
- Joined: Tue Apr 07, 2009 3:26 pm
- Location: Western Mass, USA
- Contact:
hhmm.... I never thought of creating the camber mold the same way you would make a core using a planer. Good idea! You'll want to pad the bottom of it so it won't snap under pressure. I looked at previous posts and looks like you're already doing that.
btw- Thanks the great pics, you're making great progress.
btw- Thanks the great pics, you're making great progress.
-
doughboyshredder
- Posts: 1354
- Joined: Mon Sep 17, 2007 7:37 pm
thanks doughboy.
Interested about what you are saying about the MDF
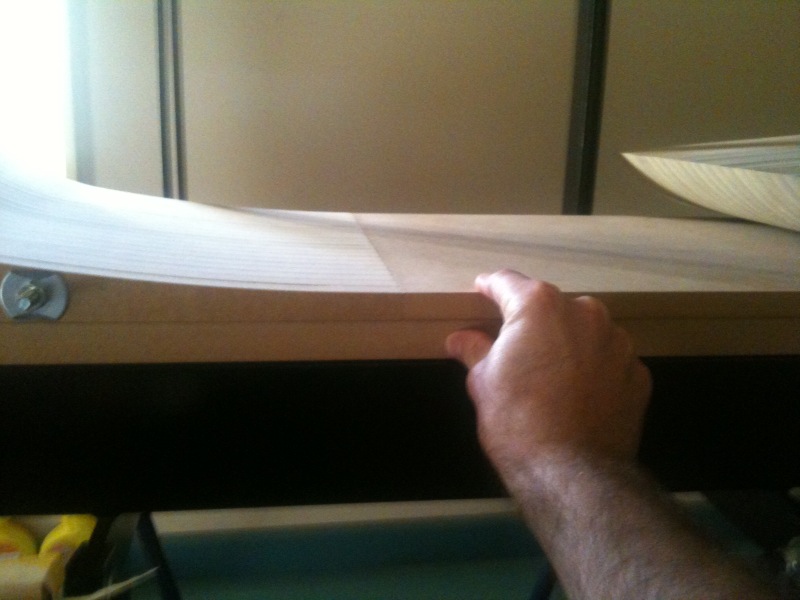
Is it the piece physically between the tip molds (with my index finger on it in the picture below) you are worried about? I thought this was a fairly well accepted method for making an adjustable mold? thanks for any input
Interested about what you are saying about the MDF
Is it the piece physically between the tip molds (with my index finger on it in the picture below) you are worried about? I thought this was a fairly well accepted method for making an adjustable mold? thanks for any input
Don't wait up, I'm off to kill Summer....
-
doughboyshredder
- Posts: 1354
- Joined: Mon Sep 17, 2007 7:37 pm
yeah that piece between your fingers.
You may be thinking of molds for vacuum bagging. I had issues with 1/2" mdf, thicker might not be as bad. Also, if you only had top heat it's not an issue. I use cheap particle board for that piece, and throw it out after one or two pressings.
I thought mdf would be better than particle board, but after 2 pressings it had pretty significant channels dented in to it where the edges of my boards were.
That board is 18mm MDF (whether that makes a difference or not).
Were you getting denting of the MDF board even through al/heatblanket/al then lower aluminium skin? What pressure were you using?
I was quite surprised teh other day when adjusting my tip molds that I had cranked the nuts on tight and even with a penny sized washer there was a depression I had created with this force. I thought MDF was stronger than that!
I guess I based my idea on pictures like this one below from head monkey's press. It looks like MDF between the tip and tail molds lying horizontally. If you really have to throw that piece away every couple of presses with MDF that gets pretty expensive.
Don't wait up, I'm off to kill Summer....
-
jeff@shaggys
- Posts: 65
- Joined: Sat Mar 29, 2008 5:42 pm
- Location: Michigan
- Contact:
As long as your gaps underneath the mdf sheet aren't to large I think it should be fine. We use 1-2 (1/2") sheets for each model depending on the camber/rocker profile. Each of our 6 mid-sections has seen 20-50 pair of skis and they are as flat as when they were new.
Disclaimer: Have 2" microlam underneath the mold and use al/steel cassettes. Press at 40 psi.
Disclaimer: Have 2" microlam underneath the mold and use al/steel cassettes. Press at 40 psi.
skishaggys.com
-
doughboyshredder
- Posts: 1354
- Joined: Mon Sep 17, 2007 7:37 pm
-
skidesmond
- Posts: 2337
- Joined: Tue Apr 07, 2009 3:26 pm
- Location: Western Mass, USA
- Contact:
I have the same kind of setup as head monkey. I have a 3/4in mdf between the tip/tail blocks. I press at around 40-45psi and so far the 3/4in (about 18-19mm) is holding fine, aside from some epoxy leaking on to it. Just need to be good about keeping that part clean between pressings.falls wrote:Thanks guys. I'm looking at 40-50psi to start so hopefully it will be ok.
@scc:when you say the gaps under the mdf what do you mean? Can you elaborate a bit on that. Thanks
You may need to beef up underneath the form w/ more mdf. I did quite a few test pressings (w/ no skis) to make sure the press held, forms didn't warp or get malformed and most of all you want to make sure when the hose is inflated that it will push down into the tip/tail blocks.
Do lots of dry runs with the press before actually pressing a set of skis and you'll save yourself a lot of headaches/money.
Thanks skidesmond. I am waiting on some plywood which will be added under my pressing surface. I just have it in the press like this at the moment for storage really. In the end I will have one inch plywood followed by one inch mdf. Then two layers of 3/4 inch mdf. On top of that I will sit the one inch mdf board with the tip/tail blocks and 3/4 inch running length in my current pictures. I think that should be enough support. (hopefully a camber block will be incorporated later). I will add or remove layers to adjust my gap to slide the cassette in and make sure I get a good tip/tail pressing. I'll also be able to adjust the top mold to help find the best spot for getting pressure in the tip and tail.
It sounds like lower pressures and thicker mdf for the running length will make these bits last longer.
It sounds like lower pressures and thicker mdf for the running length will make these bits last longer.
Don't wait up, I'm off to kill Summer....
-
jeff@shaggys
- Posts: 65
- Joined: Sat Mar 29, 2008 5:42 pm
- Location: Michigan
- Contact:

ok thanks. that's what i thought. Current zero camber is solid. Will make a camber mold at some point - if i make it non solid ribbed (like that picture) will have only narrow gaps between the ribs and use a thick piece of MDF on top.
Still waiting on this 25mm plywood. Frustrated.
Still waiting on this 25mm plywood. Frustrated.
Don't wait up, I'm off to kill Summer....

Top mould tip and tail blocks hung up.
I routed a rebate in the plywood upper layer in the press and the blocks have ball bearings that run on this ledge for adjusting them back and forth for different ski sizes. Turned out pretty well.
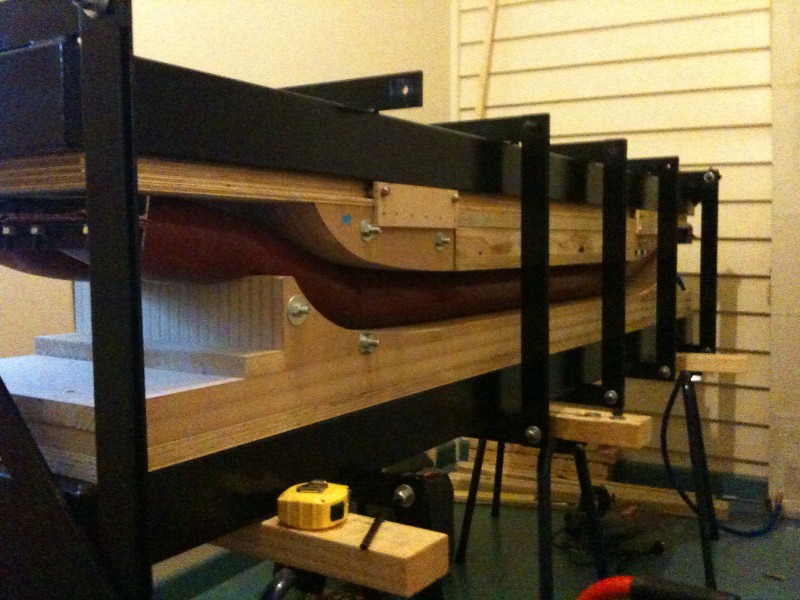
First test inflation this afternoon in the press, without cat track.
Hoses were too long as I originally made them before the cross braces at the end of the press were added. Trimmed and resealed the end and everything fits nicely. I think my max ski length might be about 190cm or a bit more
Need to rework the hose attachments as under pressure they push into the lower deck and get some air escaping. I will get some 90 degree elbows to run off the hose inlets and that should be sweet.
Cat track suspension is next - thought I had it sorted but what I planned hasn't worked. I want to fix hooks to the actual upper press frame rather than the wood. I had some metal screws that said they should sink into the 3mm steel, but no luck. I think I will end up getting some rivets and a hand squeezer to fix the hooks on that will support the bungees. All going well this time tomorrow the press will be just about operational.
Don't wait up, I'm off to kill Summer....