So... I've volunteered to build a set of skis to be auctioned off to raise money that is used for burned out families. I have been waiting for the tops to be printed and in the mean time I have everything else prepared and ready to go. What to do? I made another set and decided to press it. Here is a time lapse (first attempt) of the process. If you watch and see something that I could be doing better or any good ideas about my process, please let me know. More to come later.
Thanks,
ra
Hum... drinking that leftover epoxy might be something I would not do... but maybe it's the ticket to some awesome skis !
Can you explain why you put a small piece of VDS (?) between the first Fiberglass layer and the core (middle front section of the ski)... does it have something to do with dampening ?
Also I don't see how you locate your core relative to the base ? how do you make sure it doesn't shift ?
Thanks !.. and keep up the great work !
Ben
A bad day skiing is always better than a good one at work...
Hey Ben,
Kind of a bad (?) habit of mine to enjoy a fresh cold brew while doing the lay-up. Caution is always applied so I don't accidentally drink from the wrong cup!
The vds you see were left over pieces and decided to just put them in. As for location, I was kinda thinking of the dampening as well. Don't know if it does anything or not, just that it won't hurt anything either.
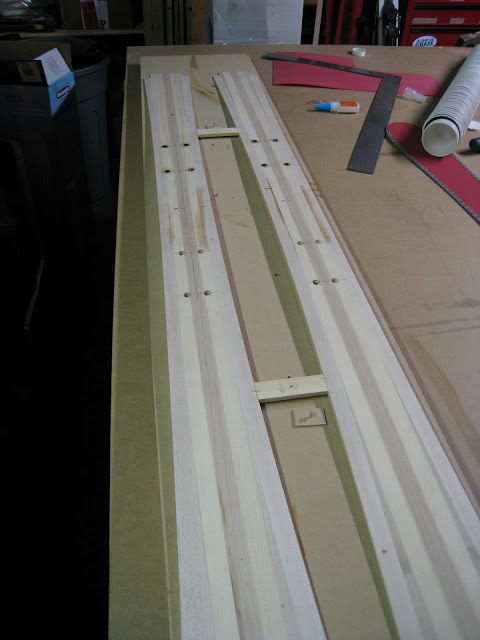
To locate the core to the base I use small plastic things which I believe are called "standoffs". Commonly used in electronics on circuit boards to isolate. I then use a sheetrock nail through the core to line up the core with the standoff and the core falls into place. The standoffs are hot glued to the base.
Here is an old pic and I hope you can see em in it..
nails in there could act as a stress point.
If you have the option is much better to put your alignment dowels outside the core and they cut off with the flash.
No real big deal, either works, I would just rather not have more holes in my core than I need.
I always wanted to try some al in the foreboddy of the ski like cam has been doing to reduce vibrations.
Great work thanks for sharing!
MM, The nails are just used to "locate" the core over the pins, You could say align the core to the base so it slides over without much issues as the pins are very small. The nails are then removed and lay-up is continued. I do know of some people who just run a brad nail through the core and base and alignment is done. They have had no issues with that either.
ra
MontuckyMadman wrote:If you have the option is much better to put your alignment dowels outside the core and they cut off with the flash.
How do you put a dowel on the base outside the edges?
You could do it like ben_mtl...
Or on tabs on the outside of your core. Glued to your cassette.
I always liked the simplicity of bens solution. Never got that organized, still using little alignment blocks hot glued to my mold.
Either way it's gone with the flash.
sam
You don't even have a legit signature, nothing to reveal who you are and what you do...
Oh OK I didn't notice the little standoffs on the video.
thanks for the explanation !
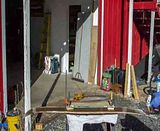
what I personally do (picture just above) is pretty low tech, I basically use scraps of wood from the sidewalls or the flash of previous skis + some bamboo skewers (very convenient as they're exactly 1/8" in diameter).
first 2 pieces of wood take car of "linking" the cores together, exactly 7" center-to-center (wherever it's convenient, depends of the thickness of the scrap...), I then drill a 1/8" hole in the middle of those links.
While the glue is curing I prepare my positioning pins :
I cut 2 small pieces out of a bamboo skewer, a bit shorter than the core thickness where my "links" are. I cut some squares (1in x 1in, very roughly) from the flash of the tip of a wood core (2mm thick). Then assemble 1 square + 1 pin, put double sided tape under the base on the pin, done !
When I'm preparing my layup : I glue the bases to the cassette (3M glue spray), 7in center-to-center, I put the pins in their matching holes on the "links" between the cores, peel the tape backing and position my cores exactly where I want them over the bases. At that point the pins are barely touching the cassette so it's easy to move them. When done I just push the pins against the cassette, the tape bonds to the cassette (even when waxed), I lift the cores assembly, set it aside and I'm ready for layup !
The good thing about it is the pins are in a location where there's no fiberglass, so no need to make a cut for that + I only have 2 pins to align for both cores !
It's pretty easy, I usually do it while I'm gluing the edges on the bases. Since the assembly of the 2 cores is kinda fragile I keep it for the last moment so I don't have to manipulate it too much.
A bad day skiing is always better than a good one at work...
So, Here is the finished ski. What I wanted to try on this set was to get a high gloss shine on the tops. These skis were pressed with cotton that I tye-dyed. normally I either just leave it after pressing or I put a few coats of polly on it to help protect from the sun and what not. This time I decided to do a "hot coat", sand, and then buff it out.
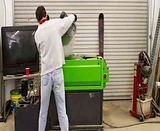
Things did not go to well at first as I did not understand the process or have the proper equipment. After much research and tool sourcing, I came out with this. I know I will do much better on the next pair as this does have a learning curve.
Enjoy,
ra
here are the skis..
Thanks.
Normal layup. Cotton fabric that was tie-dyed as the top layer. After flash removal and base prep, I waxed the bases and left it heavy to protect it. The "Hot Coat" I spoke of is what they do on surfboards. It was originally called hot coat because they would add a little "kick" via extra hardener so it would set off quicker. I spoke with West Systems and they said do not mess with the ratios. If you do, The epoxy will not harden. Some also use an additive (wax based I think) to the epoxy resin which aids in the reduction of viscosity and supposedly helps with the sanding. I did not as I did not want to wait or drive to get some.
Here is what I did.
Mix resin and hardener as usual (small amount).
Used a cheap disposable brush to apply the epoxy.
Start at tip and work down the ski to the tail.
Work your way backup only at an angle (45 or 60 depending on what you read)
Go Back over it at the opposite angle
Finally go back tip to tail.
Everyone says walk away at this point... Head their advise! I did not and that was my mistake!
Once it tacks up you can repeat the process again. I did it three times for a nice coat.
Keep in mind this can and most likely will add weight to the skis. In my opinion it is not much however I did not weigh them before or after as it is not a concern for me.
I started sanding with 220 W/D wet and worked my way up to 2000 W/D wet. Next up is the rubbing compound then finish with buffing compound.
I read that it works with plain old fashioned elbow grease but my elbows must be too old as it got me nowhere quick. This is where I did more research and hit up the local auto paint supplier for supplies and information. Use a power buffer designed for the job. Also use the correct pads and compounds. Quick and easy after that!
Things to be aware of...
1.DO NOT overwork the epoxy.
2.When buffing, Figure out the direction the wheel is spinning and only have contact on the side of the ski with the wheel spinning as it goes off the side of the ski. If you do it the other way, it can ruin the pad. Buffer can be flat in the center portions of the ski. Just use caution when working the edges.
3.Medium pressure with the buffing compound, light pressure with the polishing compound.
4.Use caution and keep the buffer moving. It will generate lots of heat and will burn through the epoxy.
After all that, Sit back and admire a truly bitchen look. They come out very smooth. Problem with this is you see anything that gets on them and you keep wiping them off. Like when I put them down to take the pics...
ra
I use a similar method, but I only do 1 coat. I lightly sand the skim coat of epoxy out of the press. Wipe down with plain water to remove the dust. Let dry.
Apply a generous coat of epoxy. Brush as described above. Lightly pass an electric heat gun over the epoxy to pop the micro bubbles.
Let it sit until it begins to kick. Touch up the fisheyes by dripping some epoxy on then with a toothpick. Lightly brush them out.
I find the surface tension on the epoxy draws it away from the edges of the skis also. And I have to lightly brush this out also, lightly flame this to help if self level.
Do a second pass with the heat gun to pop more bubbles.
Repeat as above as needed but don't mess with it too much after it starts to gel.