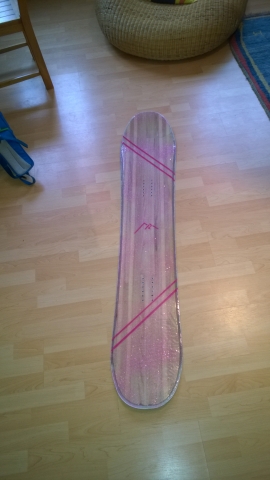
Thought that maybe someone wanted to see my first snowboard. It's supposed to be a christmas gift to my girlfriend.
measurements:
Length 1550
Shape 298 / 251 / 278
Radius 7.7m
stance 500 -600 mm
setback 25 mm
shape:
Thanks to everyone who provided input!
Hybrid S-Rocker with camber under the backfoot and a long nose rocker starting right under the front foot (thanks. 3/4- Edges with aluminum tip and tail savers.
1) base with edges and tip and tail savers spray glued to my adjustable mold
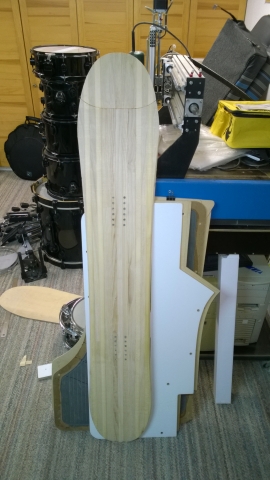
2) profiled core with wooden tip spacer
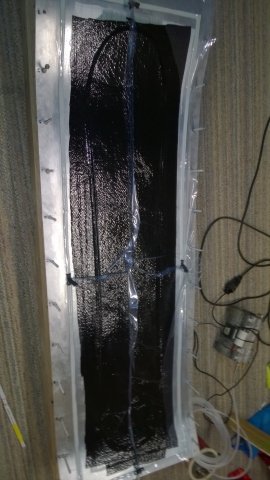
3)layup under vacuum
4) base before flashing
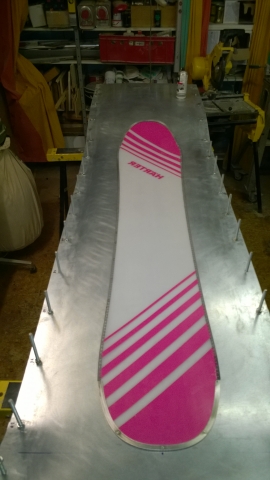
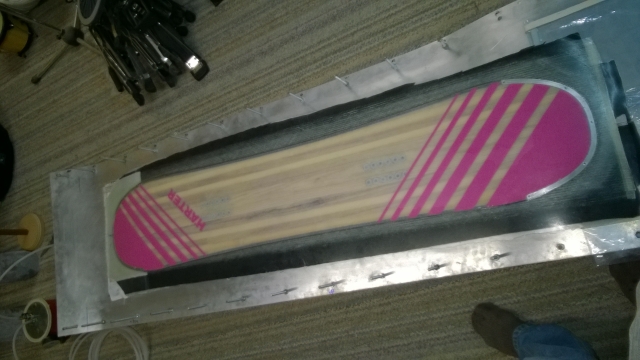
5) finished board with epoxy topcoat
if you've got any questions I'm happy to answer them.
Only thing to do now is grind away the epoxy that got onto the base. Do you guys have a clue how to do that by hand? the base is a bit convex and my local shop is afraid they'd grind through the base in the middle if they run it through their machine.
Looks rad. You paint those graphics ? To sand you can use a belt sander. First use a metal scraper and some elbow grease. The shop should be able to do it if they don't use the autofeed. I don't think I've ever had a truly flat board the wasn't a split. I do prefer convex though. Concave all you can do is push hard and grind away those edges . Huge weight savings though Lol
It's a powder board right?
How far convex is it? Your talking base would grind first in the middle during base grind right? (Some people seem to look at this the other way)
If it is too much to safely grind you could do it by hand with a belt grinder and leave some of the convexity, it will be a bit loose on the groomers but wont matter in powder.
Thanks! I'm pretty happy with the result myself! And as the board has some pink paint and glitter on it my girlfriend will be happy as well.
the pink stripes and my logo are painted using water based acrylic paint. directly painted on the base. after pressing I sealed the top with epoxy before using the paint and then a second coat of epoxy.
The aluminum has some holes in it i used to hold it on my cnc. in addition i used a coarse sandpaper to help bonding.
Yeah supposed to be used mainly in powder. just checked the base again. it's only really convex in the rockered part . if i hold a straight ruler to the base so that it touches the edge on one side the distance between edge an ruler is about a mm. I'mm gonna risk it and give it to the shop.
If its only out that much you will be fine. Thats only half a mm proud in the middle. She's gonna love it. Nice job.
Maybe just point out the convex area to the shop so they can be careful with it.
the board was a success! my local shop did a really good job with the first service and my girlfriend could not believe her eyes when she saw it.
Next project is nearly finished. A stiff powder ski for myself.
the dims:
length: 1960mm
tip 146mm
mid 126mm
tail 140mm
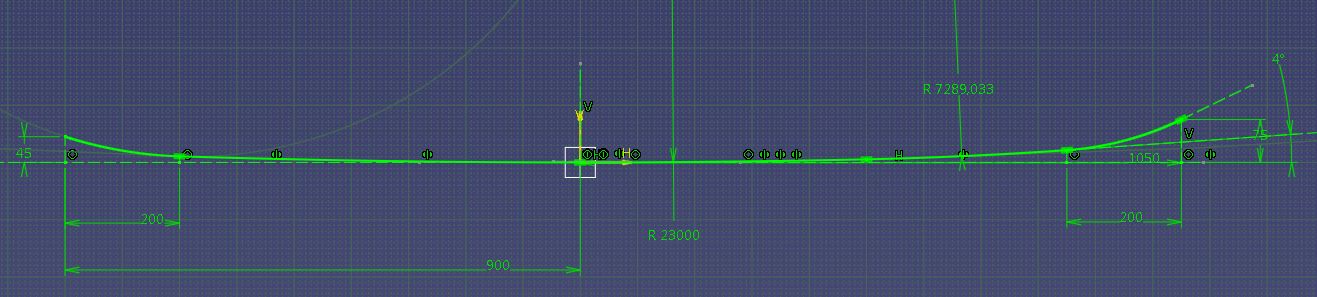
radius 23000mm
matching rocker radius
core made of fir with epoxy/graphite sidewalls
tip and tail spacer made from corecell
CNC ed die cut base.
Top sheet consists of a very light hybrid carbon/kevlar weave. Unfortunately it doesn't look black and yellow as the dry cloth does. even from upclose it seems to be some kind of military olive grey.
need some final coats of polyurethane varnish and a base grind.
questions welcome
looks pretty cool
did you centre the full rocker radius at the waist point of the ski?
3mm corecell? and is it exposed to the outside at the edges or you said you had some type of sidewall as well?
from the cd screenshot you can see that there is a two step nose lift in the front starting 500mm in front of the waist point.
it's 3mm corecell. i used a cap construction in tip and tail so that the corecell is not exposed to humidity. The sidewalls consist of epoxy mixed with graphite powder and cotton fibres. I ran out of PU. I'm pretty sure they'll hold up.
It's green base material. I could use the cnc cutter at my university to cut my bases. As the table isn't long enough I had to cut multiple parts anyway.
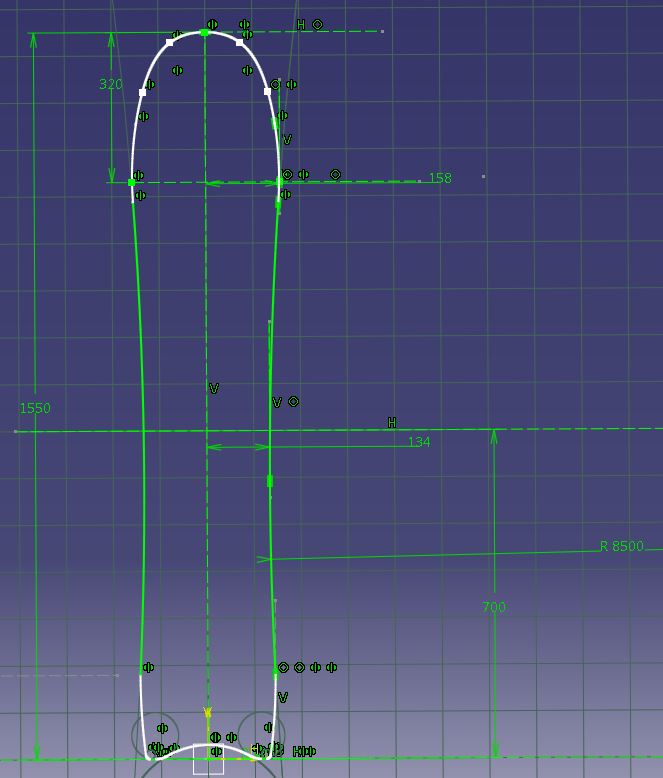
I had some leftovers from the girlie pow board. So I decided to build one for myself. I had a spare core with about 1560mm. As I'm 193cm tall I'd usually go for a much longer board. So I decided to build a board similar to the hovercraft by jones snowboards. A friend cnc'd the templates for base and core. I'm just not so suire any more about binding positioning.
Here is the boards outline. Where would you guys put the center of the stance (currently set at 700mm from the tail)?
I'll be using camber between the feet and a continous rocker starting under the front foot.
If you build a swallow tail you can move the bindings forward of the center of sidecut and you get a quicker turning board with a lot of power and feedback but for this shape I would say just a little set back.