Page 8 of 14
Posted: Fri Jul 19, 2013 3:48 am
by knightsofnii
twizzstyle wrote:You'd be surprised how many mistakes/flaws you can make and still get a perfectly skiable ski. I have a motto "that will fill with epoxy"

"oh....shit...."
"nah man, that'll press out!"
hahaha, yes and no, sometimes obvious edge gaps can disappear which is neat, after a pressing and grinding, but yea the best mistake we made
was when we goofed on finishing and handed a teamrider the deck and
he said "no way, dude, a bottle opener!!"

Posted: Fri Jul 19, 2013 10:21 am
by skidesmond
You have to put them on snow!
I had plenty of flaws and out right gaps from the core slipping off the layup by 1/4 inch. I filled it in w/ epoxy and eventually skied them. They were rock hard stiff but it gave me a good starting point on making wood cores.
Posted: Fri Jul 19, 2013 1:16 pm
by SHIF
The art of ski building is finding clever ways to overcome unexpected errors and mishaps. We all make mistakes somewhere in the process, that’s just part of the experience.
Cheers,
-S
Posted: Fri Jul 19, 2013 6:28 pm
by MadRussian
MadRussian wrote:always something

another possible issue in need of suggestion.
Sometimes ago I made mold out of three sections tip tale and camber. Now looking at the tip section not sure if I over done it. It 200 mm long plus another 50 mm for cassette I don't remember what tip radius but it rise about 70 – 75 mm. Now looking at it I think it's too much.

another day another problem lol
it was too much
never again I going to make tip/tail molds like this. Mold this shape combined with heat blanket which bit longer than it should've been.... Perfect problem cattracks do not fully settles in beginning of curvature. 3/8" at the tip, 1/4" at the tale space between cassette and the blanket I can't get rid of. Blankets with aluminum got pinched on top of the bottom mold and not sliding down into the place. Tried piece of wood, other firehose, ramped up pressure to 80 PSI nothing. All because tip/ tail molds shaped incorrectly
firehose fully inflated only 1.5 " so definitely not the case of too much space.
Posted: Fri Jul 19, 2013 6:40 pm
by MadRussian
SHIF wrote:The art of ski building is finding clever ways to overcome unexpected errors and mishaps. We all make mistakes somewhere in the process, that’s just part of the experience.
Cheers,
-S
exactly.
sometimes problems overwhelming. Doing every step of the project for the first time doesn't helping. This ski building gig by far most complicated project I ever did.
Posted: Sun Jul 21, 2013 6:48 pm
by MontuckyMadman
Mr that tip mold looks fine from here.
Thers other issues at play to get tip comfority. The space you have for the ends of the bladder to expand is one and how flat you have the hose is another. The length off all the materials as well as the amount of cassette materials and what materials they are.
Take a pick with a ski In ther under pressure with all the stuff and maybe we can help.
Posted: Tue Jul 23, 2013 1:54 pm
by MadRussian
MM thx for suggestion. Played a little with it now tip/tale conformity okay.
back on track to press skis on Thursday. Only I got left to do
cut basis and bend attach edges.
Posted: Tue Jul 23, 2013 1:59 pm
by twizzstyle
MadRussian wrote:Only I got left to do
cut basis and bend attach edges.
Wait until thursday morning to cut the bases and attach the edges. if you cut the base and let it sit, it will warp. Also be sure to use a template when attach the edges to keep things straight! It's easy to curve your whole ski and not realize it.
Posted: Tue Jul 23, 2013 3:50 pm
by MadRussian
twizzstyle wrote:
Wait until thursday morning to cut the bases and attach the edges. if you cut the base and let it sit, it will warp. Also be sure to use a template when attach the edges to keep things straight! It's easy to curve your whole ski and not realize it.
Thx twizz
for some reason I thought attaching edges stop warping

any last-minute advice?..... I can take your problems anymore lol
Posted: Thu Jul 25, 2013 6:41 pm
by MadRussian
Posted: Thu Jul 25, 2013 11:51 pm
by gozaimaas
haha what an epic day!
Congrats dude
Posted: Fri Jul 26, 2013 3:54 am
by MadRussian
Posted: Fri Jul 26, 2013 4:16 am
by knightsofnii
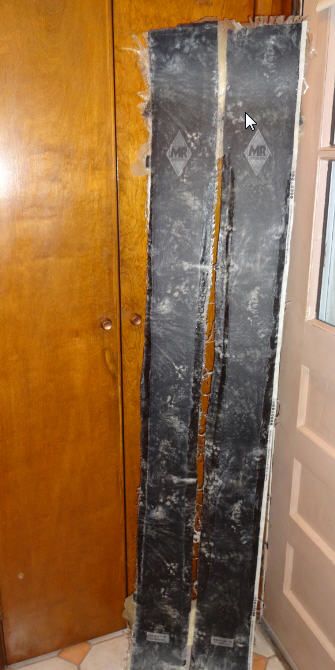
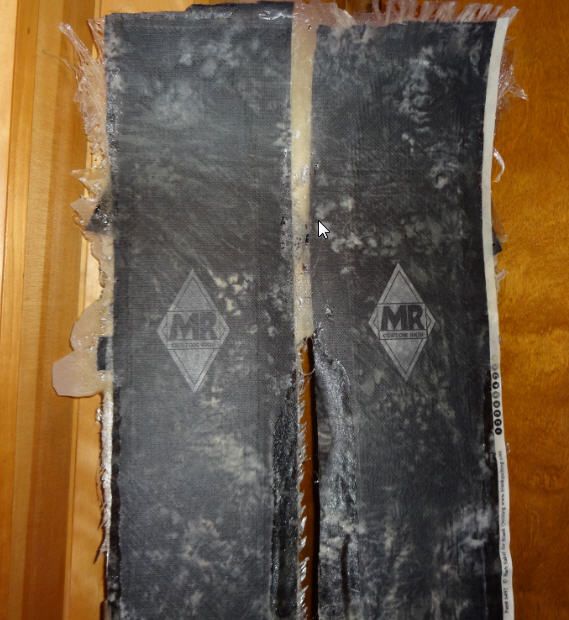
do the tops look so wierd because you have clear protective film over the topsheet?
i'm hoping that when these are done, you peel that away and it's nice and glossy and minty. good job!
Posted: Fri Jul 26, 2013 6:19 am
by MadRussian
knightsofnii wrote:do the tops look so wierd because you have clear protective film over the topsheet?
i'm hoping that when these are done, you peel that away and it's nice and glossy and minty. good job!
this is it. No glossy finish.
I don't warn glossy. I us nonstick fabric on top which when removed gives this look also it gives fabric in print similar looks to structure on the bases after stone grinder. Not sure if I can get a picture of it good enough to see.
Posted: Fri Jul 26, 2013 10:14 am
by MontuckyMadman
Congrats they look dope.
Ill tell ya the fabric doesnt wear very well and if you are in lots of snow and sun it really sticks allot to the topsheet.
You will have to wax it or epoxy clear coat it or somthing in my opinion.


