got a lot of routing to do. I cut all of the tip and tail pieces with a jigsaw first.
I did not use MDF. I used a medium density particle board. I am hoping that since I am gluing and bolting them together to form a solid block that they should be o.k. From what I could come up with the compressive strength is quite good. Also, the boards I bought are environmentally friendly, whereas that MDF shit is just nasty.
Rock, the pistons have equal force in both directions, but it is still nowhere near enough to press a laminate. I am maybe generating 4000lbs of pressure which wouldn't equate to much pressure at the laminate.
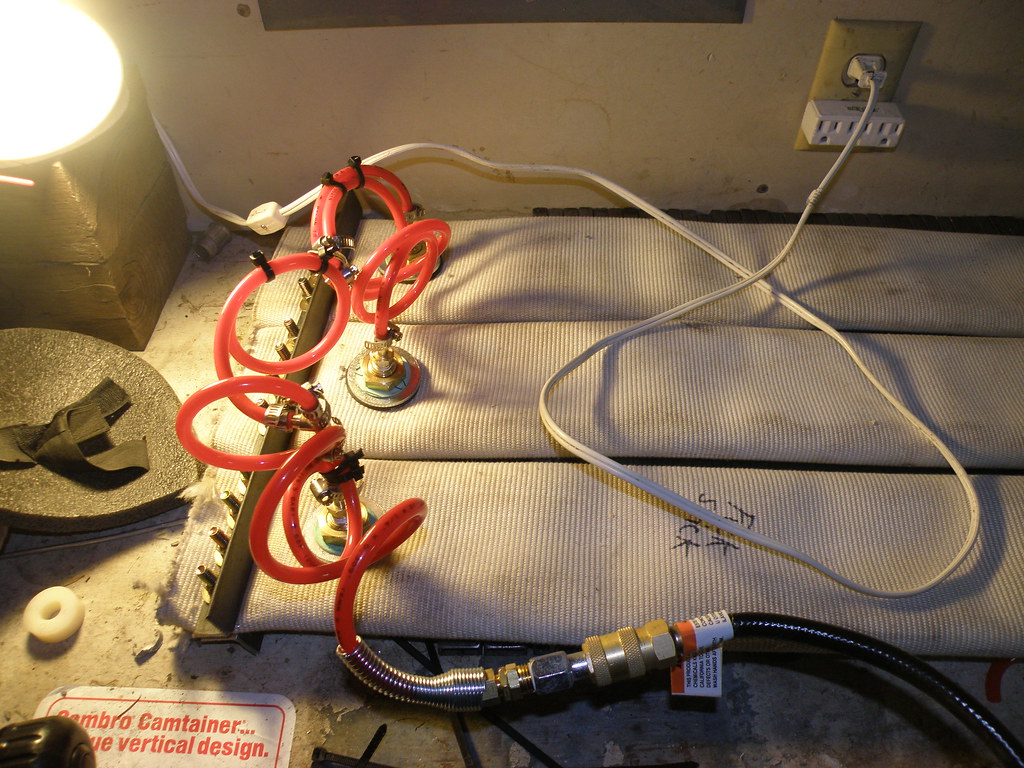
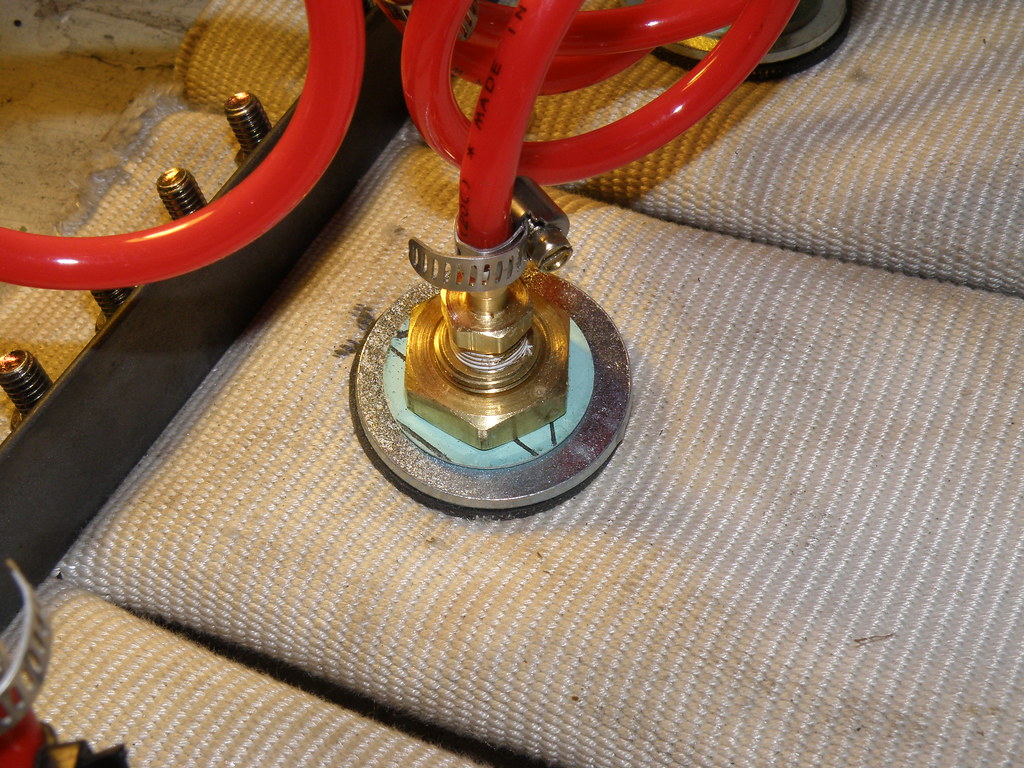
So scary. I kept expecting something to go wrong, and when the compressor kicked back on when they were almost full I about had a heart attack. Alas, everything held. And good. No leaks at all. Big thanks to head monkey for posting the parts from McMaster. The through fitting and washer assembly works like a charm!
It seems I have quite a bit of twist that becomes evident after about 40 psi. Is this normal? I don't think it will matter at all, because in the press the bladders will not have the ability to inflate to a complete round.
The other issue is that because of the different lengths of air hose in relation to the inlet valve the bladders fill up in a nice orderly fashion, instead of in unison. I am going to change the inlet valve to the middle and then have equal length air hose going to the outside bladders. If anything hopefully this will cause the inside bladder to inflate slightly ahead of the outside bladders. This would be better than having one outside bladder, then the center, and then the other outside bladder inflate. Minor pita to rework, but I think it will be better in the long run, to help keep the laminate from shifting.
Looking good!! I don't have any twist in my hoses, but I'm only running two. I wonder if a slight difference in length where they where bolted could cause it? I know what you mean about pressurizing the hoses being scary. I ended up taking mine to 85 psi, but haven't tried them past that. How high did you go? What's the highest anyone has tried their firehoses at?
Can't wait to see the heat set-up. I got my pid controllers and ssr's, and the thermocouples are in the mail. I will hopefully get wire and a box tomorrow to start putting it together. Keep up the good work.
Yeah, I don't know exactly what's causing the twist. I would guess that it has something to do with the hoses being twisted slightly before I drilled them, but slightly different lengths may also be involved. I don't think it will matter once in the press.
I redid the air hose connections so that from the inlet valve the hose was all equal lengths to the firehose. Now they all inflate simultaneously.
I took them up to 75psi and had no failures and no leaks. I now have them sitting in the garage and they haven't leaked for 1/2 an hour.
So...............close. Picking up my aluminum sheets tomorrow or Tuesday (hopefully, storm is gnarly right now), and my heat controls are supposed to deliver on Tuesday. I might be able to build my first board on Xmas. That would rock. I would have to christen it with 666 graphics.
I think that hose will twist due to its construction. Look at the outter jacket, It is woven, most likely cotton. Just the nature of the construction. should not present any problems as I think you are using a cat and some metal sheet??
ra
Yeah RA, I think all hoses twist due to construction.
Just spent the last 5 hours drilling mounting and wiring a box for the hydraulic switches and the heat controls. After making sure all of my wiring was perfect I went to close the box, and there's just no way that all of the wires were going to fit without forcing them. Arrrgghh. Tried removing the electrical switches for the hydraulics and the box still seemed to clustered.
Waste of 5 hours and 20 bucks.
Good news is I reworked the air hose lines, and the bags inflate simultaneously. I left them overnight at about 80 psi and had no leakage.
Sounds like thing are going the way they usually go for me. A seemingly simple task will go on far too long! Heres to seeing it through....
I opted for using simple hydraulic bottle jacks to raise my press. $10 at harbor freight for a 2 ton jack. Won't be as nice as what you have created....
Hope yau are able to get out and enjoy some of this great weather! (that is if you are out west)
ra
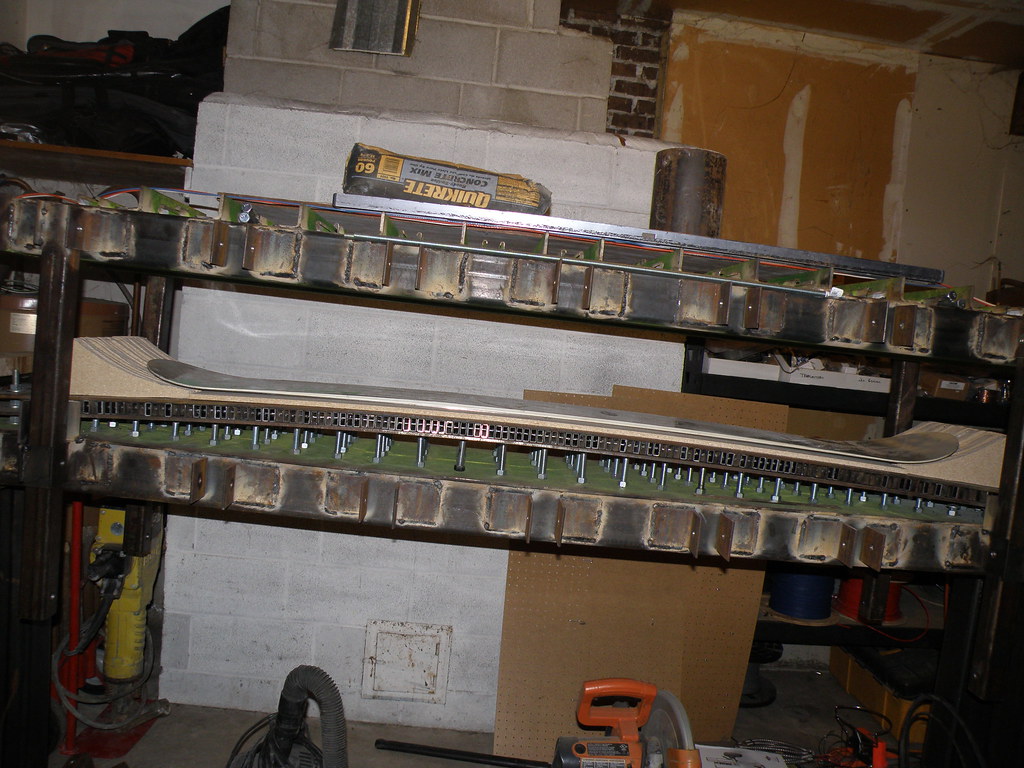
Well, I am still trying to avoid using the mdf. For my top block, I am going to use 3/4" ply to sandwich the already cut fiberboard. Since it's the top block, and will be above the air hoses I am not worried about it being perfect.
As for the tip and tail blocks, I am trying to use concrete. I formed and poured one of them earlier today. I didn't think it was going to work, but I let the concrete sit for 4 or 5 hours and then reworked it. I actually think it's gonna be o.k.
If it comes out alright tomorrow morning then I am going to make another one, and try to perfect a method for casting radius blocks out of concrete.
I really don't want to use mdf. I read that it can outgas toxic chemicals for up to 6 months after manufacturing, and possibly after any cutting or sanding is done on it. For this reason you are supposed to seal any exposed cuts.
Anyone have any ideas for an adjustable tip and tail block?
Yeah, I thought about using a casting resin, but the cost would end up being pretty high.
The concrete didn't work real well. I think it could if I spent more time on the correct mix, and a proper form. Main problem was the strength of the concrete at the thinnest point (1/2" thick).
I picked up some 1" thick laminated and sanded pine board today. I am going to try and use this for the tip and tail blocks. I think it should work pretty good.
As for the concrete route, I think they sell a 5000psi bag mix, and see if you can get some fly ash to strengthen it. Also use some chicken wire to reinforce it. You just need to make sure that some aggregate gets into your thin areas. You can use a thin set epoxy they use for terrazzo floors to put on the surface after it cures also.
Also if you can vibrate the concrete somehow, it will evacuate the air trapped within the mix.
lost wax investment casting of AL might be an option if you new how to use these technics, it could be cheap. I f you could build a mold, and pour a wax and gate it appropriately, hollow bottom, and give it to a foundry gated in your area the cost of the investment/colloidal silica and the AL would be nominal.
I worked in this field for three years hence my knowledge. The foundry charges allot for the basic setup but if you could do it yourself would be cheap.
I like the aluminum idea. That would be a whole new world to learn though.
Right now, I am really frustrated. Working with wood is not my expertise and trying to get these radius blocks built is a pain in the ass. I cut out the laminated pine and am trying to get a good one sanded and smoothed out to use as my jig for routering. I can't. Just can't get the surface perfect across the entire 1" area. So when I try and flush bearing rout it the copy piece is just whacked. Perfect on one side, all tweaked on the other side.
I am also having a hard time with the wood cracking at the thin point.
I think I am going to have to break down and order a radius piece laser cut out of steel to use as a guide. Or I guess I could make a template piece out of a piece of thinner hardwood.
This is tough to be so close, and have taken care of all of the "difficult" stuff, just to be held up on the tip and tail blocks.