
wow, you guys are doing great work.
Those clamps are rad. I just bought a ton of them today. Some random came by and asked me why I was buying so many clamps. I just told him I had to glue some steel edging on to something.
props to montuckymadman for being such a helpful member of the community.
Shopvac's Skis
Moderators: Head Monkey, kelvin, bigKam, skidesmond, chrismp
-
MontuckyMadman

- Posts: 2395
- Joined: Fri Jun 20, 2008 9:41 pm
look sweet. Yeah ply you have some type of nylon-got me thinking after I saw your photos-glad I could help shopvac.
I will make you more if you think they need to be smaller to press the tips in better.
If anyone else wants to try this I have gobs and gobs of remnant that ends up in the landfill and it will take me literally minutes to sew this type of thing.
just need the measurements.
Whatever happened to voodoo-he wanted one?

I like the idea of using material as a press. and I can see how it could be a pain in the ass to slide it between the material bags.
I was watching Ask This Old House yesterday and they featured these:
google: grabbittool ( i can't post links yet)
It's used for gripping tarps or bags so they don't rip. I'm wondering if you guys could integrate these into the bag system so you don't have to slide the mold into the bags. You can just wrap the bags around and lock them together with these tools.
I would assume that you would have to use multiple smaller tools so you don't have a lot of slack to slide them together.
you might even be able to make your own out of pipe so they are stronger.
Thoughts?
-
MontuckyMadman
- Posts: 2395
- Joined: Fri Jun 20, 2008 9:41 pm
cool let m eknow when you have some dims for me.
http://www.grabbittool.com/
That thing won't hold under the presser i feel, but maybe if you made a metal one it might.
I figure you could just build a real ghetto table with scrap metal that has one post coming up in the middle. Then your layup is in one place and you just slide each back over from each end and have like a 3 inch gap in the middle.
So I pressed the second ski yesterday and it was a lot easier to get the bags over the wood molds. I think we were just having some trouble the first time because it was new and we didn't really know what needed to happen. I think the bags we have are going to work perfect. I am really happy with them now.
In other news the first ski was flashed in about 2 minutes with the help of a small tabletop band saw. I can't believe how much easier this was than using a jigsaw. Everyone should get one of these. The blade doesn't get hot so you don't have to replace the blades every 20 inches like a jigsaw. Simply amazing.
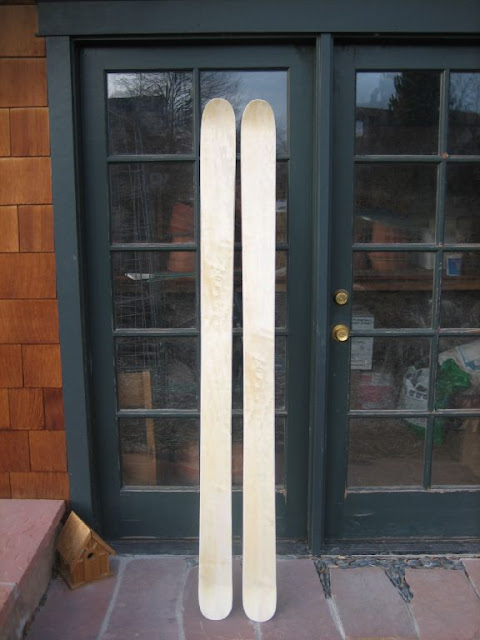
I was worried that the tips and tails weren't going to get pressed into the tip and tail molds very well, but that turned out not to be the case. They look PERFECT. I am pumped. The first ski has a very nice flex and seems to weight a good amount (not to heavy but not to light). So far I am very pleased with the outcome. My brother and I are going to try and use the router to clean up the sidewalls tonight. I will post photos when they get cleaned up.
In other news the first ski was flashed in about 2 minutes with the help of a small tabletop band saw. I can't believe how much easier this was than using a jigsaw. Everyone should get one of these. The blade doesn't get hot so you don't have to replace the blades every 20 inches like a jigsaw. Simply amazing.
I was worried that the tips and tails weren't going to get pressed into the tip and tail molds very well, but that turned out not to be the case. They look PERFECT. I am pumped. The first ski has a very nice flex and seems to weight a good amount (not to heavy but not to light). So far I am very pleased with the outcome. My brother and I are going to try and use the router to clean up the sidewalls tonight. I will post photos when they get cleaned up.
-
doughboyshredder
- Posts: 1354
- Joined: Mon Sep 17, 2007 7:37 pm
Quick question...
I have tried using my band saw in the past and had bad luck with that method. Can you shed some light on what type of blades you are using? Are they liquid cooled and possibly how many skis / boards are you cutting with each blade? Thanks for the help and I'm looking forward to learning a new and easier way!
ra
-
MontuckyMadman
- Posts: 2395
- Joined: Fri Jun 20, 2008 9:41 pm
True, Not too difficult and on the last set of skis I went thruogh two blades on my jig saw. Could have made it easier with three but you know how that goes. With the band saw, I think it would be a bit easier and you would not have to use clamps on the skis / boards. So, Any imput on the blade type and how many cuts do you get ect.....
ra
ra
-
MontuckyMadman
- Posts: 2395
- Joined: Fri Jun 20, 2008 9:41 pm
We are using a 6tpi blade on a small woodtek table-top sized band saw to flash the skis. I should also clarify that this last pair of skis we made the core was already cut out to the right shape (with the band saw) before we laid up the ski. This makes flashing much easier if you don't have to cut through the wood core and you only have to cut through the two layers of fiberglass and the wood veneer topsheet. The very first pair of skis we had to cut through two layers of fg, the wood core, and the topsheet with a jigsaw. We burned through at least 5 blades doing both skis. I would bet that using a jigsaw to flash a ski with only 2 layers of fg and a topsheet wouldn't be too big of a deal either but I think you would still use more blades than if you had a band saw. I know they are expensive and can be very large so that is the down side.
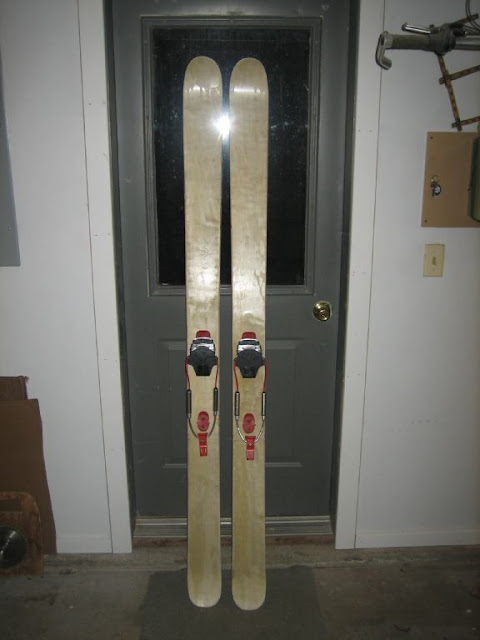
The second pair of skis have been cleaned up and I took them down to Monarch and Crested Butte for a little mid-week ski vacation. They worked awesome.
The skis:
191.5cm long (straight tape from turned up tip to turned up tail)
134-113-122
38.6m turn radius
flat camber (the camber mold we built is flat over the running length it turns out)
Aspen veneer topsheets
26cm of tip rocker 1.5cm high each ski on the tips
15cm long tails with a height of 2.5cm
6cm height tips total
pallet wood core skis
wood sidewalls (mostly oak and some cherry)
mounting line is 110cm from tip to boot center
running length = 152cm
sidecut = 7.5mm
core profilied to 1.7-12.5-2.5 mm
weight = 2490grams per ski without bindings
1.2mm thick bases
22oz triaxial fiberglass on top and bottom
vds rubber along edges and around the tips and tails (not too much extra)
white tip spacers straight across 13cm in front and 10cm in back
3/4 edge wrap
The skis still need to get a base grind, edges sharpened, waxed, and three coats of Minmax Helmsman Spar Urethane varnish to be finished
We mounted them with an old pair of G3's I had laying around at 112cm to boot center (this may be too long by 2cm)
Tip Rocker:
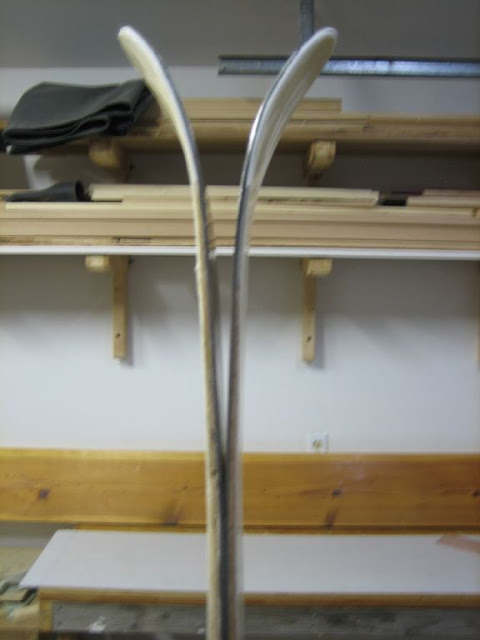
Tail Rocker if you can call it that (more like a small slow rise twin tip:

They really worked great over the three days I got to ski them. I like the flat camber and early tip rise. I also really like the flex, weight, length, and overall feel. If I had to change anything it would be to move the bindings towards the tips another 1.5-2cm. I think that would help.
Here is a photo my brother took of me skiing my new homemade skis at Monarch on the best 3" day of the year!
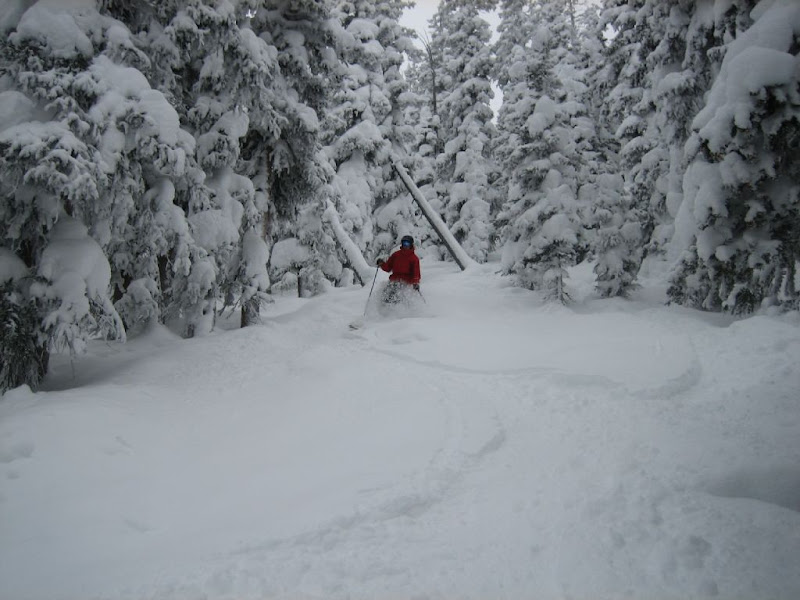
Can't complain about nothing.
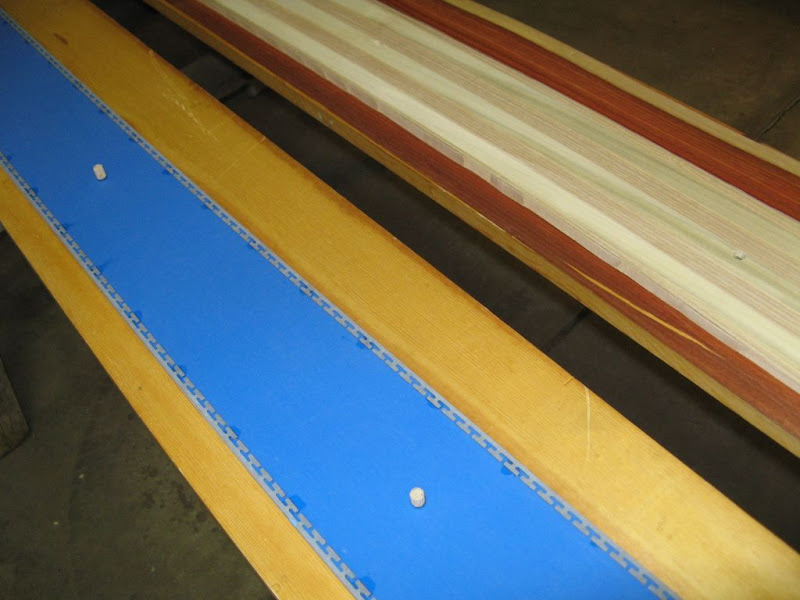
We have adopted the dowel super glued to the core method for aligning our cores and this has been fantastic. We drill two holes in the core around 20-30cm apart in the middle of the thickest part of the core and then we cut two dowels to be just shorter than the cores thickness. Once we have the edges super glued onto the bases we place the already cut out core that is the right shape of the ski on top of the base material. We take a pencil and mark on the base the location of the where the two dowels need to be glued down. Then we move the core out of the way and glue the two small dowels onto the base material with small dabs of superglue.
Here is a closeup of the blue bases with the dowels glued down and the core sitting next to it with the two matching holes.
My brother was so excited that my skis worked he had to have his own pair so we have already pressed one and the other is in the press as I type. It should be out tomorrow night and we will post some photos of them soon. They have the blue bases and padauk veneer topsheets. They should be pretty!
Montuckymadman, the cloth bags are still working great at 42psi for the forth ski in 2 weeks.
The second pair of skis have been cleaned up and I took them down to Monarch and Crested Butte for a little mid-week ski vacation. They worked awesome.
The skis:
191.5cm long (straight tape from turned up tip to turned up tail)
134-113-122
38.6m turn radius
flat camber (the camber mold we built is flat over the running length it turns out)
Aspen veneer topsheets
26cm of tip rocker 1.5cm high each ski on the tips
15cm long tails with a height of 2.5cm
6cm height tips total
pallet wood core skis
wood sidewalls (mostly oak and some cherry)
mounting line is 110cm from tip to boot center
running length = 152cm
sidecut = 7.5mm
core profilied to 1.7-12.5-2.5 mm
weight = 2490grams per ski without bindings
1.2mm thick bases
22oz triaxial fiberglass on top and bottom
vds rubber along edges and around the tips and tails (not too much extra)
white tip spacers straight across 13cm in front and 10cm in back
3/4 edge wrap
The skis still need to get a base grind, edges sharpened, waxed, and three coats of Minmax Helmsman Spar Urethane varnish to be finished
We mounted them with an old pair of G3's I had laying around at 112cm to boot center (this may be too long by 2cm)
Tip Rocker:
Tail Rocker if you can call it that (more like a small slow rise twin tip:
They really worked great over the three days I got to ski them. I like the flat camber and early tip rise. I also really like the flex, weight, length, and overall feel. If I had to change anything it would be to move the bindings towards the tips another 1.5-2cm. I think that would help.
Here is a photo my brother took of me skiing my new homemade skis at Monarch on the best 3" day of the year!
Can't complain about nothing.
We have adopted the dowel super glued to the core method for aligning our cores and this has been fantastic. We drill two holes in the core around 20-30cm apart in the middle of the thickest part of the core and then we cut two dowels to be just shorter than the cores thickness. Once we have the edges super glued onto the bases we place the already cut out core that is the right shape of the ski on top of the base material. We take a pencil and mark on the base the location of the where the two dowels need to be glued down. Then we move the core out of the way and glue the two small dowels onto the base material with small dabs of superglue.
Here is a closeup of the blue bases with the dowels glued down and the core sitting next to it with the two matching holes.
My brother was so excited that my skis worked he had to have his own pair so we have already pressed one and the other is in the press as I type. It should be out tomorrow night and we will post some photos of them soon. They have the blue bases and padauk veneer topsheets. They should be pretty!
Montuckymadman, the cloth bags are still working great at 42psi for the forth ski in 2 weeks.
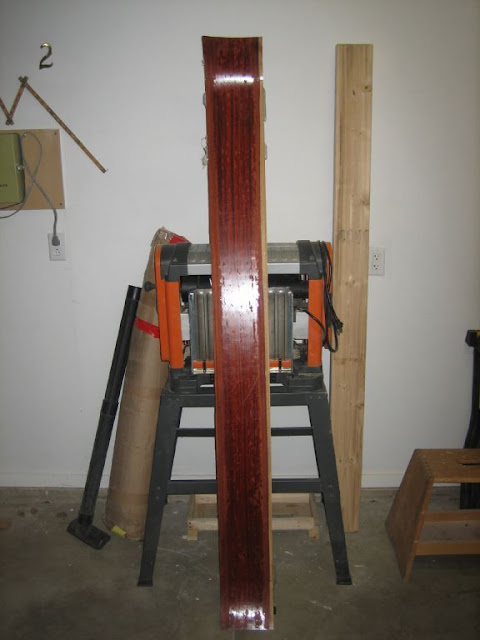
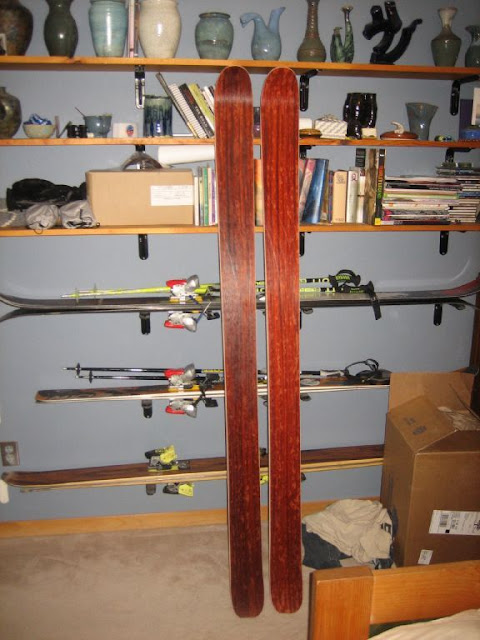
The third pair of skis are pretty much done. We flashed them with the band saw, routed the extra material with the flush cut bit, belt sanded and did a round-over on the tops. They still need a couple coats of the helmsman minwax and a full tune but they are close now.
Tops right out of the press:
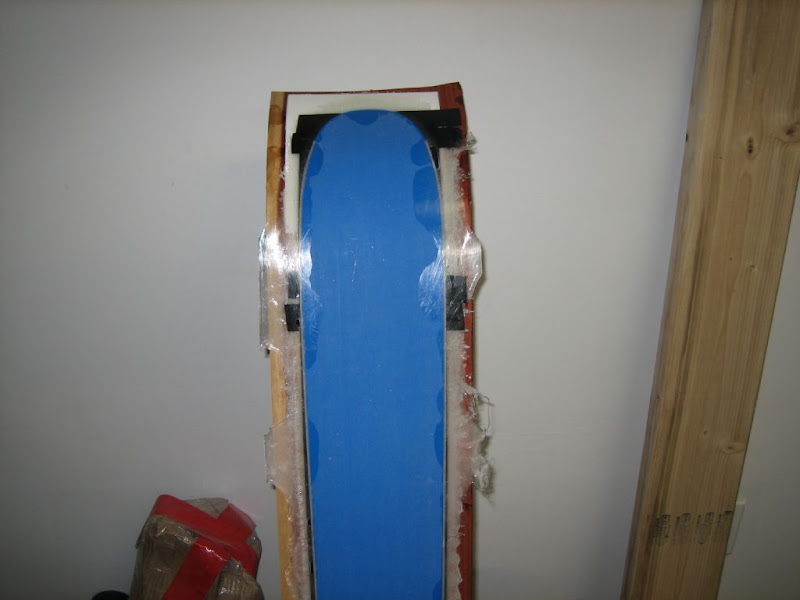
looking at the tip and tail profile:
the bottom near the tip:
the bottom at the tail:

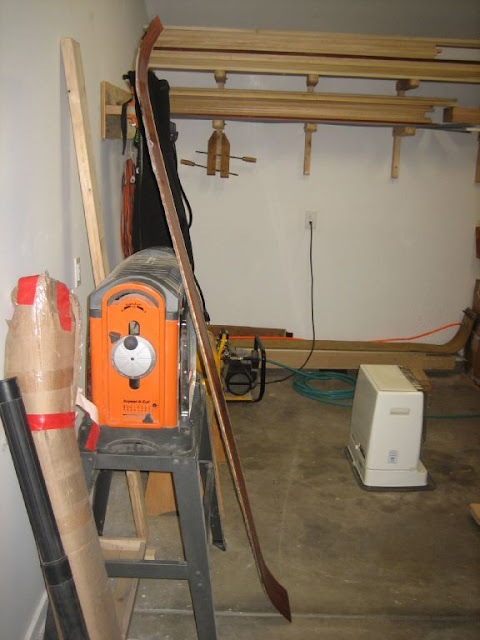
the skis:
the bases need a base grind to get some epoxy off:
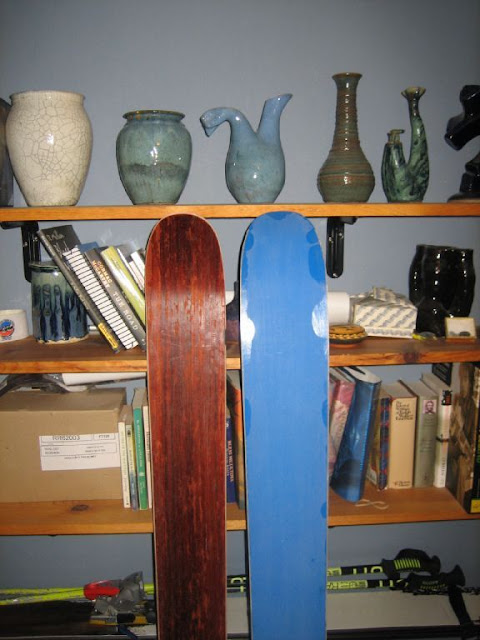
These skis are the same as the last pair with Aspen topsheets. The only difference is that they have padauk topsheets and they also have the thick blue bases that are 1.5mm thick bases instead of the 1.2mm bases on the last 2 pairs of skis. All of the other dimensions are the same. The cores are 4 strips of white ash alternated with three strips of poplar. The sidewalls are all white ash.
I believe the weight right now is less than 9.5lbs for the pair so somewhere around 2150 grams per ski. This is lighter than the last pair. We are getting better with each ski we build.
Tops right out of the press:
looking at the tip and tail profile:
the bottom near the tip:
the bottom at the tail:
the skis:
the bases need a base grind to get some epoxy off:
These skis are the same as the last pair with Aspen topsheets. The only difference is that they have padauk topsheets and they also have the thick blue bases that are 1.5mm thick bases instead of the 1.2mm bases on the last 2 pairs of skis. All of the other dimensions are the same. The cores are 4 strips of white ash alternated with three strips of poplar. The sidewalls are all white ash.
I believe the weight right now is less than 9.5lbs for the pair so somewhere around 2150 grams per ski. This is lighter than the last pair. We are getting better with each ski we build.