
I spent the day in the shop working on a new set of skis. Dimensions listed above (140*115*130). Wasn't too sure on what size to build, just wanted to try a bigger ski with a bit of rockaer fore and aft. The length of the ski will be 180CM. I am not sure about the rocker part but will do a bit of research here to fingure what the "norm" is. As of now I will look at 40CM from the tip and 30CM from the tail.
What is completed so far is the core has been milled to 11mm. Setting up the jig for the taper which will go to 2mm tip and tail. The template has been completed and made out of 5/8" mdf. Binding insert holes have been located. Tonight I should be able to either taper the core or bend the edges.
I plan on terminating the edges early and not do a full wrap. Anybody want to talk me out of this?
Another question is about the tip spacer. In the past I have cut a rounded area out of the core and matched with the spacer material. I was noticing that several builders are cutting the core straight across and mating the spacer to it. Have any problems with this? Looks very easy and quick but the concern would be if it will be a weak point in the ski (creating an area for a crease to happen?).
Any input would be great and pics will follow.
ra
140*115*130
Moderators: Head Monkey, kelvin, bigKam, skidesmond, chrismp
Sounds like a fun ski. We are thinking of building something similar for our next ski. I think 180cm might be a little short for a ski with so much rocker. Your running length is going to be really small. I ski on a pair of 195 praxis powder skis (rev/rev) and they don't feel long at all. I was concerned when I first got them that they would be too long but the extra length is actually really nice with the rocker in any condition.
We have been cutting our cores straight across at the tips and tails and taping the tip and tail spacers down with the thin double-sided carpet tape. The carpet tape looks like fiberglass already so I am pretty sure it isn't bad to have in the ski. Anybody else have any comments on this method? We are always up for new ideas.
This has worked great on the 4 pairs of skis we have built so far. I haven't seen any issues with weak tips or tails and definitely no issues with having a crease or anything at that point. My brother and I have skied our skis that were built this way 10 days each and they are fine.
As a side note, are you drawing the ski to have a radial sidecut or will it be a bi or tri-radial design? I have just been looking into this a lot more lately and love to hear what other people are doing and what they prefer.
I think the 40cm and 30cm rocker sections sound like good numbers to go with. This is roughly what my brother and I were thinking of building next.
We also do the 3/4 edge wrap and it works just fine. I am not proficient at bending edges yet so I think just going 2 inches or so from the tip saves me a lot of time. If you do a 3/4 edge wrap make sure to prebend your bases with edges (to match the contour of your tip and tail molds) before you put them into your mold. We have found this helps a lot. Can't wait to see photos.

I made a similar pair for my wife. Dimensions 141-116-129. I used top heat only on a flat mold to achieve a continuous reverse camber of about 1 cm tip and tail. She loves them.
I have abandoned the full wrap edges for simplicity and have seen zero problems. I had a couple pair of Igneous that were like this and they lasted until I sold them.
I also cut the tip spacer straight across and it has been working well. Keith at Praxis suggested I do this. I have been using mesh tape that is used for drywall or hardibacker joints to secure the spacer to the core. Just make sure that your core thickness matches the spacer thickness. Your 2 mm is on target.
I have been beating the crap out of my skis lately and they are holding up great.
Thanks for the input! I will go with a straight cut across the tip and tail for the spacer. I am planning on having about 4" on the tip and 3" on the tail for spacer material. Does this sound about right?
Further question on holding back the edge. How far should it go? I was figuring that it would wrap up just past the contact point (provided it was a std. camber ski).
When you hold back the edge, what are you using for a guide while cutting out the tip and tail section?
Rocker or not? I may just press it flat. My orange skis are 181, 130*100*130 with a core at 2*10*2. the glass is triax on bottom and bi on top. The ski lays flat even though it was pressed wiith a mold of 19mm camber. The ski is alot of fun in the soft stuff so I'm not sure if I need the rocker???
As of now I am planning on using the same layup. triax on bottom and bi on top, But the core is 11 instead of 10 in the center.
On to the production pictures....
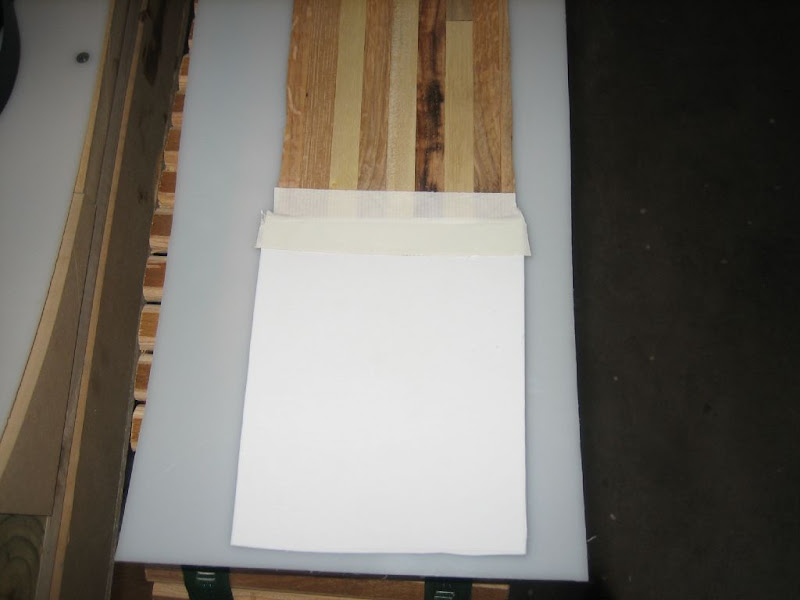
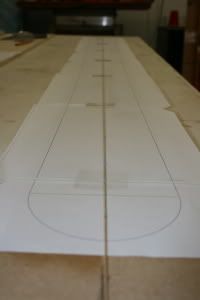
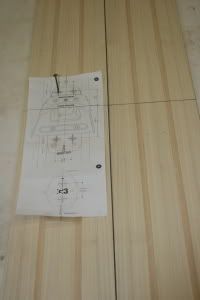
laying up the printout on the mdf.
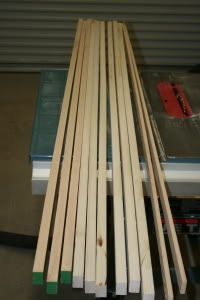
Ash and poplar cut into strips.
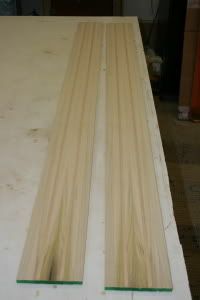
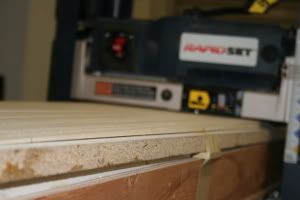
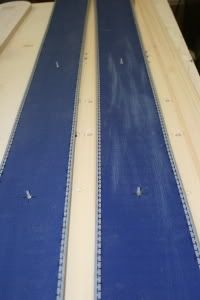
Cores milled to 11mm.
Template rough cut and on to sanding it to size.
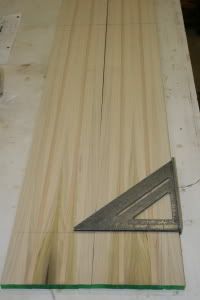
Locating the inserts prior to profile.
reference marks on the core for profile work.
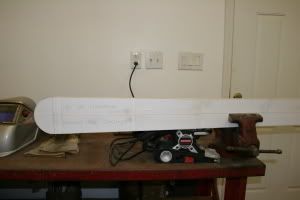
profiling the cores.
Insert holes drilled and test fitted.

That is it for the night. Need to rest up for a big day on the hill!
ra
Further question on holding back the edge. How far should it go? I was figuring that it would wrap up just past the contact point (provided it was a std. camber ski).
When you hold back the edge, what are you using for a guide while cutting out the tip and tail section?
Rocker or not? I may just press it flat. My orange skis are 181, 130*100*130 with a core at 2*10*2. the glass is triax on bottom and bi on top. The ski lays flat even though it was pressed wiith a mold of 19mm camber. The ski is alot of fun in the soft stuff so I'm not sure if I need the rocker???
As of now I am planning on using the same layup. triax on bottom and bi on top, But the core is 11 instead of 10 in the center.
On to the production pictures....
laying up the printout on the mdf.
Ash and poplar cut into strips.
Cores milled to 11mm.
Template rough cut and on to sanding it to size.
Locating the inserts prior to profile.
reference marks on the core for profile work.
profiling the cores.
Insert holes drilled and test fitted.
That is it for the night. Need to rest up for a big day on the hill!
ra
Looking good ra, I cut tip and tailspacers with a 90deg on the last pair
I didn't like the idea of having a straight line across the tip of the ski.
It was real easy with a builders square. Then used a few dabs of hot glue to hold it in place until layup.
Still holding up
There is a photo in my log
sam
I didn't like the idea of having a straight line across the tip of the ski.
It was real easy with a builders square. Then used a few dabs of hot glue to hold it in place until layup.
Still holding up
There is a photo in my log
sam
You don't even have a legit signature, nothing to reveal who you are and what you do...
Best of luck to you. (uneva)
Best of luck to you. (uneva)
Update
Spent the day in the shop playing with the build. Here are some pictures of the progress.
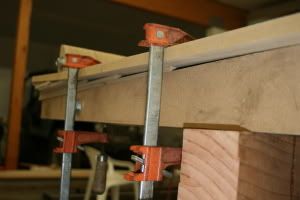
First off is a pic of the edges bent (help back tip and tail) and getting ready to cut the bases

Base cut with the notch where the edge ends
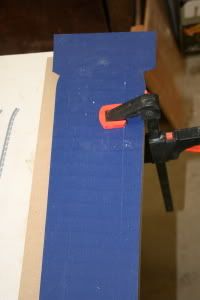
Edges glued in place
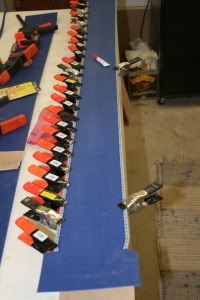
Fittment of the ends

Locating pins attached to the base (Hot Glue)
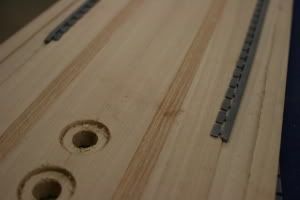
Bottom of the core with the recess routed for the edges (test edges in place)
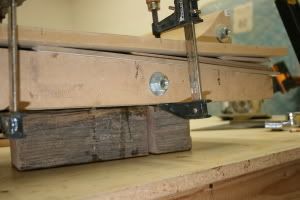
This is an attempt at a rockered ski. I'm too cheap (broke) to build a new mold and was talking to a friend who tried this method to achieve an adjustable mold. After placing several shims and clamping the base, I think I have a platform that I can live with. I will be cutting another piece of 1/2" mdf to go on top of the other one. I will pressure test this to see if I can see if the MDF carries the gaps. If so, I hope to press Monday night. Pending how tired I am after skiing.
Pic aof the tail section
Pic of the tip section
Overview of the mold
First off is a pic of the edges bent (help back tip and tail) and getting ready to cut the bases
Base cut with the notch where the edge ends
Edges glued in place
Fittment of the ends
Locating pins attached to the base (Hot Glue)
Bottom of the core with the recess routed for the edges (test edges in place)
This is an attempt at a rockered ski. I'm too cheap (broke) to build a new mold and was talking to a friend who tried this method to achieve an adjustable mold. After placing several shims and clamping the base, I think I have a platform that I can live with. I will be cutting another piece of 1/2" mdf to go on top of the other one. I will pressure test this to see if I can see if the MDF carries the gaps. If so, I hope to press Monday night. Pending how tired I am after skiing.
Pic aof the tail section
Pic of the tip section
Overview of the mold
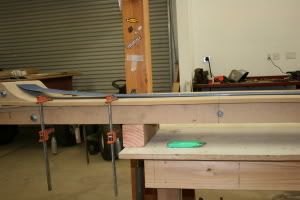
They are out!
Got back form a great day at the resort. Took the skis out of the press. They were in a room heated to 100+ overnight. Turned off the heat and left them under pressure (60psi) for the day while they cooled down and I skied.
here are some more pics...
Pressed both at the same time...
Pic of the base, use of carpet tape to hold in place, and only a tiny bit of epoxy under...getting better each time!
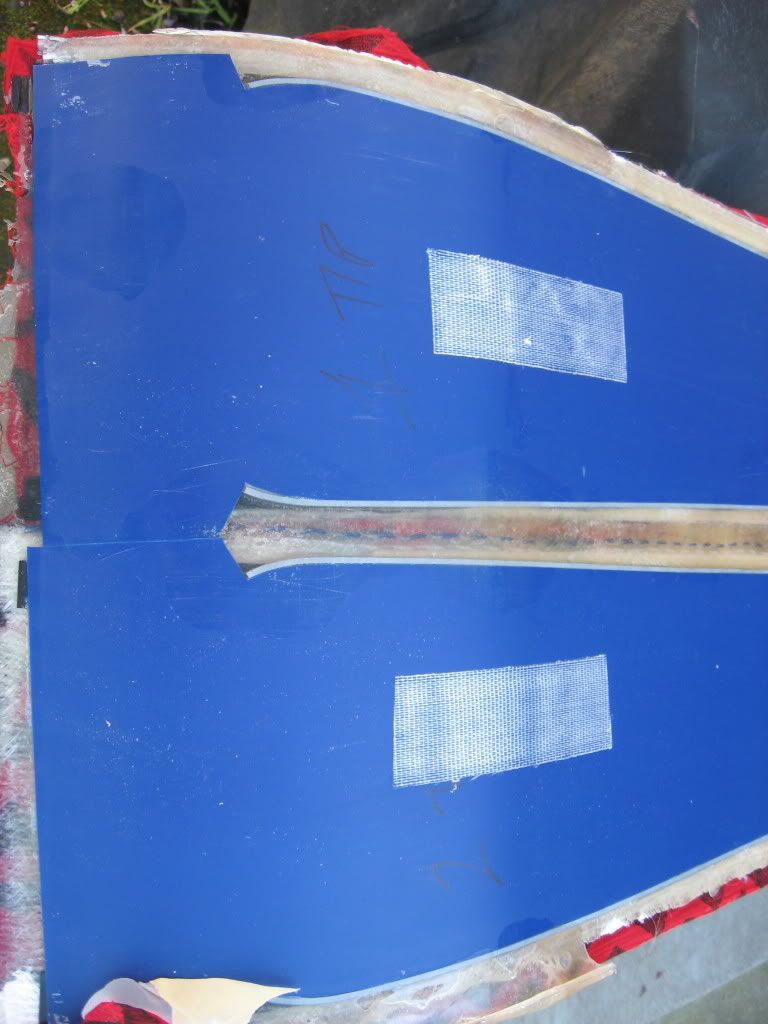
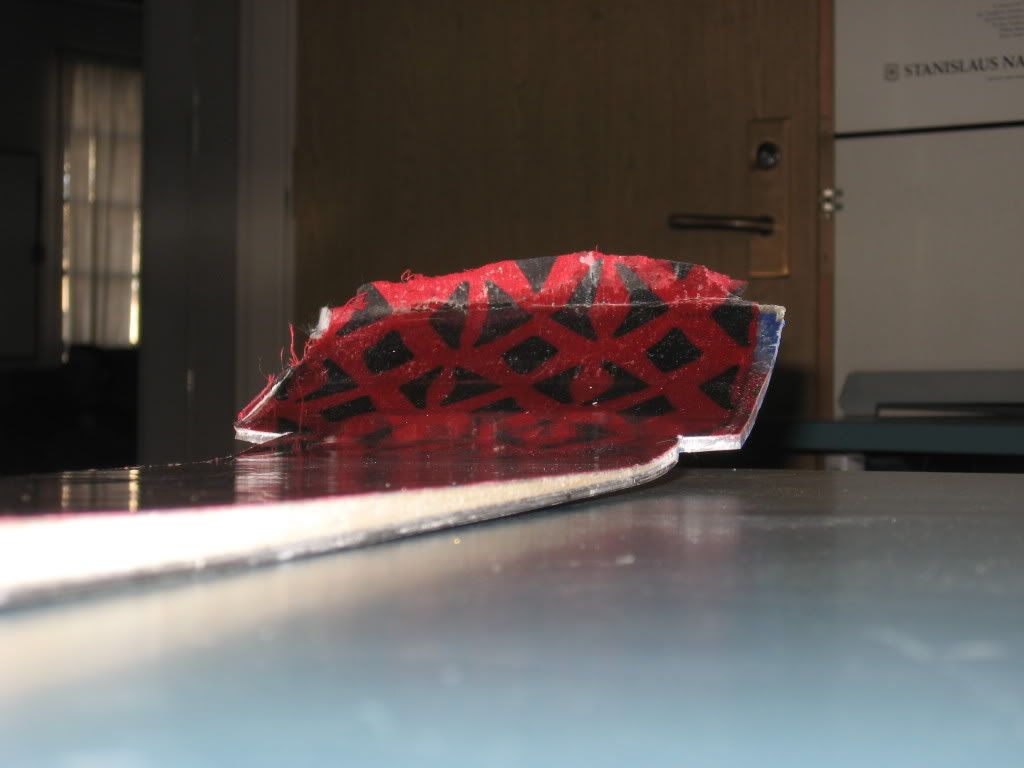
Here you can see the little rocker at the tip. Or is it early rise? Don't really care as long as it works like I think it will!
Skis cut out. All but the tip and tail, Need to come up with something good.
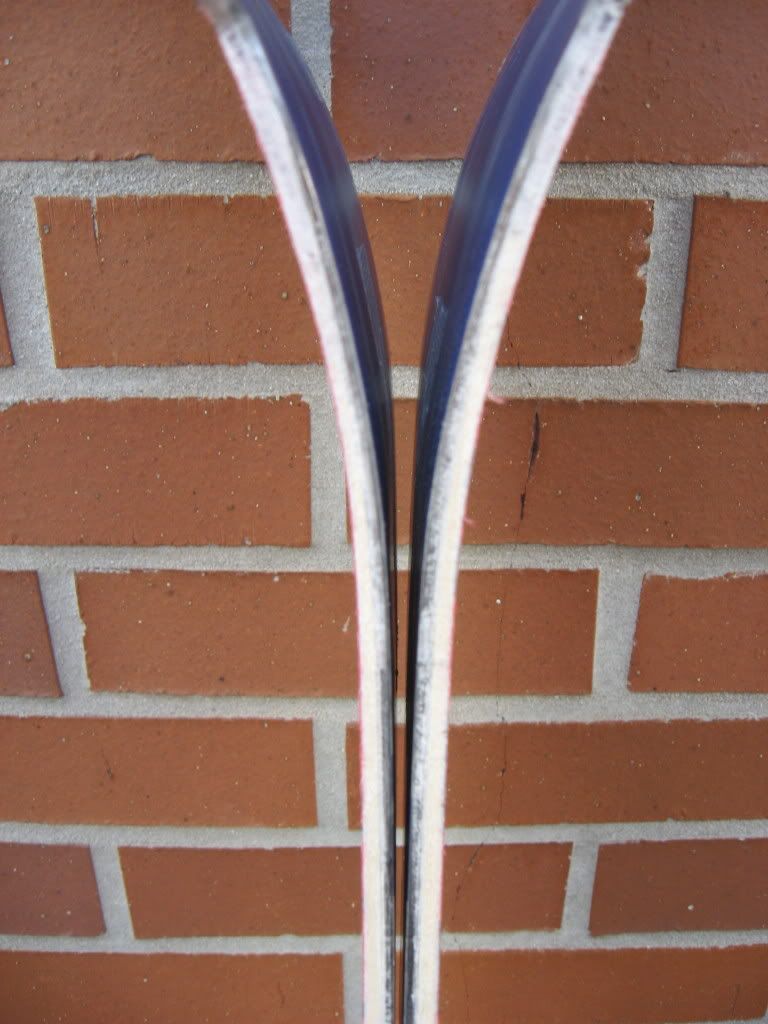
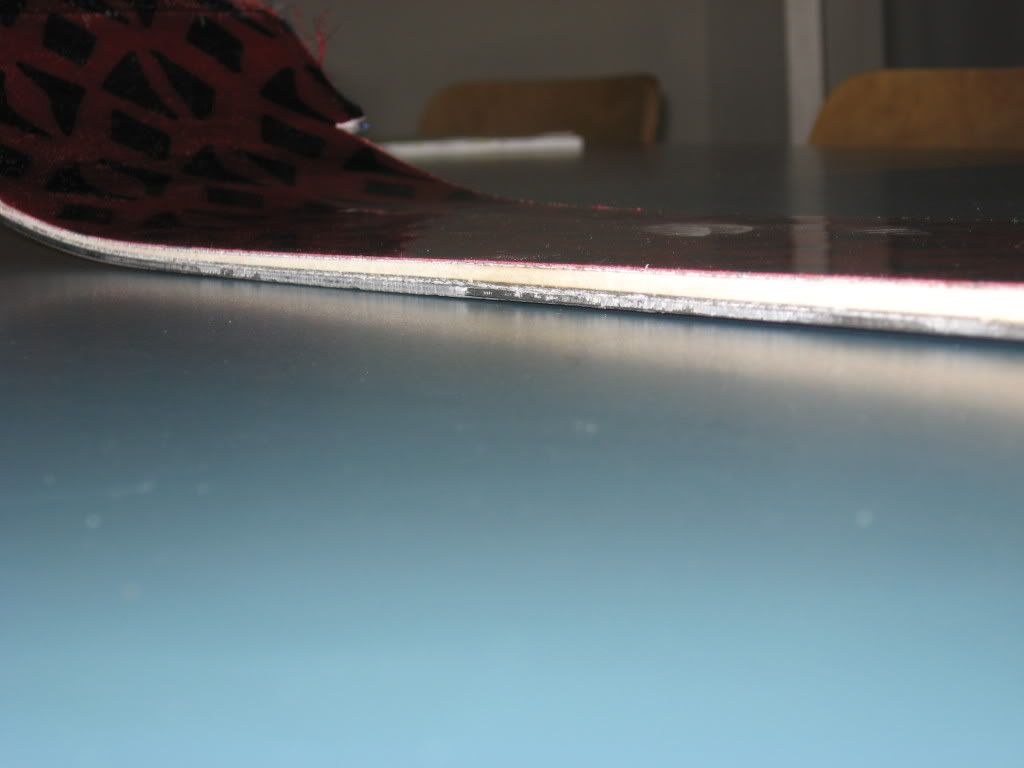
Camber under foot.
tip rocker.
Tail rocker was not as pronounced...
When I stepped on the skis, the tip and tail comes up off the ground so I think they will float quite well.
All in all the skis seems to have come out okay. I have three days plus the cut out today invested in these. Not much time and am happy with the outcome.
time will tell.
here are some more pics...
Pressed both at the same time...
Pic of the base, use of carpet tape to hold in place, and only a tiny bit of epoxy under...getting better each time!
Here you can see the little rocker at the tip. Or is it early rise? Don't really care as long as it works like I think it will!
Skis cut out. All but the tip and tail, Need to come up with something good.
Camber under foot.
tip rocker.
Tail rocker was not as pronounced...
When I stepped on the skis, the tip and tail comes up off the ground so I think they will float quite well.
All in all the skis seems to have come out okay. I have three days plus the cut out today invested in these. Not much time and am happy with the outcome.
time will tell.