OH NO!

Document your personal work here. Show photos, movies, and share your secrets.

Moderators: Head Monkey, kelvin, bigKam, skidesmond, chrismp

Post Reply
rockaukum
Posts: 558
Joined: Fri Nov 03, 2006 9:23 am
Location: Placerville area

OH NO!

Post by rockaukum »

A while back I went an took a router to the base of some skis. Well I went to do it again and after about 5" of routering, I removed the ski from the clamp to take a look. What I found is that I was putting the pattern in the base backwards! I promptly put the skis in the corner and thought "there is a wasted set of skis" (well something along those lines).
Anyway, I came to the realization that I could fix the bases. So here is the process I went by. Please give any pointers you may have outside of the obvious....
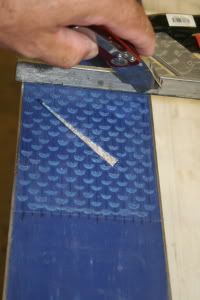
First I cut across the base of the ski with a knife on eaither side of the area to be removed.
Image
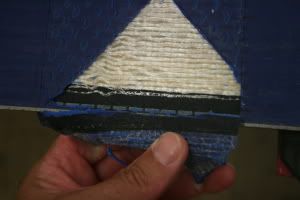
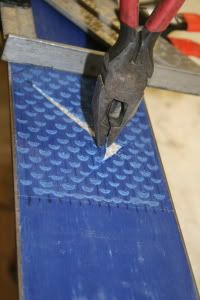
Then using pliers, chisel or what ever else would work, I removed the mistake. The base was difficult to remove and the glass remained in tact.
Image
Image
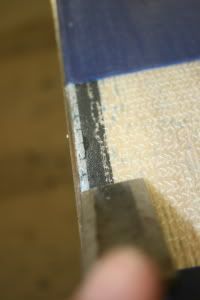
Using the chisel, I cleaned up the edge material.
Image
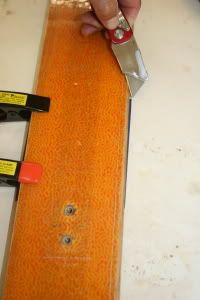
Using some scrap material, I cut it to fit the void in the ski base. First cuts were to match the cuts I made in the base, Next were the cuts to fit to the edge. I slid the new base past the edge and used the ski edge as a guide.
Image
Then slid the base over the other side enough to account for the edge and cut again.
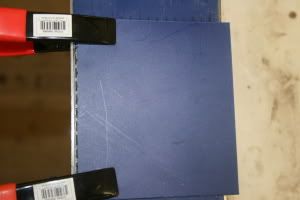
Image
Checking the fit of the new material.
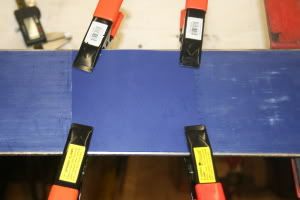
Image
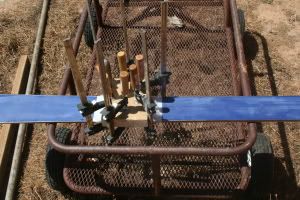
epoxy in place, clamp, and cure.
Image
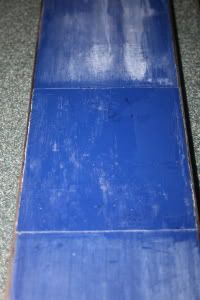
here is the ski out of the clamp.
Image
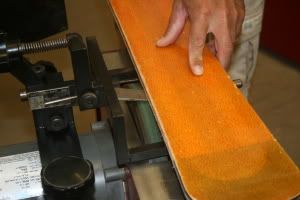
Sanding the base to match the existing base.
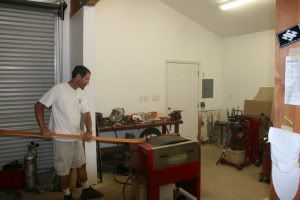
Image
Cleaning the edges while at it.
Image
Finally, here is the base repair completed, less the wax.
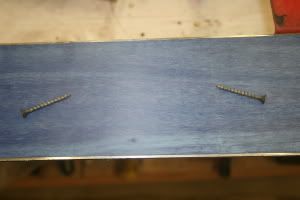
Image
All in all, the repair took about an hour to do the prep work and maybe a half hour to do the sanding and edge job.
Seeing how this went okay, we may try to add some contrasting base material to some new layups.
Again, any input would be great!
ra
User avatar
Head Monkey
Posts: 310
Joined: Sun Jul 17, 2005 4:53 pm
Location: Carnation, WA
Contact:

Post by Head Monkey »

Nice work... that looks way better in the end than I expected it to when I started reading :) I've heard of people doing this to repair especially deep base gouges, but never done it myself. Cool...
Everything I know about snowboard building, almost: MonkeyWiki, a guide to snowboard construction
Free open source ski and snowboard CADCAM: MonkeyCAM, snoCAD-X
User avatar
Dr. Delam
Posts: 423
Joined: Thu Feb 01, 2007 10:07 am
Location: Truckee

Post by Dr. Delam »

Reminds me of my last pair of skis when I started doing the edge relief on the top of the core instead of the bottom. Oops! I was able to salvage it as I only did a couple inches and had enough core overlap that I could shift it out of the way in layup.

Great job on the repair! I have never done a full edge to edge base repair but done quite a few good size ones while repairing edge/sidewall blowouts. We had various shaped punches to cut out the damaged area and then cut out the exact same size for the new material. All it took was a good wack with the hammer to get a clean cut. The kit also included a heating plate to clamp the new material and speed up the cure time.

At first reading I couldn't figure out why you would router the base of the ski. Are you doing something crazy like trying to go up hill on these? Are you using a tilt base laminate trimmer to do it?

I don't think you need any pointers. Very professional work.
hansonc
Posts: 19
Joined: Fri Jan 11, 2008 8:10 pm
Location: Park City

Post by hansonc »

Dr. Delam wrote: At first reading I couldn't figure out why you would router the base of the ski. Are you doing something crazy like trying to go up hill on these?
As I recall yes. There was a conversation a while back about adding fish scales like on cross country skis in an effort to make a touring ski with no need for skins.
rockaukum
Posts: 558
Joined: Fri Nov 03, 2006 9:23 am
Location: Placerville area

Post by rockaukum »

Thanks for the good words.
I was just a bit mifted at the screw-up. Not sure if I will try and do the router on the base again...
The reason is to make the skis like cross country skis. So when I go on a tour I can go up and down without the use of skins. It is a big advantage, not only in time savings (putting skins on and taking them off) but on spring days the wieght is the same. Remember those days when the skins are soaked? Very heavy! Not a big difference on the down hill either. Much worth not having to put the skins on.
ra
User avatar
Dr. Delam
Posts: 423
Joined: Thu Feb 01, 2007 10:07 am
Location: Truckee

Post by Dr. Delam »

Yeah I figured they were for touring once I saw the pics. My xc skis have similar fish scales.

Are you using a tilt base laminate trimmer for this or some other secret method?

It looks time consuming but I think the desired effect will work. I wouldn't abort the mission since it looks like you are on the right track. It was looking factory except for the wrong direction part.
User avatar
MontuckyMadman
Posts: 2395
Joined: Fri Jun 20, 2008 9:41 pm

Post by MontuckyMadman »

skidesmond
Posts: 2337
Joined: Tue Apr 07, 2009 3:26 pm
Location: Western Mass, USA
Contact:

Post by skidesmond »

You don't need any pointers. That is a great repair. I'm going to save this post for future reference. My biggest fear of making skis is getting all the way to end, cutting away the flashing and the router slips and makes a gouge that could ruin all the hard work. Nice to know how to make a repair like that. Thanks.
Post Reply