
cant understand so many of your posts until like days later same with oac. Im sure its my ineptitude its just funney.
I use the same template for the core and just offset the core edge cut with a pin or stick as the guide. opposite the template and suspend above with the router bit and core. I use a couple beads of hotglue. the core is below the template so It holds down tight.
Probably need a pic.
"shouldering" cores for edges
Moderators: Head Monkey, kelvin, bigKam, skidesmond, chrismp
-
MontuckyMadman

- Posts: 2395
- Joined: Fri Jun 20, 2008 9:41 pm
hmm. Well I run a bead and follow it up with my finger and really just lay a real thin fill in the crack like a tight caulk job.
Real minimal like.
You have to wipe your finger on the work bench asap or it smarts a bit. I have lost much of my heat sensitivity in my fingers from my previous employment.
If you wipe your finger quick it doesn't do any damage to your skin.
The clean up is minimal with a razor blade. The hot glue is extremely strong. i have found you need very little.
I will be more informative. With pics etc.. But I didn't said anything in this thread??? Did I...MontuckyMadman wrote:cant understand so many of your posts until like days later same with oac. Im sure its my ineptitude its just funney.
I use the same template for the core and just offset the core edge cut with a pin or stick as the guide. opposite the template and suspend above with the router bit and core. I use a couple beads of hotglue. the core is below the template so It holds down tight.
Probably need a pic.
-
MontuckyMadman
- Posts: 2395
- Joined: Fri Jun 20, 2008 9:41 pm
-
n.marshall
- Posts: 30
- Joined: Mon Aug 30, 2010 7:29 pm
I tried to do the recess with a rabbeting bit that has a bearing. Looks like this-

Imagine it flipped upside down and mounted into a router table. It worked pretty good for the cores that only had wood sidewalls, but when I attempted to route into thin plastic, this happened-
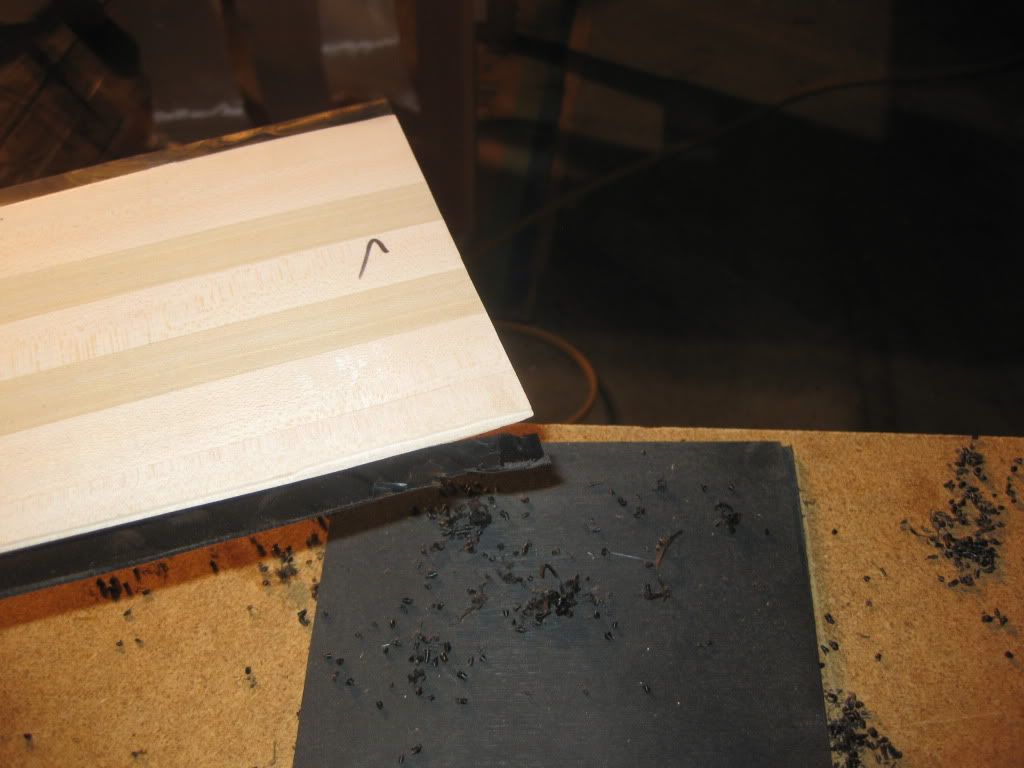
The sidewall cracked off the core. Has anyone else had this problem?
My plan now is to use the router for the middle of the core, and buy a handheld belt sander to do the tips and tails.
My bases ended up convex though, I don't really know why.
Imagine it flipped upside down and mounted into a router table. It worked pretty good for the cores that only had wood sidewalls, but when I attempted to route into thin plastic, this happened-
The sidewall cracked off the core. Has anyone else had this problem?
My plan now is to use the router for the middle of the core, and buy a handheld belt sander to do the tips and tails.
My bases ended up convex though, I don't really know why.
-
MontuckyMadman
- Posts: 2395
- Joined: Fri Jun 20, 2008 9:41 pm
Never having worked with plastic sidewalls myself, the issues here are difficult and reoccurring on the forum. I am thinking the best way to deal with all these bonding issues and profiling/bonding issues is to pre profile the abs or uhmw sidewall and stick it on after profiling and treating separately. Doesn't help with the edge rabbit issue unless you could rabbit the plastic before attaching.
Perhaps your router bit was spinning away from and not into the core thus ripping it off?
Perhaps your router bit was spinning away from and not into the core thus ripping it off?
-
skidesmond
- Posts: 2337
- Joined: Tue Apr 07, 2009 3:26 pm
- Location: Western Mass, USA
- Contact:
This is definitely a good idea. Another idea, though not neccessarily a good one, is to run the router backwards (i.e., clockwise). Not as safe, and a little harder to keep smooth, but it does seem to pull a lot less on the sidewall. I've had my fair share of tearing off sidewalls and i'm pretty sick of it!Richuk wrote:Changing your router bit to a flush trim router is going to help a lot too. Maybe it is worth trailing a few different techniques on a scrap piece and find out what works for you - save burning all you hard work.
-
skidesmond
- Posts: 2337
- Joined: Tue Apr 07, 2009 3:26 pm
- Location: Western Mass, USA
- Contact:

I agree that I can get the base just as flat either way.
However, I do notice that when I don't do the relief the topsheet isn't as flat. They come out just slightly concave. Not a big deal at all since I try not to ski on the tops of my skis.
Whichever way I am doing it,I account for the finished sidewall thickness to be close to the thickness of the the tip spacer.
It makes sense to do the relief and isn't hard to do but if you are not careful you can ruin a pair of cores easily.
-
doughboyshredder
- Posts: 1354
- Joined: Mon Sep 17, 2007 7:37 pm
The easiest way to rabbit the sidewall is to use a straight tip router bit the width of your sidewall and run the router on the core while following the sidewall with the bit. No guides necessary, you just have to have a good eye, and follow it carefully. Doesn't matter if you rout in to the core a little. You can set your bit depth to the exact right height for the edges and it will work great. Takes minutes.