full manufacturing process: from the wood to the snow

Document your personal work here. Show photos, movies, and share your secrets.

Moderators: Head Monkey, kelvin, bigKam, skidesmond, chrismp

davide
Posts: 260
Joined: Wed May 04, 2005 7:13 am
Location: Tsukuba, Ibaraki-ken, Japan
Contact:

full manufacturing process: from the wood to the snow

Post by davide »

These are my 4th and 5th pair. One was finished about a month ago, the other one still need some work: I have to thin the core, as they get a little bit too stiff.

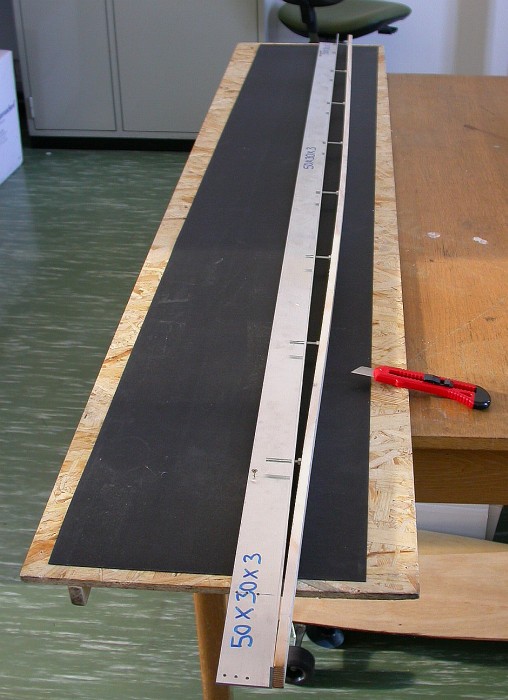
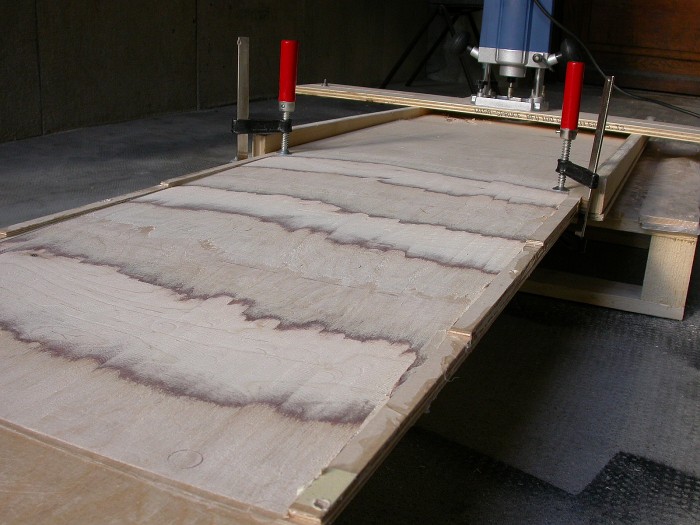
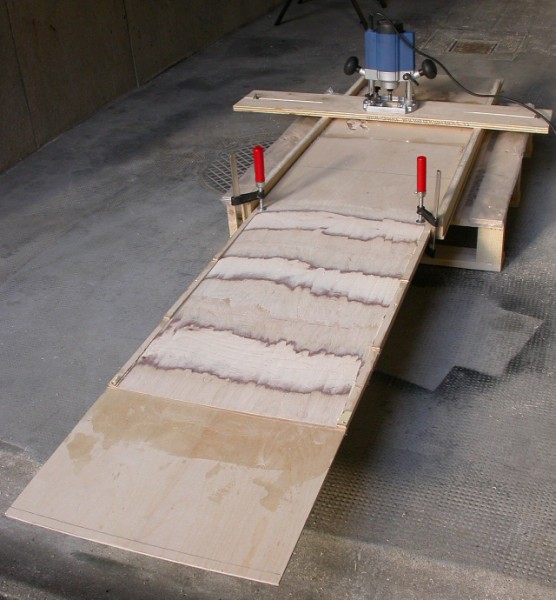
This is used to cut the base:
Image

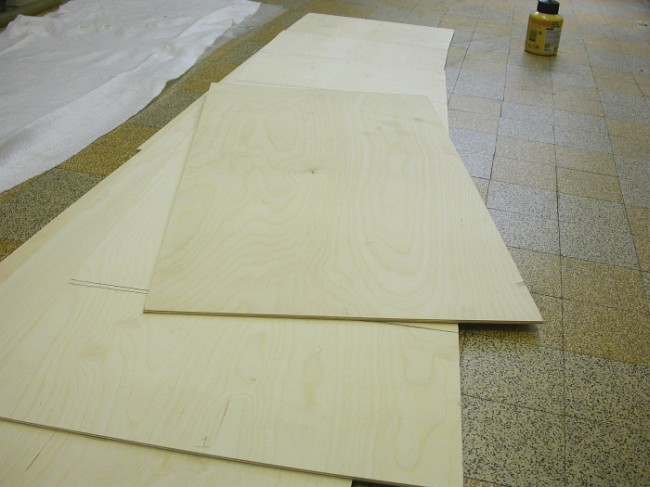
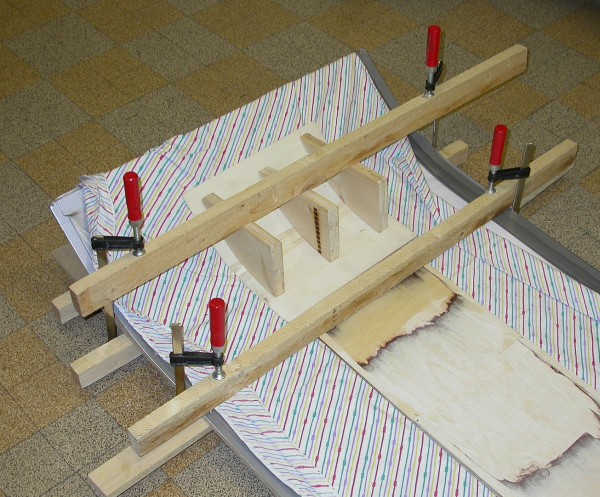
Then I glue the orizontally laminated core (3ply birch plywood)
Image
Image

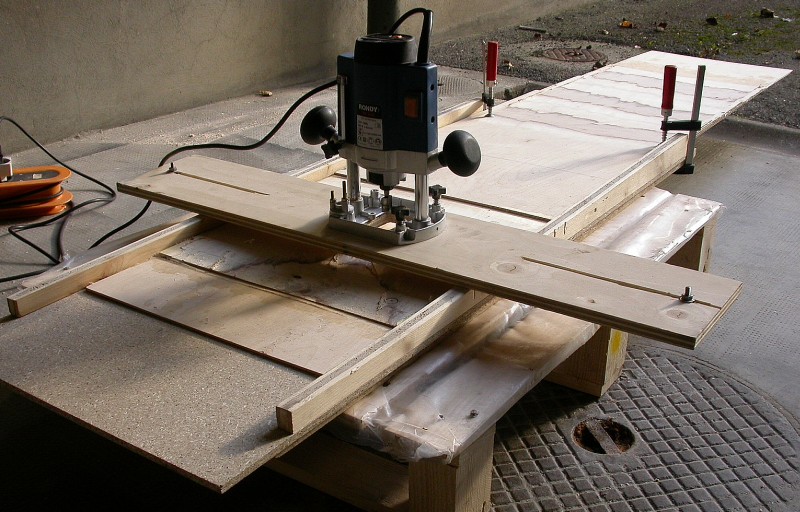
Then I machine the core: it is 4mm think at the tip and tail and 12mm thick in the centre.
Image
Image
Image

I bend the wood with hot water
Image

I usually do not put the edges in the tip and tail
Image

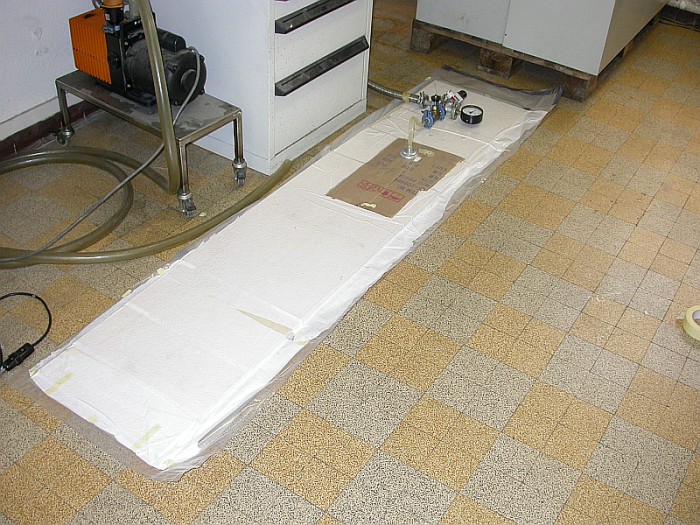
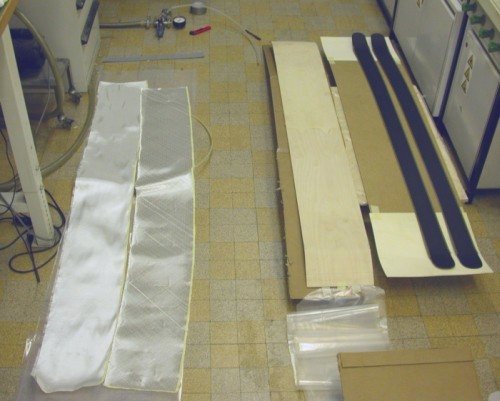
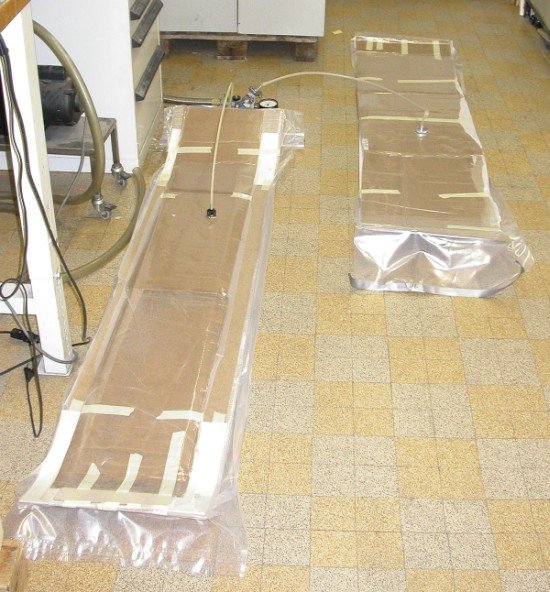
then lamination and pressing under vacuum (glass: 300g/m2 biaxial and 425g/m2 UD between the base and the core and 425g/m2 UD as top layer )
Image
Image

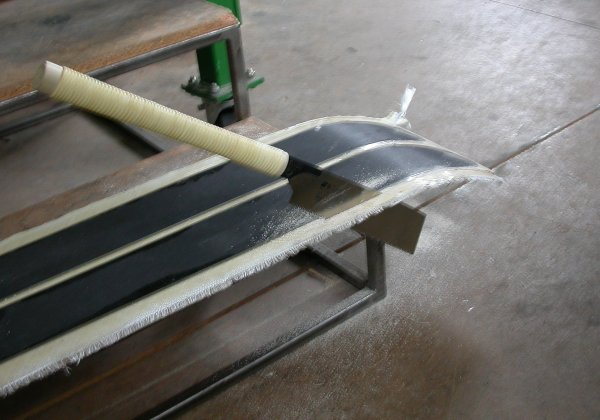
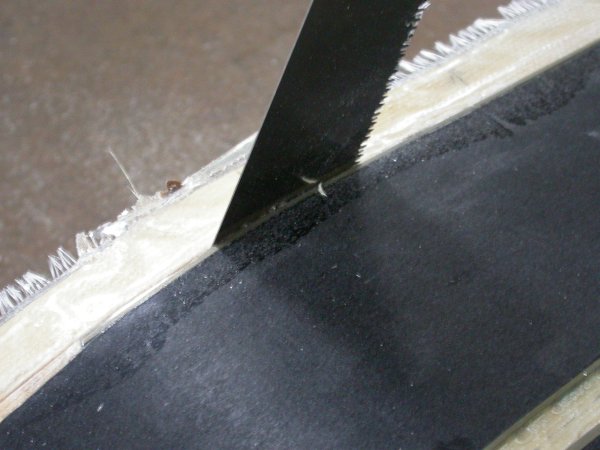
They I cut out the skis form the board with a "kataba meiko"
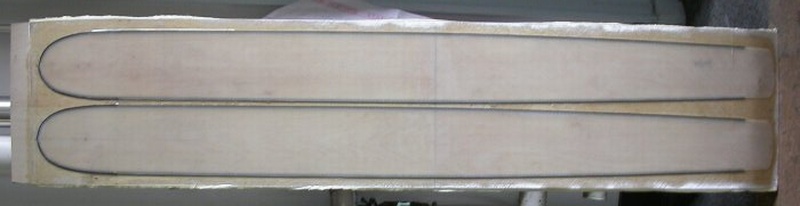
Image
Image
Image

Here they are
Image
Image
Image

I called them the "()", that is double parentesis. They are somehow like the Kananas: inner radius is about 25m, on the outer edge they have a very small reverse sidecut; they are about 90mm wide. Actually I wanted to make something different, but I made a mistake in cutting the base, so I recycled the base for these ones.

I tested them in Les Paccots (CH). This is a tiny resorts in the "pre-alpes fribourgeoises".
http://www.les-paccots.ch/haut_int.php3 ... =0|0|2|3|5|
I love this kind of places. I had also my TUA OneTen, that I used in the morning. When I do testing I always have a backup pair, just in case… Then in the afternoon I picked up the "()".
They are nice when I ski them parallel in piste; in tele turns, I found difficult to keep the inner ski on the edge. I have Crispi CXA, and I have already noticed that it requires some effort to put a 90mm ski on the edges; I can do that, but it is not fun. Probably 80mm is the limit for these boots.
In off-piset (powder) they were nice of course. But 100mm or even 120mm at the centre are even better.
I think that if I must choose only two pair of skis, I would pick up a 110-75-100 for piste and backcountry (in variable conditions) and a 100mm or even 120mm wide ski (standard or reverse sidecut) for the pow-days. 90mm wide skis are not more forgiving in piste than a 110mm (at least for me) and they are not so impressive in the powder as the really large ones.
Last edited by davide on Wed Sep 16, 2009 10:39 pm, edited 1 time in total.
collin
Posts: 105
Joined: Sun Oct 23, 2005 10:19 pm

Post by collin »

Pretty cool. I really like your adjustable sidecut template thingy. Is it wood or metal? I can't tell from the pic. [are those two home made long boards on the floor in that pic?] And the "tiger stripe" pattern you get from shaping the plywood is cool too.

Those saws are awesome. I've only heard them called "japanese razor saws" or a "japanese pull saw" since they cut on the pull stroke. I got one that has a coarse side and a fine side for building a boat [which is sitting half finished in my livingroom] and I'm amazed how easy it is to make quick precise cuts. Best hand saw I've ever used by far. Amazon has a lot if some body wants one and can't find it locally.

Are you not using inserts? I'd guess that it might be hard to line up the bases so they were in the right spot. Do you work in a lab?
davide
Posts: 260
Joined: Wed May 04, 2005 7:13 am
Location: Tsukuba, Ibaraki-ken, Japan
Contact:

Post by davide »

The adjustable templetate is made with an L shape aluminium bar, 2.2m long (measurements are in picture) and a wood stick.

Yes, I made three longboard up to now. I did them also to get trained for the skis.

Your saw is a ryoba: the coarse side is to cut along the grain, the fine one to cut across. I got them from www.answerk.ch but also www.fine-tools.com has many of them.

Yes, I did the work in the lab at the University (in the evening or during the weekend)
User avatar
littleKam
Site Admin
Posts: 269
Joined: Mon Dec 13, 2004 7:43 pm
Location: SoCal

Post by littleKam »

davide, awesome setup. i especially like that saw! i'm thinking about making a vacuum setup as well. what are the specs on your vacuum pump? what kind of pressure are you exerting on the skis? are there any problems with the materials moving around while vacuumming out the air?
- Kam S Leang (aka Little Kam)
davide
Posts: 260
Joined: Wed May 04, 2005 7:13 am
Location: Tsukuba, Ibaraki-ken, Japan
Contact:

Post by davide »

The primary pumps can go down to 10E-2/10E-3 bar.
I have a manometer on the pipes connecting the pump with the bag (you can see it in the photos), and it goes down to zero. I read on grafsnwboard that someone put a second manometer directy connected with the bag, at the tip or tail, just to be sure the pressure was low enough also at the extremities. Actually it is easy to see that the pressure is low, because the bag is really tight on the skis.

The cheapest pump around are small, i.e. it takes a little bit longer to get the air out from the bag, but it is not important in this case if takes 2 minutes or 10 seconds.

When I made my very first pair, I had a little problem about materials moving in the bag. At that time I machined the two cores with the right sidecut, and then I wanted to glue them on the base/edges., so I just put the different materials on the other and the two skis parallel, 1 cm apart. During the pumping, the pressure on the bag made the cores to shift one towards the other (less than 1mm), so the base/edge was shifted respect to the core. But actually it was not a problem when skiing. Just take care, and use some stops to keep the pieces in position.
Now I have a single core, wider the the two skis, and if fix the base/edge with same tape.
davide
Posts: 260
Joined: Wed May 04, 2005 7:13 am
Location: Tsukuba, Ibaraki-ken, Japan
Contact:

Post by davide »

They are ready now. I just have to wait for some soft snow.


Image
Image
Cicciobombocannoniere 166-169-133, L=184cm, about 4.6Kg (per pair without bindings).

I put only biax glass (300g/m2) between the base and the wood.
Alex
Posts: 105
Joined: Mon Nov 07, 2005 7:41 am
Location: Munich (Germany)

Post by Alex »

169 under foot - that's a true fat ski - very impressive! And the negative camber is huge!

I like the shape with minimal reverse side cut before the binding and much behind. I've been thinking about this too for my next one with reverse sidecut. Hopefully it compensates the bad effect with catching the edge in front of the binding, turning the ski in the wrong direction (just on the piste) ....

Hopefully you manage to test them soon!
User avatar
littleKam
Site Admin
Posts: 269
Joined: Mon Dec 13, 2004 7:43 pm
Location: SoCal

Post by littleKam »

nice bump skis ;)

for some reason i really like those bases!
- Kam S Leang (aka Little Kam)
Henrik
Posts: 14
Joined: Wed Apr 20, 2005 12:00 am

Post by Henrik »

Hi Davide!

I am always routing out seats for edges in my cores. You do not seem to do that! Do you not get a concave base?

Henrik
Professor!
davide
Posts: 260
Joined: Wed May 04, 2005 7:13 am
Location: Tsukuba, Ibaraki-ken, Japan
Contact:

Post by davide »

Yes, but I use a big file to thin the edges on the finished ski. They have still some concave, but it is not a big problem.
Actually I measured the base and edge thickness, and I found that the edges are always few tens of mm thicker than the edges. The best thing to do would be to use a stone grinding machine to flat the base.
Freeskier15
Posts: 8
Joined: Sun Nov 20, 2005 3:49 pm

Post by Freeskier15 »

does the horizontally laminated core create a stiffer ski? If so, then I could create a ski with a thinner core in order to save weight. Ski looks great by the way.
jiri23
Posts: 17
Joined: Thu Oct 01, 2009 9:27 am

Camber

Post by jiri23 »

HI, I really like the idea of plywood skis, have few questions:

do you have a little more fotos of how you done your camber?

do you think its neccesary to profile the core so smooth? for example my first bc skis - big trouble from Dynastar have the core profiled like stairs would it work with plywood?

and third - its been a while you posted your ski building diary? how is your construction durable? are the skis still in use?

Thank you

Best regards from Austria

Jiri
davide
Posts: 260
Joined: Wed May 04, 2005 7:13 am
Location: Tsukuba, Ibaraki-ken, Japan
Contact:

Post by davide »

1) To make the camber, I put a wood block under the mid-ski and weights over tip and tail. Check in my gallery, under Davos.

2) I think steps are not good: mechanical stresses would concentrate there and it may break. At least you should smooth the steps.

3) I made my first pair of plywood skis before Skibuilders.com was on line. I have many skis, so it not easy to ski all of them a lot. Plywood skis seems as durable as the others, if you choose a strong wood, like birch. Better avoid cheap, fragile poplar plywood.
jiri23
Posts: 17
Joined: Thu Oct 01, 2009 9:27 am

Post by jiri23 »

Hi Davide!

where did you source the plywood from? I have been looking nearly everywhere and all I can find is 3mm poplar or 3 mm birch but in max. length of 150 cm. Is your bottom layer from one piece of ply or did you have to put two together?

Cheers

Jiri
Steevner
Posts: 29
Joined: Mon Sep 10, 2007 2:54 pm

Post by Steevner »

I'm also really interested to see if the bottom ply is 1 piece of wood or 2. From the picture that shows the sidewalls underneath the bindings, it looks like a joint on the bottom ply? I'm wondering if that would even make much of a difference, since it's directly underfoot.
Post Reply