156 all mountain freestyle twin

Document your personal work here. Show photos, movies, and share your secrets.

Moderators: Head Monkey, kelvin, bigKam, skidesmond, chrismp

doughboyshredder
Posts: 1354
Joined: Mon Sep 17, 2007 7:37 pm

156 all mountain freestyle twin

Post by doughboyshredder »

This board is going to be a 156 with camber under foot and rockered tip and tail. (no, you don't have to weight it out to see the rocker :D ). Long effective edge, with a short tip and tail. The rocker extends from insert packs fore and aft, so I was able to shorten up the tip and tail.

Everything is ready to be pressed but it will be a few weeks before I get to it.

I wanted to post a few pics with some helpful tips.

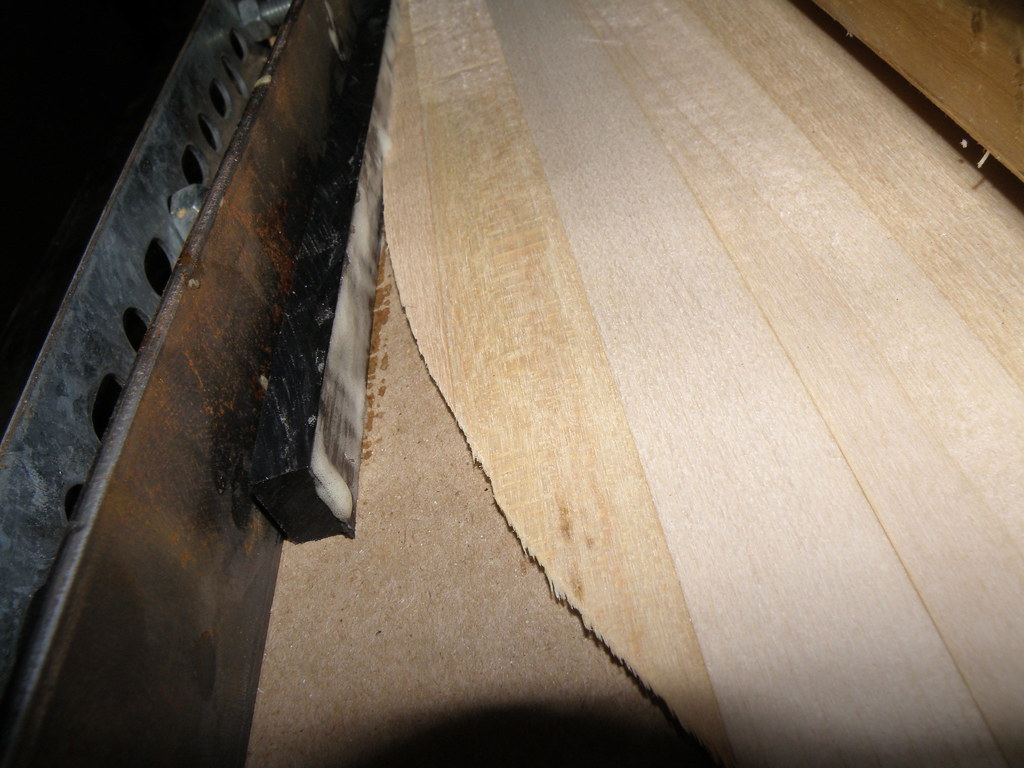
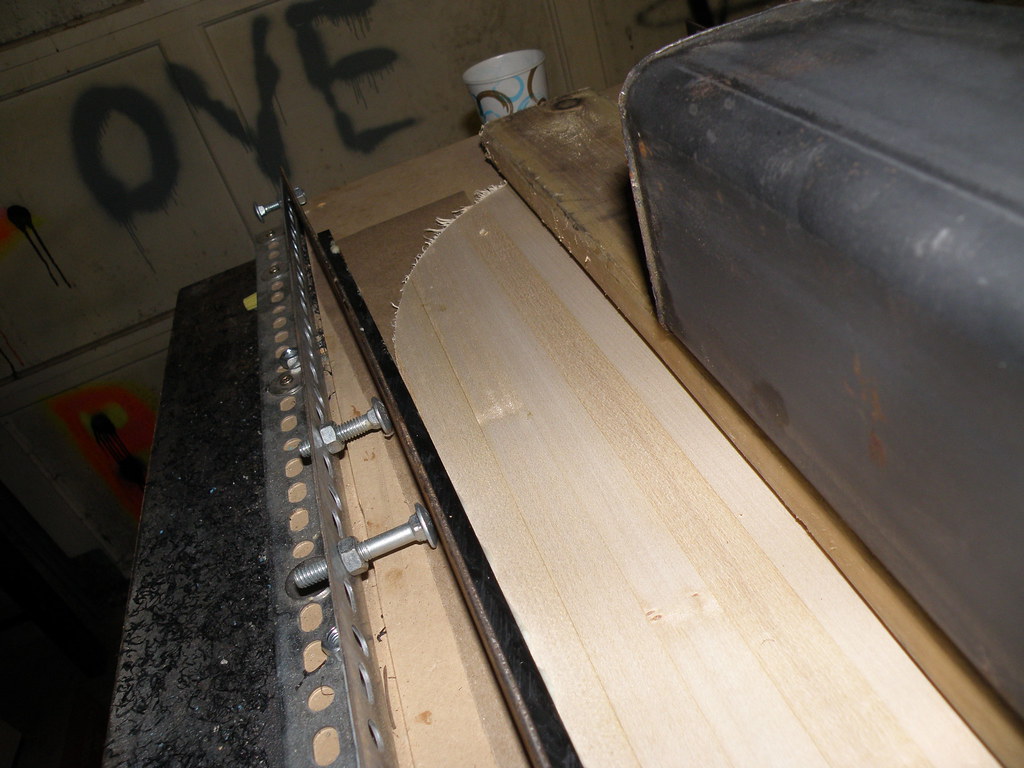
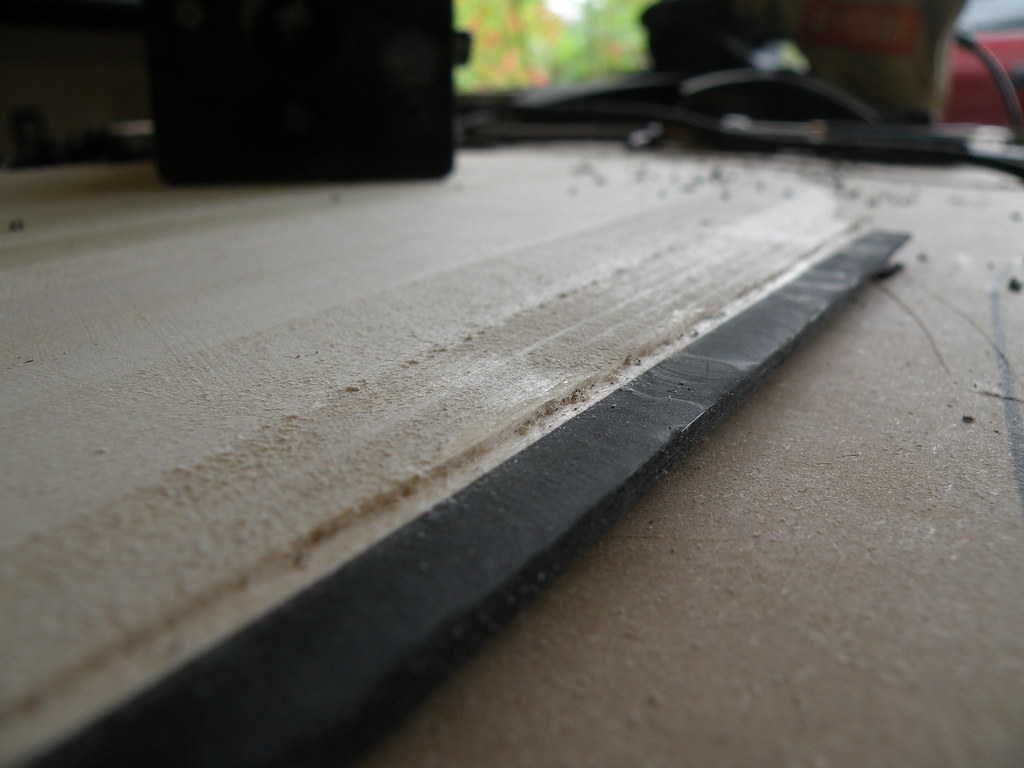
First is edges. Make sure they fit before you glue them.
Image

There is no glue on that edge. Also notice where the edge is cut off. To get the fit I trace the edge with a mechanical pencil and then cut the base to the right size.

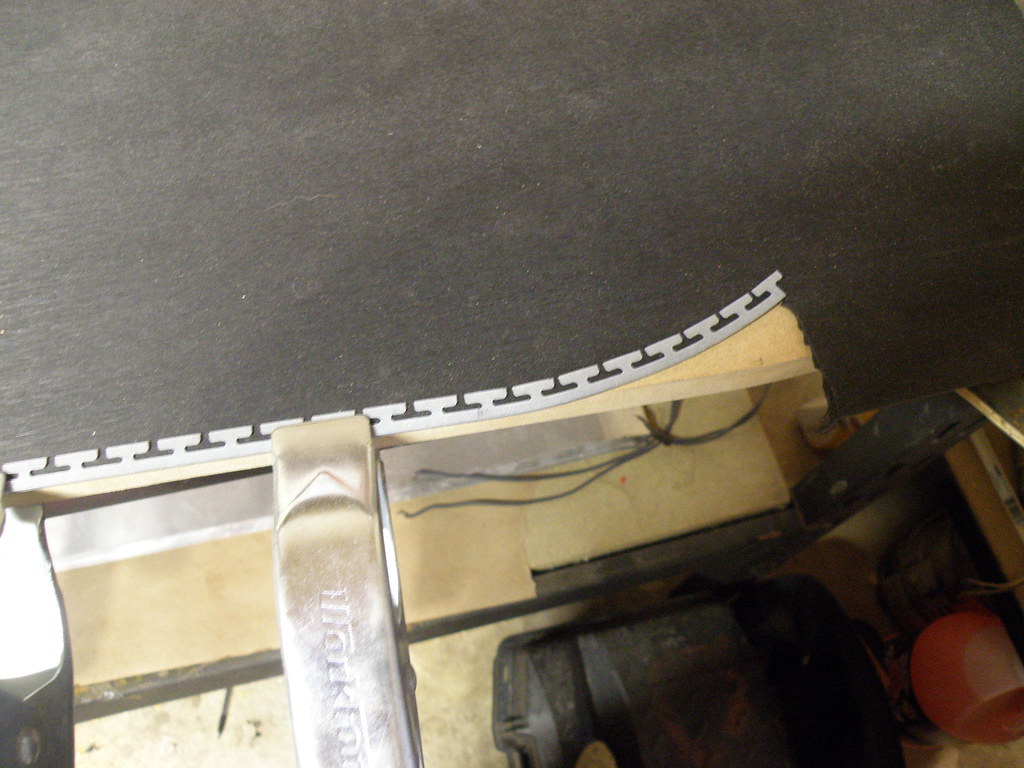
Rabbiting for the edge.
Image

Image

The bit is set for the right depth of the edge. I make a few test cuts too make sure it's right, and then I eyeball it along the length of the core. It's really easy to follow the sidewall, and if you do get off it's really not a big deal.

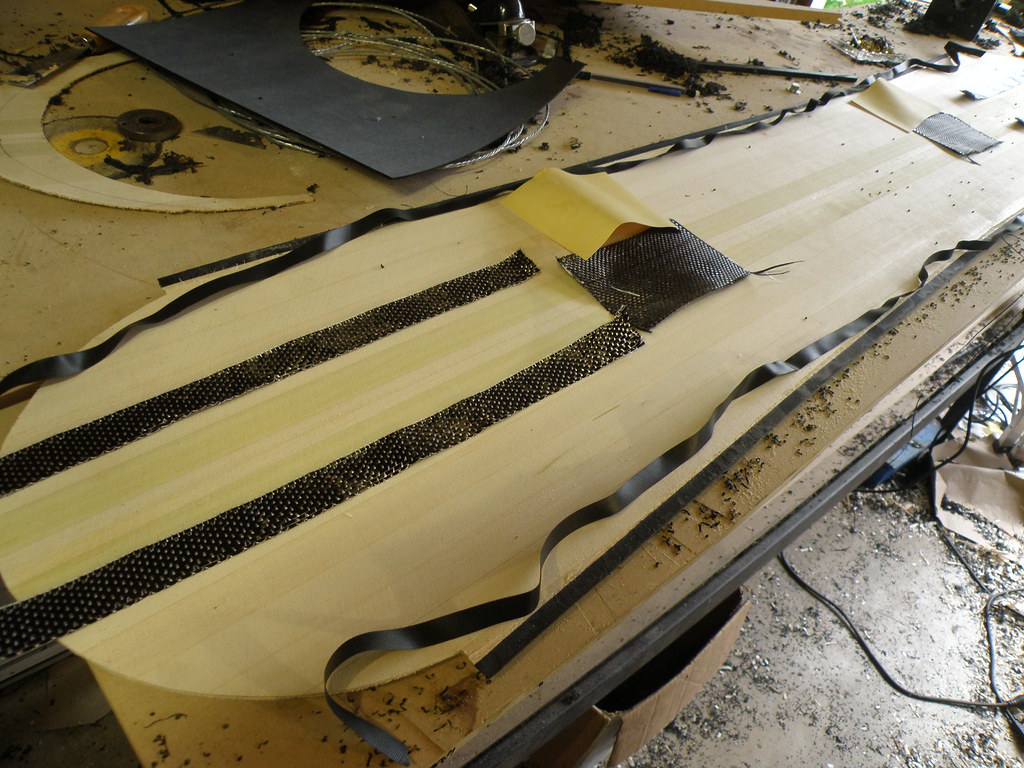
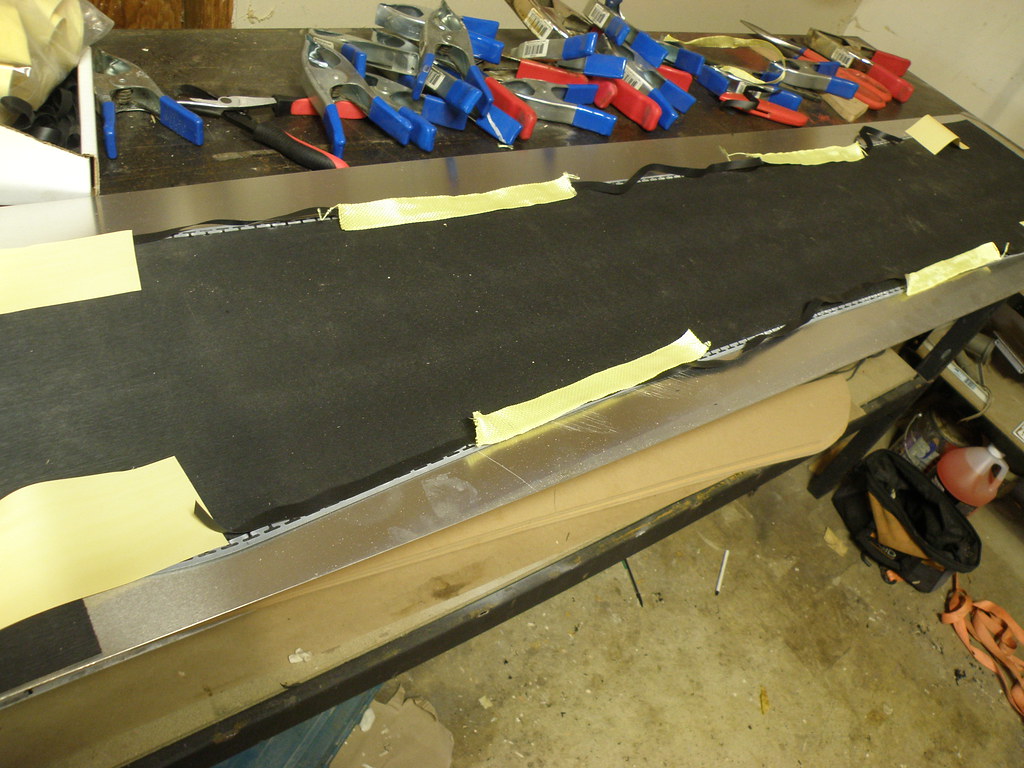
Prepping the material.
Base with two strips of black vds for the running length of each edge. 4 squares of natural vds for the contact point and end of the edge attachment. 4 strips of kevlar biaxial tape for reinforcement of the edges where the bindings will be.

Image

Core prep:
Core with carbon fiber strips through the rocker point and the tip and tail. Carbon fiber pads that the inserts get mounted through. VDS squares for over the inserts and carbon fiber. VDS strips for above and below the sidewall.

Image
User avatar
chrismp
Posts: 1444
Joined: Fri Feb 13, 2009 9:00 am
Location: Vienna, Austria

Post by chrismp »

with all the camber/rocker options out there what made you choose this setup?
the way i see it there's basically two options to combine rocker and camber. one being the way you did it and the other putting the camber underfoot and rocker for the rest of the board (á la neversummer, burton flying v,etc).
what are the advantages/disadvantages of each of these systems?
doughboyshredder
Posts: 1354
Joined: Mon Sep 17, 2007 7:37 pm

Post by doughboyshredder »

chrismp wrote:with all the camber/rocker options out there what made you choose this setup?
the way i see it there's basically two options to combine rocker and camber. one being the way you did it and the other putting the camber underfoot and rocker for the rest of the board (á la neversummer, burton flying v,etc).
what are the advantages/disadvantages of each of these systems?
IMO, rocker underfoot makes for more of a slidey surfy style of turns. Camber underfoot allows more of a hard charging alpine style carving. I like camber. I like the feeling of having to push the camber out to make a hard carve. I like the rebound of camber. I started messing around with rockered tips last year, and I found that the increased float was awesome. I also like that there is less of a need to detune the edges to avoid catchiness.

This board is for another of my friends that calls Alpental their home mountain. The terrain we ride is steep and technical. Edge hold is paramount and so camber (underfoot) is king.

Check out Jones snowboards line up. All of their boards have camber underfoot, with varying degrees of tip/tail rocker.

Also, the rocker I have used and am using on this board is actually a lifted flat section. So, it will still flex in to the turn instead of already being shaped to the carve. Does that make sense?
twizzstyle
Posts: 2204
Joined: Tue Mar 07, 2006 8:25 pm
Location: Kenmore, Wa USA

Post by twizzstyle »

Did you do that core with your new planer? Cause the sidewalls look great.
doughboyshredder
Posts: 1354
Joined: Mon Sep 17, 2007 7:37 pm

Post by doughboyshredder »

twizzstyle wrote:Did you do that core with your new planer? Cause the sidewalls look great.
heh, glued the sidewalls on after planing and then used an angle grinder with a sanding disc to get them to the right height. It worked, and didn't take too much time, but it stunk up the whole house for hours.
I am starting a couple more boards today, and they will have wood sidewalls for the first time.

my sidewall gluing contraption is still working out great.

Image

Image
OAC
Posts: 961
Joined: Thu Jul 23, 2009 9:34 am
Location: Sweden
Contact:

Post by OAC »

Good to see that the sidewalls are "stable" after glueing them afterwards!
An adjustment tip: If you can turn your glueing station 90 deg. More glue will stay in the lamination(core) rather than disappearing down on the table. :) That goes for all core lamination.
(I took me 8 cores to realize that )
Alex13
Posts: 238
Joined: Wed Dec 09, 2009 12:01 am

Post by Alex13 »

I use spring clamps, spare pieces of cat track and sash clamps to glue my sidewalls on. It has worked out very well for me, however, I glue them to the unprofiled core and they need to be the same thickness... i.e.
Image

Board looks great, what's the reason for carbon rather than glass under the inserts? So they don't flex so much, rather than for impact absorption? I like the VDS idea as well. Also, is there a reason you're using biax carbon tape rather than uni directional carbon for stiffening up the tip and tail?
User avatar
falls
Posts: 1458
Joined: Tue Oct 27, 2009 5:04 pm
Location: Wangaratta, Australia

Post by falls »

I think they put perforated carbon or Kevlar behind the inserts and pop them through this layer. When the epoxy sets it is a really strong layer for the inserts to be tightened against rather than just the softer wood. I read that on some boards people have tightened their bindings and it pulls the inserts into the wood leaving a dimple on the base.
Reinforcing the rockered section sounds like a good idea. My first rocketed skis the rocker is a bit floppy. Unidirectional carbon coming up in the next set.
Don't wait up, I'm off to kill Summer....
doughboyshredder
Posts: 1354
Joined: Mon Sep 17, 2007 7:37 pm

Post by doughboyshredder »

carbon under the inserts instead of fiberglass is for the added strength without much of an increase in weight.

biaxial instead of uni. huh. I really hadn't thought of using uni. Using uni would probably make more sense as that small amount of crosswise fiber probably isn't stiffing anything up much at all. Although it is creating an area of more resistance for the lengthwise fibers, so it's giving it some added strength, but probably not commensurate to the added weight.

Thanks for pointing that out, I hadn't really thought about it.
Alex13
Posts: 238
Joined: Wed Dec 09, 2009 12:01 am

Post by Alex13 »

No probs, though it was intended as a genuine question rather than pointing out anything ;) I thought it may be for ease of application, as the carbon tape may be a bit neater when laying it all up, and possibly less likely to "wander" when pressing.

falls - let me know if you need any additional uni directional carbon. I have shitloads that I'm not using, can give you it as a 1" wide tape or as 10mm or 20mm roving. If you only want a small amount (1-2 ski pairs worth) its free, larger amount we can work out a cost. This goes for any other Aussies who are regular contributors to the forum too if you come across this post.
User avatar
falls
Posts: 1458
Joined: Tue Oct 27, 2009 5:04 pm
Location: Wangaratta, Australia

Post by falls »

Thanks alex. I just bought 10m so should be ok for a while.
Skied last Friday again on the homebuilts. Really enjoyed them this time in the spring conditions.
Don't wait up, I'm off to kill Summer....
doughboyshredder
Posts: 1354
Joined: Mon Sep 17, 2007 7:37 pm

Post by doughboyshredder »

funny. I looked closer at my carbon tape and it is uni. Just doesn't look like it because it has a crosswise nylon? fiber tying it all together.

Here's the spec: Style 1016, 5.8 oz./yd.² , Warp 8, 12K Carbon X Fill 8, ECG-150 1/0, Unidirectional, .010 in. Thickness.
User avatar
falls
Posts: 1458
Joined: Tue Oct 27, 2009 5:04 pm
Location: Wangaratta, Australia

Post by falls »

Also notice where the edge is cut off. To get the fit I trace the edge with a mechanical pencil and then cut the base to the right size.
By this do you mean it is best to cut edges level with the base of the last tooth?
Don't wait up, I'm off to kill Summer....
doughboyshredder
Posts: 1354
Joined: Mon Sep 17, 2007 7:37 pm

Post by doughboyshredder »

I think so. Basically so the edge has nothing sticking past the base of the last tine.
twizzstyle
Posts: 2204
Joined: Tue Mar 07, 2006 8:25 pm
Location: Kenmore, Wa USA

Post by twizzstyle »

doughboyshredder wrote:funny. I looked closer at my carbon tape and it is uni. Just doesn't look like it because it has a crosswise nylon? fiber tying it all together.
Pretty sure that's fiberglass :)
Post Reply