In the Beginning...

Document your personal work here. Show photos, movies, and share your secrets.

Moderators: Head Monkey, kelvin, bigKam, skidesmond, chrismp

agiocochook
Posts: 72
Joined: Tue Apr 27, 2010 1:18 pm
Location: White Mts, NH

In the Beginning...

Post by agiocochook »

Image

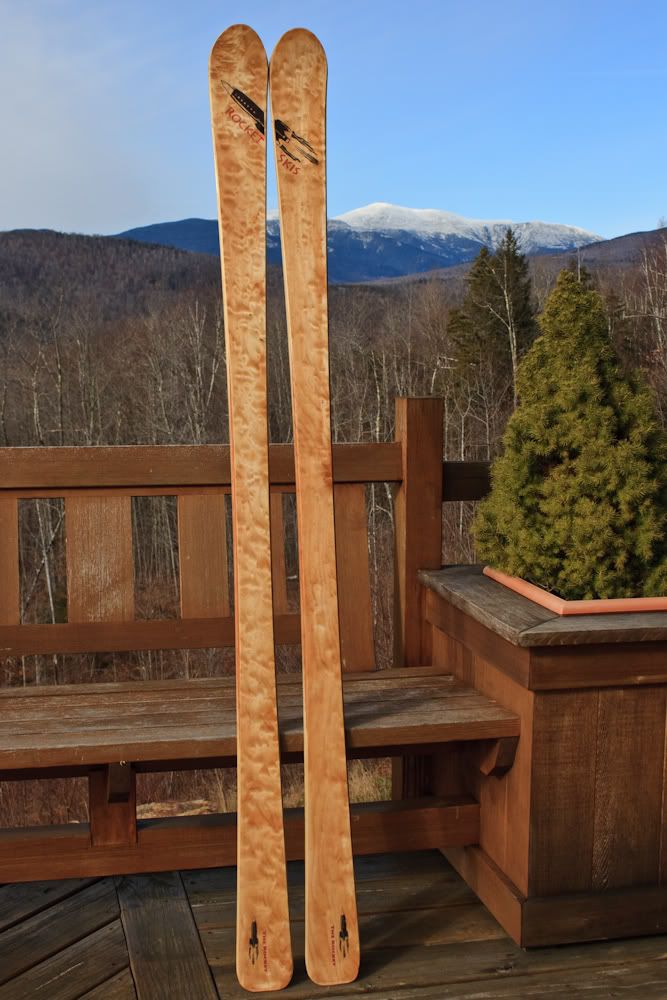
These are my first pair. I wanted to start with something I was familiar with (as a sort of baseline) so I patterned them after my Volkl Racetiger RC's.They're a slalom/GS hybrid, so the waist is pretty narrow (67mm) and they have fairly aggressive sidecut (17m). In the picture though, both the narrowness of the waist and the amount of sidecut appear more pronounced because I beveled the sidewalls.

Vacuum press and fairly standard construction. The core is poplar/cherry and I used a planer/crib to profile. I haven't profiled cores with a router and sled, but using the planer was quick, easy and resulted in very smoothly profiled cores. Took less than an hour to build the crib. Rather than build in sidewall material (and therefore, cut the cores to shape), I decided to go with epoxy coated wood sidewalls (more later). This allowed me to press both skis at the same time as a single double-wide core blank with both bases kept in place using pins. Other than speeding up the production process, it also helped ensure that the tip/tail/camber profiles of the two skis were identical. For a topsheet I used a quilted maple veneer.

For the most part the pressing went well, except that I got some air bubbles under the center sections of both skis. The air bubbles appear to be both between the p-tex and glass, as well as between the glass and underside of the core. I did try to roll out any trapped air, but.....is it possible that epoxy which got into the pins started to set before I got it into the bag and under pressure, preventing the core from being fully pressed against the base? Or, could the pressure on the excess core areas, where it wasn't supported underneath by the bases, have caused the core to "bow" over the bases? BTW, the pump I used was pulling around 27" of Hg.

The other problem which became apparent at this point was that the skis are very soft. I profiled the core to 2mm at the tip, 10mm at the waist and 3mm for the tail. I also only put one layer of glass (biax of unknown weight that I had kicking around) between the base and core, and between the core and topsheet. There's the general narrowness of the skis as well....Oh well, considered this first pair as a trial run, anyhow....

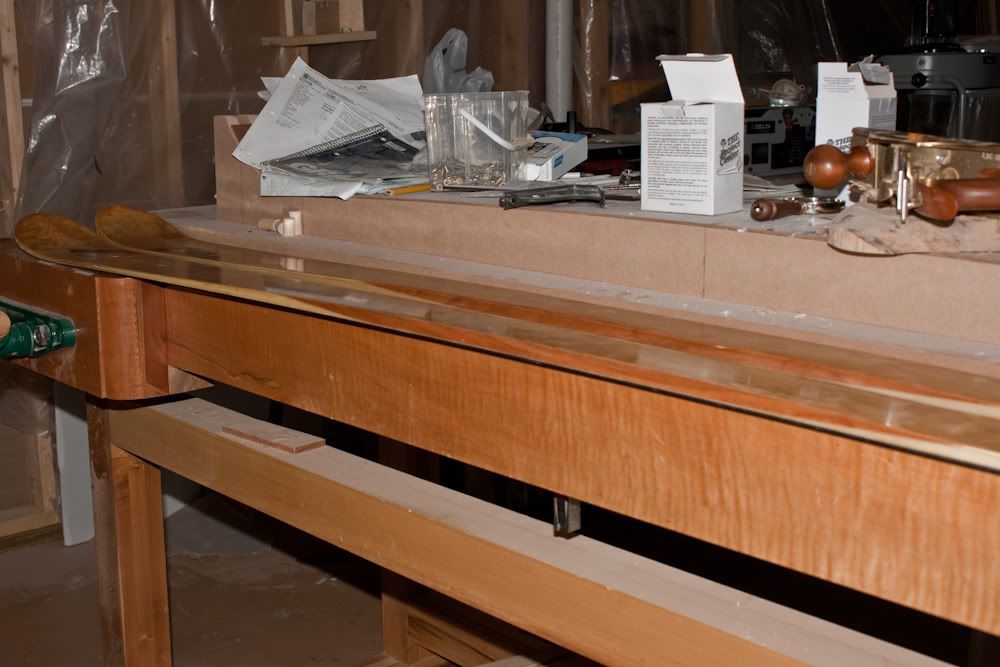
For the sidewalls, I was concerned that even if I beveled and epoxied them, the epoxy coating would, more and more, get ground off as I sharpened the edges. So, I replaced the bearing on the bevel bit with one that was 1/8" smaller which added a 1/16" rabbet to the bevel. 1/16" looks awfully small on a ruler, but I think, now, more than I needed. Next time I'll try a 1/32" rabbet instead. In any case, after bevel/rabbeting the sidewalls, I set the skis on edge, but not quite perpendicular, so that the sidewalls were level, added some tape extending off the edge of the topsheet to create a barrier and then "back-filled" the rabbet until the epoxy was flush with the exposed metal edge. This gave me a 1/16" coating of epoxy over the wood sidewalls.

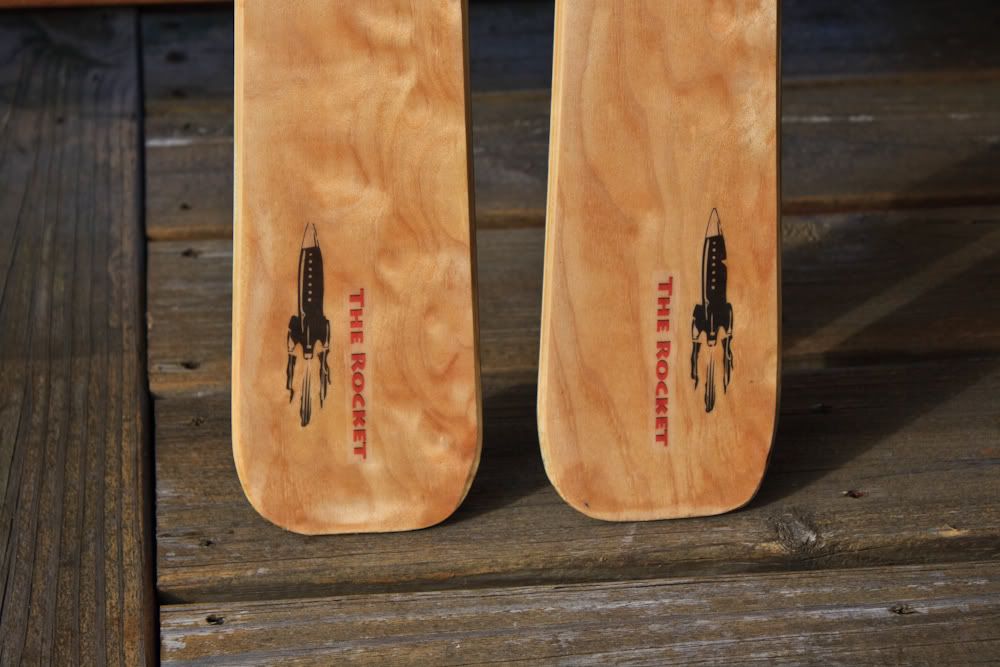
Something that came out kind of cool, but completely unplanned, was that the sidecut just barely cuts through the outer strips of poplar in the cores and exposes a cherry strip under the center section of the ski for a two-tone effect.

Image

After sanding the veneer tops, I applied two coats of epoxy and then a couple coats of spar urethane for UV protection. Applying a smooth coat of epoxy was difficult and required a lot of sanding after. I found a suggestion for a curved squeegee type applicator that will hopefully help next time.

For graphics, I simply printed them out on large clear packing label sheets (from Staples) and put them on before the epoxy coats.

Image
COsurfer
Posts: 357
Joined: Sun Jul 11, 2010 1:42 pm
Location: Evergreen, CO

Post by COsurfer »

Awesome looking skis! for your first set very impressive!
agiocochook
Posts: 72
Joined: Tue Apr 27, 2010 1:18 pm
Location: White Mts, NH

Post by agiocochook »

Thanks!....which is why I didn't include a pic of the bottoms....
twizzstyle
Posts: 2204
Joined: Tue Mar 07, 2006 8:25 pm
Location: Kenmore, Wa USA

Post by twizzstyle »

You said you used biax fiberglass. Are the fibers running lengthwise and widthwise on the skis? Or are they at 45's? If the latter then that's why the skis are soft.

They look great though! I love the unintentional two-tone effect on the sidewalls, that looks pretty awesome!
jvangelder
Posts: 181
Joined: Tue Jul 07, 2009 4:41 pm
Location: Southern NH

Post by jvangelder »

Looks good, loving the little rockets

Im especially envious of the background of your pic. You look to be around an hour north of me, must be a very nice sight to walk outside too

As far as the bubbles are concerned, only time we get bubbles in snowboards is when we put it in the press two soon. Might be different for your epoxy however we have a few gal from QCM and we are suppose to let it setup for around 24min before putting in the press and heating it. If we rush it, we get bubbles


-Jacob
skidesmond
Posts: 2337
Joined: Tue Apr 07, 2009 3:26 pm
Location: Western Mass, USA
Contact:

Post by skidesmond »

Great looking skis. I like the look of the sidewalls. Looks great! I have cores I made specifically to give that look. I have ash in the center and cherry on the outside.

If you used triaxial FG above and below the core you'd get a much firmer ski using those core dimensions.

I like the graphics too. I've been looking for simple ways to apply graphics after pressing. I'll have to try your method.

Mount them up and let us know how they ski.
agiocochook
Posts: 72
Joined: Tue Apr 27, 2010 1:18 pm
Location: White Mts, NH

Post by agiocochook »

Thanks for the comments. I just checked the biax I used and the fibers are running lengthwise/widthwise. As I mentioned, though, I'm not sure what the weight is and compared to the 22oz triax that I got from SB for the next pair, it's a lot lighter.

From beginning of wet-up to in the press was probably 25-30 min, should I have waited longer still before applying pressure? I was wondering if it would help rolling out any air to first set the pump to pull only enough to get everything flat against the mold. Then, after rolling, reset the pump to it's maximum.

The only hitch to the graphics was that the packing label sheets weren't completely clear; just a little bit cloudy. The rockets weren't too bad to cut out, the letters not so much...fortunately, the epoxy and urethane coats made it less noticeable. Probably something better out there, but it was the best Staples had and I wanted to get them done.

Will update as soon as I get them on the snow -- as you can see from Mt Washington in the background, it's coming... and, yes, it's a great view! Didn't know what we had until we cleared to build a house.....even better, we have a 160deg pan unobstructed (N to SW) and can't see one other house, street, light......

The backyard playground:
Image
skidesmond
Posts: 2337
Joined: Tue Apr 07, 2009 3:26 pm
Location: Western Mass, USA
Contact:

Post by skidesmond »

Killer view!
User avatar
Skammy
Posts: 50
Joined: Sat Oct 03, 2009 1:49 am

Post by Skammy »

Very awesome looking!
doughboyshredder
Posts: 1354
Joined: Mon Sep 17, 2007 7:37 pm

Post by doughboyshredder »

jvangelder wrote: As far as the bubbles are concerned, only time we get bubbles in snowboards is when we put it in the press two soon. Might be different for your epoxy however we have a few gal from QCM and we are suppose to let it setup for around 24min before putting in the press and heating it. If we rush it, we get bubbles


-Jacob
I've never heard of such a thing. Did QCM tell you to let it sit before putting it in the press? Which epoxy and hardener are you using?
User avatar
SHIF
Posts: 280
Joined: Sat Jul 14, 2007 7:43 pm
Location: Wasatch Mountains
Contact:

Post by SHIF »

jvangelder wrote:...As far as the bubbles are concerned, only time we get bubbles in snowboards is when we put it in the press two soon. Might be different for your epoxy however we have a few gal from QCM and we are suppose to let it setup for around 24min before putting in the press and heating it. If we rush it, we get bubbles

-Jacob
The pot life for any epoxy is the published working time before the stuff starts to set. If you lay up a ski using QCM epoxy and then wait 24 minutes before pressing it, you might create a useless brick.

Avoid introducing air bubbles by carefully stirring the hardener into the epoxy. Don't whip it fast, just stir it in slowly and completely. Then be careful when spreading it out on your composite layers. Smooth and steady with the squeege does it. If you move too fast the resin can foam up causing loads of tiny bubbles to form. This is especially true if you are using a cotton fabric graphic layer, the fine texture of the fabric easily foams the resin.

-S
jvangelder
Posts: 181
Joined: Tue Jul 07, 2009 4:41 pm
Location: Southern NH

Post by jvangelder »

Ill search for the pdf i read it in tonight. I didnt get it stright from QCM

In short, it was something to the effect of, heating the epoxy to soon after it became mixed caused an unwanted chemical reaction that formed a gas which became small bubbles.

A few of our boards went into the press 2 or 3 min after the epoxy for the top was mixed, once we stopped putting it in right away and waited so it didnt go in untill around 24min after we started mixing it, the bubbles stopped showing up.

-Jacob
doughboyshredder
Posts: 1354
Joined: Mon Sep 17, 2007 7:37 pm

Post by doughboyshredder »

SHIF wrote: Avoid introducing air bubbles by carefully stirring the hardener into the epoxy. Don't whip it fast, just stir it in slowly and completely.

-S
I disagree with this statement completely.

I have never had air bubbles in a board, and not a one of the thousands of boards I built in production ever had air bubbles.

I have always mixed my epoxy with a paint mixer on the end of a drill.

Since I haven't ever seen an air bubble in a layup, I can't say for sure, but my guess is that what is causing it is too low of pressure,pieces that don't fit perfectly, or epoxy that is already kicking when placed in the press.
jvangelder
Posts: 181
Joined: Tue Jul 07, 2009 4:41 pm
Location: Southern NH

Post by jvangelder »

Well im not really sure what to say. Only thing we changed was making sure the time between when we mixed the epoxy and when it went into the press and was heatead was about 24min.
agiocochook
Posts: 72
Joined: Tue Apr 27, 2010 1:18 pm
Location: White Mts, NH

Post by agiocochook »

Got the skis on the snow a couple weeks ago and, as expected, they were noodles. Carved nicely once in a turn, but not a whole lot of spring coming out.....no delams yet and the bindings seem to be holding, but I doubt they'll survive any full on yard-sale.....

Image

Just about done with the second pair and this time I think they're a little stiff. Same core dimensions as the first pair, but 22 oz glass top and bottom with a second layer on top under the bindings. Excess epoxy, too, I'm guessing.....when I put everything into the mold, I forgot the breather mesh...at least until I was just about done sealing up the bag. I didn't have time to unseal, add the mesh and reseal so I had no choice but to hope for the best.....without the breather mesh though, the vacuum bag prevented epoxy from being squeezed out the sides of the layup. Epoxy did manage to come out at the tips and tails though, (these are twin tips) but was then forced back under between the bases and the mold. When I popped them out of the mold there was nearly 1/8" of epoxy at the very tips (both ends) feathering to nothing at the start (fortunately) of the running lengths. The good news was that at the tips, the epoxy was evenly spread, so pressure on the bases was also even. At the tails though, the epoxy sort of pooled and left a couple air pockets which resulted in waviness and a couple soft spots. Fortunately, none of this effected the running length of either ski. One other piece of luck was that I had covered the bases with blue painter's tape, so it wasn't too difficult to peel the epoxy off them.

Also had a bit of an event with the router. As with the first pair, I put a slightly smaller bearing on the bevel bit so that I'd get a rabbeted bevel. On the first pair, the rabbet was 1/16" which turned out to be a little much. The only 7/16" bearing (to get a 1/32" rabbet) I could find, though, was a pin bearing. Because there isn't a raised center collar, I thought it would just want to spin with the bit, but a friend with considerable machine shop experience said it'd be fine......It was fine, for about 8 inches....then I think the bearing burned up; I saw sparks, but there wasn't any damage to the blades or the ski edge. In any case, something caught and the router almost jumped out of my hand as the bit shaft bent nearly 90 deg, broke the collet and came out of the router chewing up the base plate on it's way by....after checking myself for holes, I found the bit at the opposite end of the room. Surprisingly, the only damage to the ski was a slight nick on the upper edge. More than a little bit gun-shy the next time around....

The dimensions of the skis are 129/92/115 and have a 16 m progressive sidecut. The length is 162cm and I built them for a friend, but they may be too stiff for her. If I re-do them, to make them softer should I use 19 oz glass instead, or would the epoxy that couldn't bleed out have been more of a factor?
Post Reply