Page 1 of 5

sammer 2011/12

Posted: Tue May 03, 2011 10:19 am
by sammer
Haven't had too much time to work on skis these days.
Stupid work schedule takes up too much time.
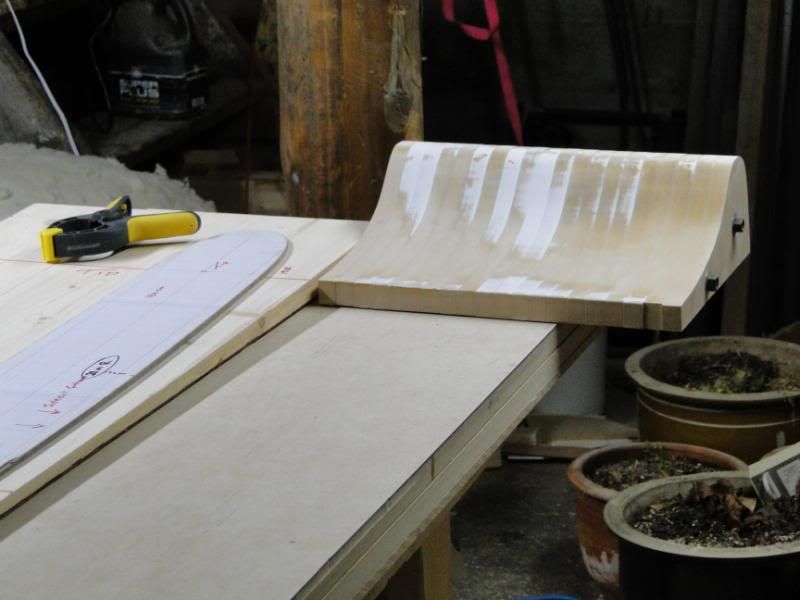
Did get some time this morning to make a couple of patterns though.

After trying a pair of armada arg's this winter decided that reverse/ reverse was definitely on the menu!

The boy needed something new as well!

Image

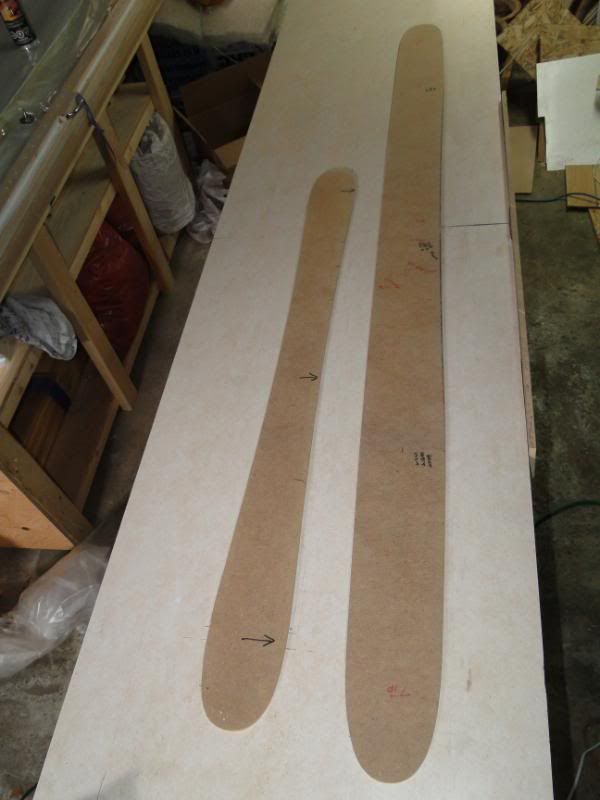
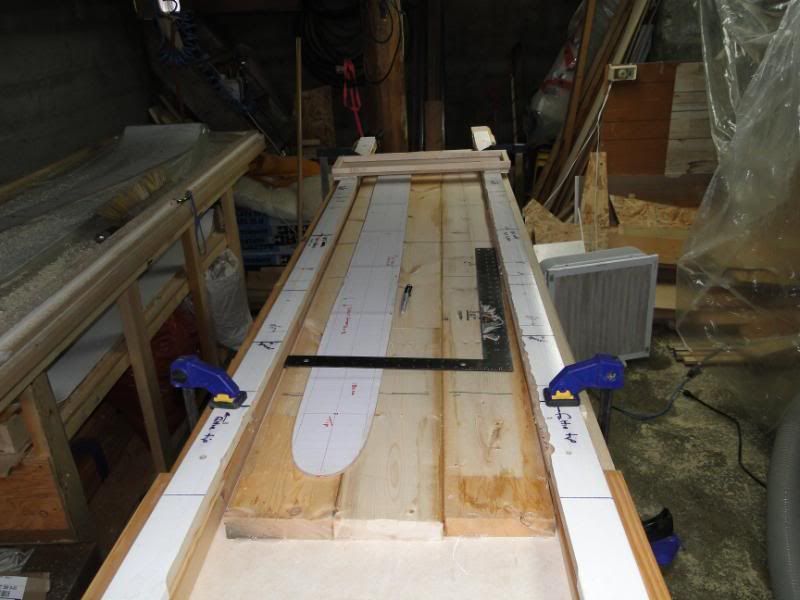
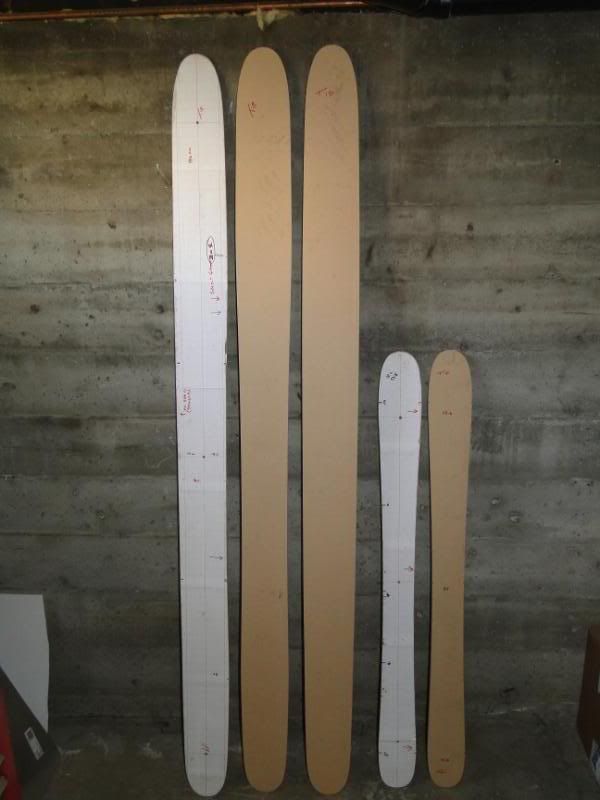
The big ones are a double sided pattern one side is reverse/reverse, the other is more like a JJ (20m? meter sidecut).

The little ones are 117cms should turn out to be 114-86-104

Reverse/reverse 186cms 126-132-135-128-119

Sidecut version 186cms 126-132-121-128-119

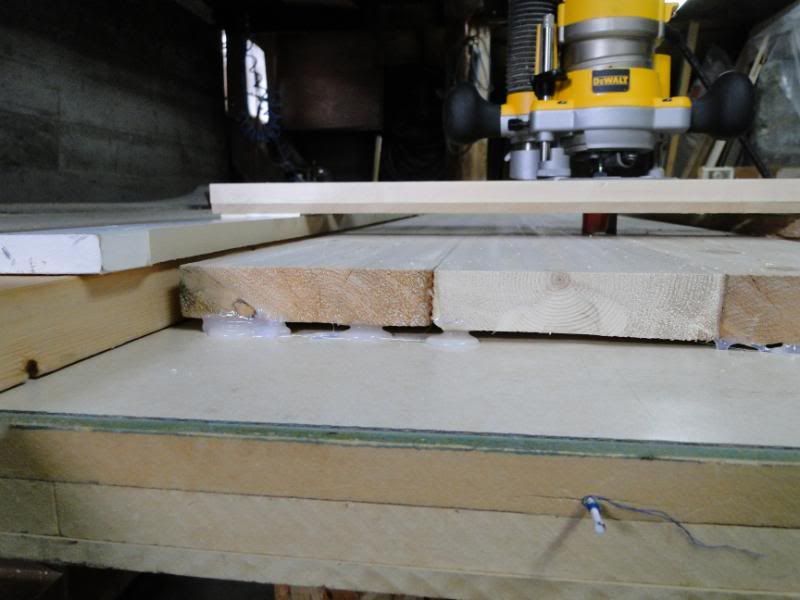
All will be rockered with flat camber.

Hopefully get some time to transfer these to actual templates soon.
will update as I progress.

sam

Posted: Mon Jul 18, 2011 3:47 am
by ben_mtl
Looks promising Sam !
Can't wait to see them coming to life !

Posted: Tue Aug 23, 2011 8:52 pm
by sammer
Progress is pretty slow around here this year.
Busy work schedule, 3 growing kids, and trying to get my house in a state where I can sell it, has eaten up most of my time.

I have gotten down in the dungeon a bit so here's where I'm at.

Building reverse/reverse skis needs a reverse camber mold.
Started by glueing three twisted 2x6s together. (All I had kickin' around and needed to use them up)
Then flattened one side with the router and bridge.

Image

Flipped it over and planned the camber.

Image

Machining the camber. Had to do it in 2 stages as the boards were taller than my rails
Setting up the second stage ( the first stage the rails were on 2x4s)

Image

Finished :D
Started out 1 1/2" ended 3/8" ( 10mm) in the middle.

Image

Turned out pretty flat. Not bad considering I'm using flexy MDF for my rails.

Image

Quite the mess to clean up after.

Image

Had a few visitors while I was working.
This guy and his buds hang out in my yard all the time.
Last year there was a bigger one but I think someone poached it over the winter.

Image

Built new tip and tail molds. Cut and traced 40 pieces of 3/4 MDF.
I need to get a drill press. I screwed my template to each piece then traced it on the router table.
Then used the screw holes for registration, but hand drilling came out a little off so had to use some spackling compound to even it all up.

Image

The tip and tail sections are exactly 1/4" taller than the camber section so that's an easy fix.A piece of 1/4" ply takes care of that. Still have to cut the excess off the camber mold but you get the idea.

Image

Picked up some new base. Should be enough of the swirl for 4 pairs and maybe another 10 of the orange.

Image

I'll spend the day tomorrow cleaning up the mess down there, at least one trip to the dump to get rid of some accumulated scrap and misc. crap.
Then next set off well see how it goes :D

sam

Posted: Tue Aug 23, 2011 10:32 pm
by OAC
Good progress sam!

I've made a couple of core profilers this week. But I did it outside. :) (To avoid the mess inside...) And somehow, it(the mess) just disappeared...

Posted: Wed Aug 24, 2011 2:26 am
by Richuk
Go Sam!

Posted: Wed Aug 24, 2011 1:46 pm
by Brazen
Very cool sammer...do you feed those guys in the backyard? What do they even eat, like penguins or something?

Posted: Wed Aug 24, 2011 3:01 pm
by skidesmond
Nice progress despite everything else you got going on! Good size deer. We got wild turkeys visiting now. Coyotes at night, what a racket they can make.

Posted: Thu Sep 08, 2011 8:15 am
by sammer
Another "weekend" , a bit more progress.

Got molds finished for the boy and myself.

Image

His mold is recycled from previous molds.
The tail section was my first ever tip mold.
The reverse camber comes from the camber section I've used in most of my previous skis, just flipped around. Was an old core I made too thin.
you can see it under the MDF layer.
Got a new skin of puck board.

Image

My mold, the pieces got hot glued together onto 3/4" MDF.
And a new skin of puck board as well.

Image

Finally made templates from the patterns I created months ago when I started this log.

Image

Still have to make some cores. Might get a chance to glue up some wood today!

Brazen, not too many penguins here so if that was their primary diet the view out my window wouldn't be this...

Image

This pic's from April
I know they eat tulips as I haven't had a flower on one since they started showing up a few years ago.

More as I progress.

sam

Posted: Thu Sep 08, 2011 2:05 pm
by johnnyo
sammer

why do you make the molds so thin?

im just starting out skibuilding.. so its kinda a noob question

Posted: Thu Sep 08, 2011 2:19 pm
by chrismp
because he's using a vacuum press which doesn't put as much stress on the molds as a pneumatic press does.

Posted: Thu Sep 08, 2011 4:23 pm
by johnnyo
thank you chrismp

Posted: Thu Sep 08, 2011 8:46 pm
by OAC
Ski building is a though job, and someone has to do it! :D
Wonder what's so special in your garden? All this wildlife...

Posted: Fri Sep 09, 2011 5:12 pm
by sammer
The back/side yard is kinda hidden from the road so a pretty good hiding spot for the city deer. My yard's not that big but I've had a fawn born here the last 3 years running.

Well back to building :D
Been a busy "weekend"
New camber mold didn't really fit the vacuum press membrane as I had to thermoform it to the last mold.
So I bought some polyurethane bagging film from joe woodworker. (still cheaper than silicone)
Took a bit of time to replace the film and a test suck.
still had to thermoform a bit, but this stuff is really stretchy.

Image

Last season I had a few issues with a ski delam-ing
(check the last few pages of my old log.)
I had planned on building 3 pair but only got 2 built before the delam issue became apparent.
With all the materials cut, edges bent and cores made it was pretty easy to put together a ski.

Image

No clamps holding the edges to the template, just a stellar bending job 8)

Image


I still have a bunch of the floro green base
Even had a couple pieces cut ready to go.
Taped it to my template, traced it with the router, then tried to glue on the edges, once again couldn't get them to stick.
Even just picking up the base the edges popped off.
Can't remember if I cut that base before I sent the roll back to crown for re-treat.
(Gonna have to try a fresh piece off the roll next time.)
So cut some of the orange instead. Edges are stuck like they were glued on ;)

Image

Got to try the new tip bender. worked pretty good and the edges didn't pop off. The radius is a bit tight but it's always easier to relax the bend.

Image

Didn't get pics of it in action as I was home alone.

The rest of the day was a sticky epoxy mess, but got it in the press and rolled the air out.

Image

This ski was designed for my last tip rocker mold and is a bit shorter than the ski this mold was designed for. I skied about 20 days on its twin so will be fun to see what its like as a full rockered ski.
The tail will be very flat, as it didn't reach the upturned part of the mold.

Back to work tomorrow so will be a week before I can tell you how they came out. Fingers crossed!!

sam

Posted: Fri Sep 09, 2011 6:18 pm
by Brazen
I can't wait to see 'em! :D

Posted: Fri Sep 09, 2011 8:02 pm
by falls
nice. i think the low tail will be good for powder skiing, so long as you aren't riding switch!