
Living-room project... CNC !
Moderators: Head Monkey, kelvin, bigKam, skidesmond, chrismp
-
knightsofnii
- Posts: 1148
- Joined: Tue Jan 08, 2008 6:02 am
- Location: NJ USA
- Contact:
-
knightsofnii
- Posts: 1148
- Joined: Tue Jan 08, 2008 6:02 am
- Location: NJ USA
- Contact:
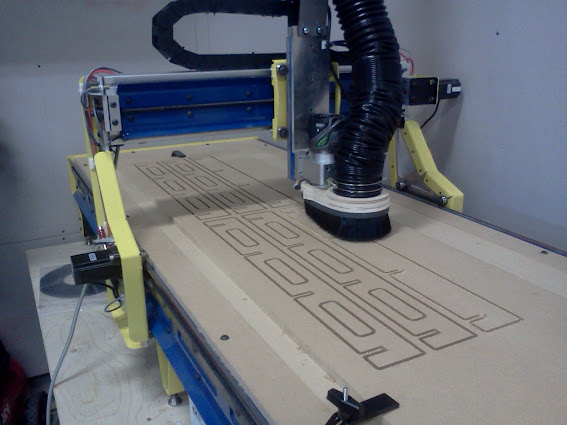
Got Vectric Aspire working nice, which I've had even before I had a CNC. My old cnc guy gave me a copy so that we'd be on the same page with design.
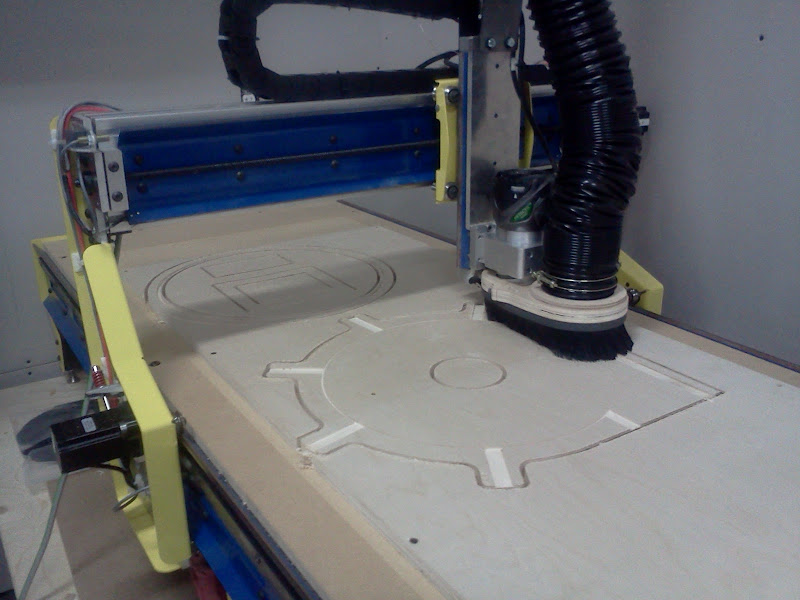
Cut channels into a 3/4" MDF piece, and holes into a 1/2" piece to glue together for a vacuum table. Super dusty, I have no dust collector yet. Putting the dust collector ring and brush onto the router, and capping the hole, helped to keep the dust down onto the table instead of going all over the room.
next is flattening of the vacuum table/spoil board, then core profiling, and some side jobs .
.
Cut channels into a 3/4" MDF piece, and holes into a 1/2" piece to glue together for a vacuum table. Super dusty, I have no dust collector yet. Putting the dust collector ring and brush onto the router, and capping the hole, helped to keep the dust down onto the table instead of going all over the room.
next is flattening of the vacuum table/spoil board, then core profiling, and some side jobs
Doug
I started to cut the parts for my vac table yesterday :p
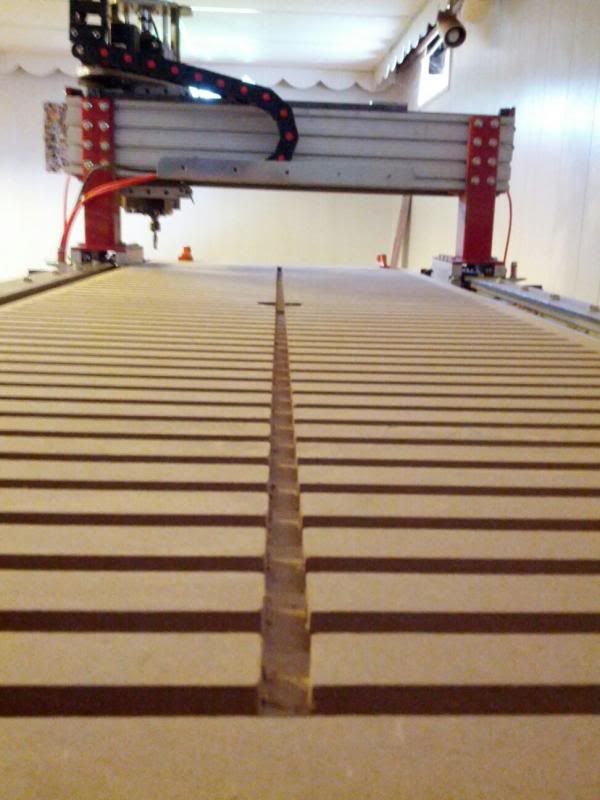
Dust collection was definitely a mandatory part of my machine, I machined a dust shoe similar to the kentCNC design, ordered some brush from McMaster (that part was the biggest PITA) and now everything works great, next addition after the vacuum table is going to be a cyclone (Thien top hat) so the dust get trapped before my cheapo Dust Collector, no more filters clogging...
Do you have any pics or plans of your vacuum table ? I'll post mine as soon as I can but basically it has both T-Tracks and vacuum holes on the top for more versatility. My vacuum table is divided in 3 zones (3 "strips" lengthwise) so I can "suck" 1 ski, 2 skis/1 board, or the full table surface. At least that's the plan, we'll see how it works :p
crappy cellphone pic of yesterday's CNC action :
A bad day skiing is always better than a good one at work...
-
knightsofnii
- Posts: 1148
- Joined: Tue Jan 08, 2008 6:02 am
- Location: NJ USA
- Contact:
bottom layer
top layer
just need to make an adapter with a smaller hole because i mistakedly put 1.25 radius instead of diameter for the center hole.
Also, when your machine is running thru cutting components, dont, please dont do this, do not step on the power cord to the router... luckily i was able to plug it in quickly and it only stopped for a second while the machine DRAGGED it thru the mdf... but it was only milling 1/8" at a time. As a result it bogged down and its coordinates shifted a pinch, it was a pain to line it back up to run the holes program to get that to line up with the channels, but it worked out:).
Doug
-
knightsofnii
- Posts: 1148
- Joined: Tue Jan 08, 2008 6:02 am
- Location: NJ USA
- Contact:
Very nice !
Couple questions :
- what's your vacuum holes spacing and diameter on that table ?
- I see your Z Axis uses the "new" rails system from CNCRouterParts, how do you like it ? I plan on changing my rails in a not-so-near future because my "CNC-bent" rails are not super smooth... the new V-bearing rails system Arhen did looks promising and I would not have to change everything...
On my machine, I assembled the torsion-box /vacuum plenum, now need to cut the holes for the vacuum on the top sheet but before doing so I want to take some time to have functional home switches (they're wired but not adjusted nor used by Mach3), that way when the time will come to replace the top sheet on my cutting table I will have a reliable reference to do all the drilling in the same spots... at least that's the plan...
A bad day skiing is always better than a good one at work...
-
knightsofnii
- Posts: 1148
- Joined: Tue Jan 08, 2008 6:02 am
- Location: NJ USA
- Contact:
-
knightsofnii
- Posts: 1148
- Joined: Tue Jan 08, 2008 6:02 am
- Location: NJ USA
- Contact:
I planned on going with 1in center-to-center in both directions (X and Y).. might not be that bad..
.25" diameter was also the plan. just need to figure out how I'm gonna drlll all those holes : the end-mills I have are supposed to be "plunge end-mills" but as they are .25" in diameter they will only do the "plunging" action... they're going to take a beating ! I also have 3/16" bits but I don't know if they are long enough to pocket-drill through 3/4" MDF (the shank is 1/4" on those too)
.25" diameter was also the plan. just need to figure out how I'm gonna drlll all those holes : the end-mills I have are supposed to be "plunge end-mills" but as they are .25" in diameter they will only do the "plunging" action... they're going to take a beating ! I also have 3/16" bits but I don't know if they are long enough to pocket-drill through 3/4" MDF (the shank is 1/4" on those too)
Last edited by ben_mtl on Thu Sep 05, 2013 4:08 am, edited 1 time in total.
A bad day skiing is always better than a good one at work...
-
knightsofnii
- Posts: 1148
- Joined: Tue Jan 08, 2008 6:02 am
- Location: NJ USA
- Contact:
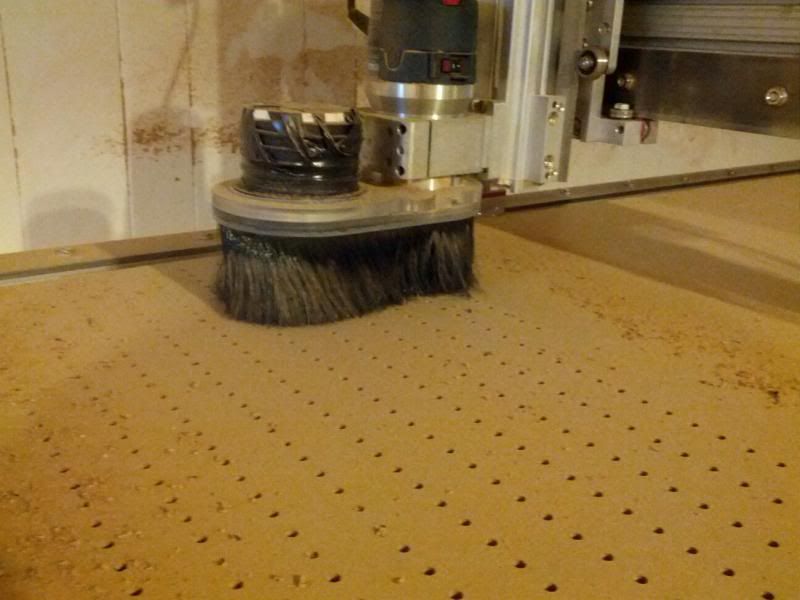
i used a whiteside 1/4" spiral upcut bit.
I'll get the specs on it tomorrow.
worked fine, i put the rpms up to about 6 on the router, I told it to drill down in .25" increments, but since the next step was to go down further it just pushed straight in at whatever speed it was set.
Aspire has a drilling feature. I dont know what all the settings and features mean. But when it looked right on screen i went for it, and did a dry-run with the zero set a few inches higher than the table, so i could watch it do its thing and make sure it was gonna do what i wanted.
Doug
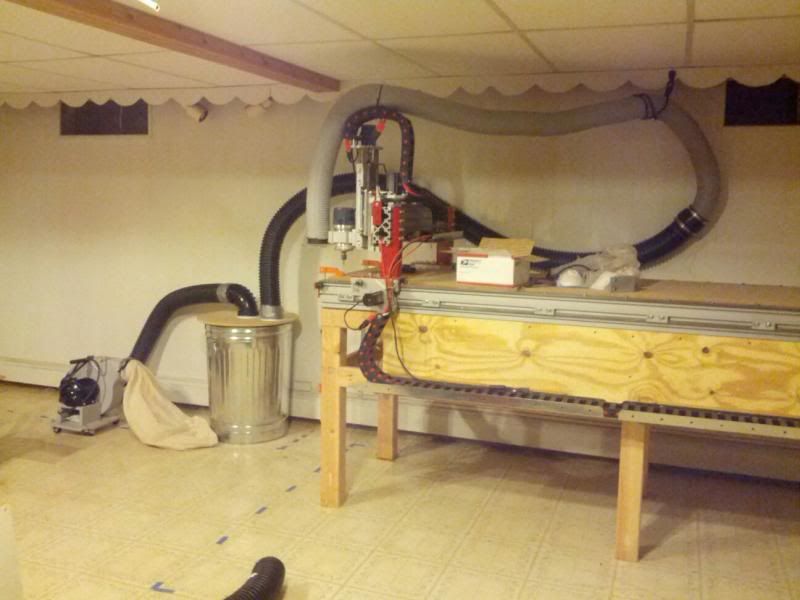
OK, I took a couple pics today while the machine was "working" :
The vacuum/t-track table is close to be finished, all the parts are here, just missing a couple brackets to hold it on the machine, then I'll be able to cut all the small holes.

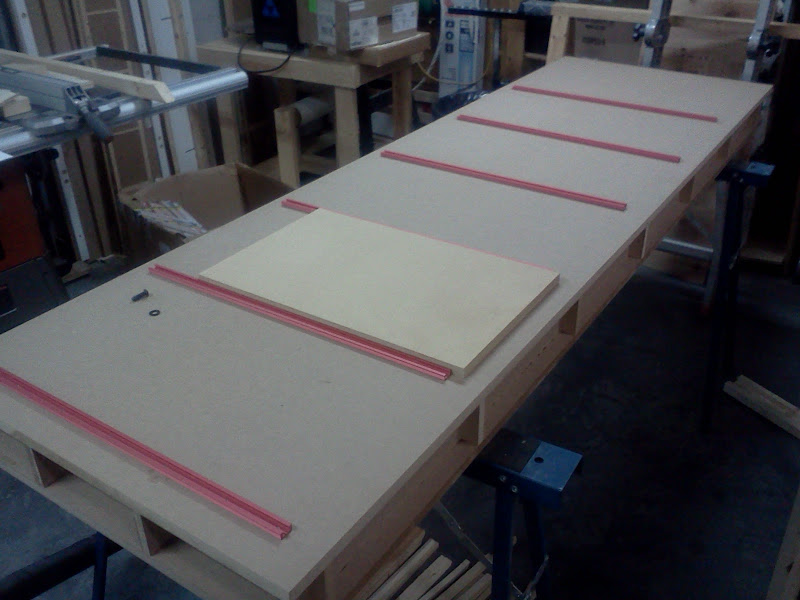
The vacuum holes will be drilled between the t-tracks so I can hold material with both methods (there will be "sacrificial" layer of MDF between the tracks).
The table is divided in 6 zones, I wanted to find some kind of ball valve to isolate the zones, no luck with that at the local hardware stores... thought about making some custom blast gates, it would be OK to close a zone but the way they're done would not make them airtight enough when the zone is active (I would have suction loss there)... so I cancelled that too. I will just cover the areas that are not used with MDF leftovers...
Plumbing under the table:

What the machine was cutting when I took the pictures :
It's a "Thien TopHat", It's a real PITA to change the dust bags on my dust collector so that's gonna be taken care of + this will reduce the clogging of the filter since the dust and debris are separated from the airflow before reaching the dust collector... can't wait to try it !
As soon as I have the vacuum table and the dust separator installed I'll be able to start making skis again ! (I hope... my GF and a few friends already found me some other projects to be cut...)
The vacuum/t-track table is close to be finished, all the parts are here, just missing a couple brackets to hold it on the machine, then I'll be able to cut all the small holes.
The vacuum holes will be drilled between the t-tracks so I can hold material with both methods (there will be "sacrificial" layer of MDF between the tracks).
The table is divided in 6 zones, I wanted to find some kind of ball valve to isolate the zones, no luck with that at the local hardware stores... thought about making some custom blast gates, it would be OK to close a zone but the way they're done would not make them airtight enough when the zone is active (I would have suction loss there)... so I cancelled that too. I will just cover the areas that are not used with MDF leftovers...
Plumbing under the table:
What the machine was cutting when I took the pictures :
It's a "Thien TopHat", It's a real PITA to change the dust bags on my dust collector so that's gonna be taken care of + this will reduce the clogging of the filter since the dust and debris are separated from the airflow before reaching the dust collector... can't wait to try it !
As soon as I have the vacuum table and the dust separator installed I'll be able to start making skis again ! (I hope... my GF and a few friends already found me some other projects to be cut...)
A bad day skiing is always better than a good one at work...
-
knightsofnii
- Posts: 1148
- Joined: Tue Jan 08, 2008 6:02 am
- Location: NJ USA
- Contact:
-
knightsofnii
- Posts: 1148
- Joined: Tue Jan 08, 2008 6:02 am
- Location: NJ USA
- Contact:
Nice one ! are you satisfied about how it separates the chips and fine dust so it doesn't clog your filter bag ?
I've been a bit more fancy for mine.. I guess I just wanted to see the machine cut something complicated ! haha... counterpart is I'm still not done with it.. I need to find a sheet of 1/8" plastic (HDPE or similar) but can't source it locally... Acrylic from Home Depot is too brittle, I tried and just wasted $40..
I've been a bit more fancy for mine.. I guess I just wanted to see the machine cut something complicated ! haha... counterpart is I'm still not done with it.. I need to find a sheet of 1/8" plastic (HDPE or similar) but can't source it locally... Acrylic from Home Depot is too brittle, I tried and just wasted $40..
A bad day skiing is always better than a good one at work...
