Bent Green Things 13/14
Moderators: Head Monkey, kelvin, bigKam, skidesmond, chrismp
-
skidesmond
- Posts: 2337
- Joined: Tue Apr 07, 2009 3:26 pm
- Location: Western Mass, USA
- Contact:
In tests I did last year with 9.4oz uni carbon and 22oz triax FG, the longitudinal stiff of the carbon was about the same as the FG. So a little bit of CF can go a long way.
I just made a pair for my daughter, 152cm 3-10-3 with 20FG and a 3in wide 9.4 oz uni-CF top and bottom. Probably way to stiff for her. I brought the ski to the ski shop and the comments were, WOW that stiff. It would work for me in a longer ski length, but I'm 200lbs, my daughter.. not so much:D maybe 110lb
I think when I make my next pair for me I'll go with a 2in wide 9.4oz uni-CF down the center or put 1 inch wide uni-cf over on the outside edge of the ski.
Let us know how it comes out.
SD, Triax plus uni carbon or biax?
If it was triax, no wonder it came out top stiff.
If it was triax, no wonder it came out top stiff.
Fighting gravity on a daily basis
www.Whiteroomcustomskis.com
www.Whiteroomcustomskis.com
-
skidesmond
- Posts: 2337
- Joined: Tue Apr 07, 2009 3:26 pm
- Location: Western Mass, USA
- Contact:
Always use VDS, over edges and under core. Next year ill used it over edge, under and over core, just didn't have enough this season.
No failures so far with using it just over the edges.
No failures so far with using it just over the edges.
Fighting gravity on a daily basis
www.Whiteroomcustomskis.com
www.Whiteroomcustomskis.com
completed the pair last night. Being at work sucks when you have a set that needs to be cut.
So far everything looks good. there is one section that it appears that the edge "cupped". So the outside edge turned inwards. causing inside edge (tines) to raise up into the ski. how is this even possible. I'm hoping I'm wrong but I feel confident about this one.
checked the aluminum casset and its dead flat. I press 55psi. I did not rabbet this pair but I would think the 9oz carbon fiber should have made up the difference of the tine.
this has me perplexed.
-
twizzstyle
- Posts: 2204
- Joined: Tue Mar 07, 2006 8:25 pm
- Location: Kenmore, Wa USA
Are you using a cattrack? Is this edge "cupping" in a tip or tail? Are you sure everything was pressed down completely?
Some folks have had issues of not getting things pressed down completely in the tip and tail area because their hose/cattrack/cassette won't make the tight radius for a number of possible reasons. At 55psi your edges should be flat.
Some folks have had issues of not getting things pressed down completely in the tip and tail area because their hose/cattrack/cassette won't make the tight radius for a number of possible reasons. At 55psi your edges should be flat.
Yes I have Cattracks.twizzstyle wrote:Are you using a cattrack? Is this edge "cupping" in a tip or tail? Are you sure everything was pressed down completely?
Some folks have had issues of not getting things pressed down completely in the tip and tail area because their hose/cattrack/cassette won't make the tight radius for a number of possible reasons. At 55psi your edges should be flat.

Cupping is occurring over the length of the ski. tips and tails are solid.
It's like pockets of air are forming. Maybe I'm not wetting out the material enough. Sometimes it seems that the resin gets slightly bubbly when i'm working it into the fiberglass maybe that the issue. what ever it is, im getting separation above and below the sidewall. I'm really hoping one of the Seniors on here can help me out with this.
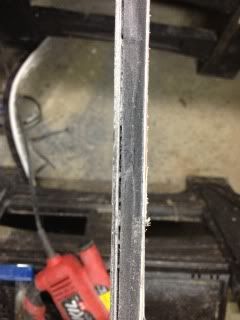
here is a photo, it runs almost the whole length.

Cut them out and shaped them. THEY ARE BOMBERS! i'm loving how stiff they are. I'll do some flex test on them tomorrow to see how much stiffer they are.
I'm sending them out to CO to a buddy with a disclaimer that they are going to delam at some point.
tough to tell from the pic. I'm guessing the black line that you can see there is the issue you are describing???
If you think that is trapped air, I'd first check your mold conformity. It would be strange to see that along the running lenght like that. It seems like it would be a pressure issue creating a void.
Did your epoxy kick too fast? Were things getting gelled before you put them in the press?
Did you turn on the heat immediately when you put them in the press? If so could your epoxy have kicked too soon before things squeezed out well enough trapping air and cured epoxy inside the lam? I tend to put everything under pressure for 5-10 min before turning on the heat to allow thing to squeeze out before the epoxy kicks off.
For a fix I'd backfill that with JB weld paste epoxy before you flex them too much. It might hold up well enough. If the voids are really deep then a liquid epoxy might be better. If it is only 1-3 mm go with the JB weld. much deeper and maybe you'd want something that would flow into the void better. The JB weld liquid stuff maybe. or something that is more flexible perhaps. JB weld doesn't like to bend much without cracking.
Fighting gravity on a daily basis
www.Whiteroomcustomskis.com
www.Whiteroomcustomskis.com
- MontuckyMadman
- Posts: 2395
- Joined: Fri Jun 20, 2008 9:41 pm
CRAP... I did kick on the heat right away. My second pair i made, that I did not see this issue with, I kick the heat on after 8 minutes of pressing. I say that was the only operational difference this time.Vinman wrote: Did you turn on the heat immediately when you put them in the press? If so could your epoxy have kicked too soon before things squeezed out well enough trapping air and cured epoxy inside the lam? I tend to put everything under pressure for 5-10 min before turning on the heat to allow thing to squeeze out before the epoxy kicks off.
Montucky: No Rabbet this time. 9oz of carbon with 22oz fiber i figured I'd make up the difference. the basses are actually really flat just not on this one running side. I figure it has nothing to do with the rabbet because I see the separation above and below the sidewall.
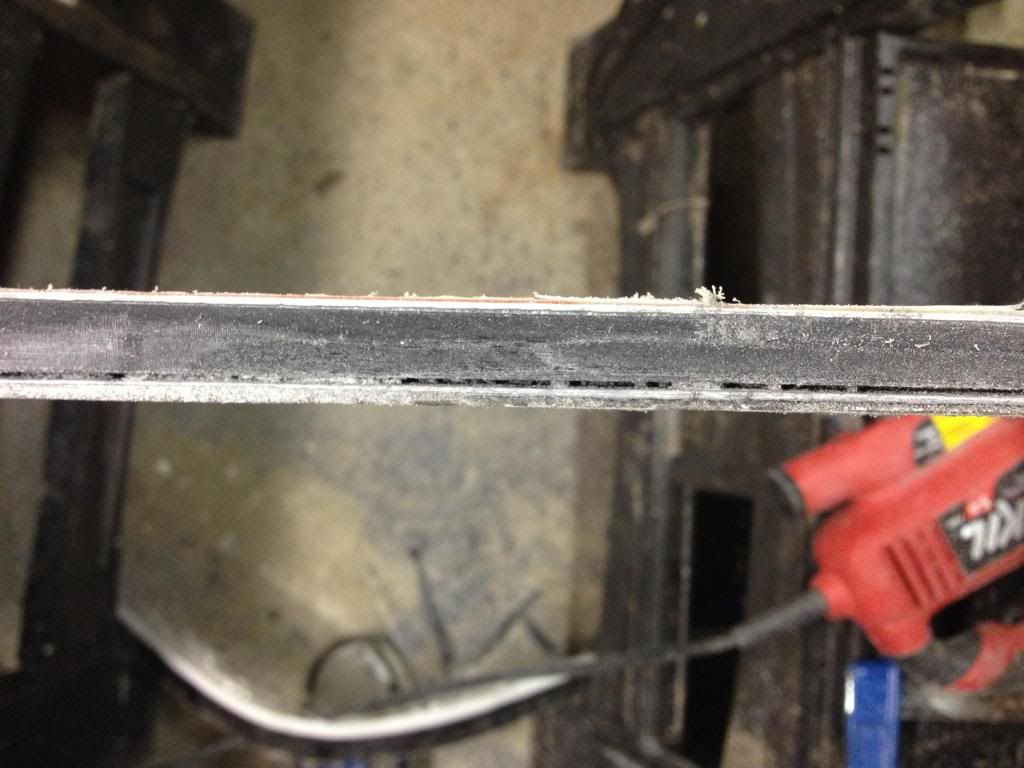
Because it's above and below the edge I'm wondering if I didn't wet out the VDS well enough and this is the reason I'm having separation. I'll get my Macro lens out tonight and take a photo of the area in question to see if I can see the different layers and see what layer actually failed.
here is a better upload of the photo, It looks like the separation occurred between the VDS and sidewall in this photo:

- MontuckyMadman
- Posts: 2395
- Joined: Fri Jun 20, 2008 9:41 pm
hummm not sure I agree with this one. if there was no rabbet then the sidewall would press extra hard into the edge material. correct? but I would get a huge void in the base. Now for argument sake lets say that i put two big of a rabbet. then I completely understand how this would happen.MontuckyMadman wrote:Its cause u didn't rabbit.
I looked more closely at it this morning and the delam above the sidewall looks like the VDS bounded fine with the fiberglass and not with the UHMW.
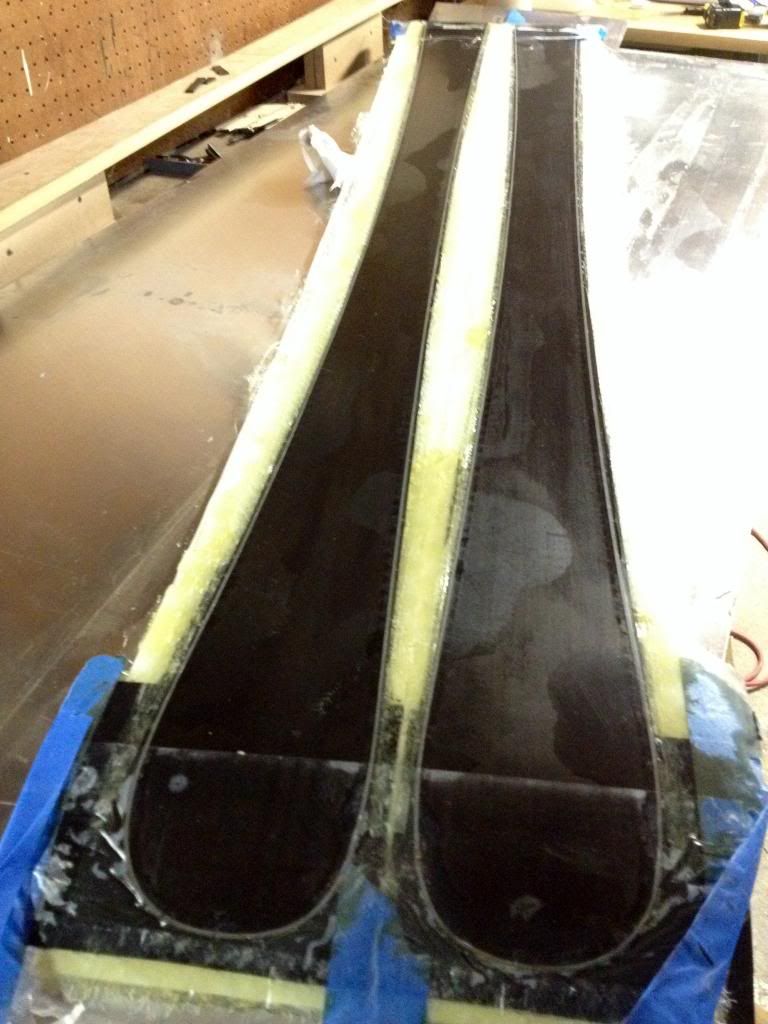
GOZ: the void was there when I cut the flashing away. I knew something was up before I cut it out, i could see the base was curved down in this area. It was there from the beginning. When I press the the side of the ski that is all separated, with my fingers, it goes all back together.
super frustrating because the flex in these skis is EXACTLY what I was looking for. arrggghhhh...
here is a pic of the ski before i cut it out for what it's worth...


