Crisp Customs 2014

Document your personal work here. Show photos, movies, and share your secrets.

Moderators: Head Monkey, kelvin, bigKam, skidesmond, chrismp

User avatar
falls
Posts: 1458
Joined: Tue Oct 27, 2009 5:04 pm
Location: Wangaratta, Australia

Post by falls »

right click on your image on the web and click "copy image location" or something like this. It should end in .jpg or .gif
then paste this inside the img /img tags

Enjoy the BC gozaimas. I have work this weekend :(
sucks
Don't wait up, I'm off to kill Summer....
pavelbozak
Posts: 57
Joined: Tue Jun 10, 2014 6:18 am
Location: Europe

Post by pavelbozak »

thanks, going to try
Last edited by pavelbozak on Sun Jul 20, 2014 1:59 am, edited 1 time in total.
User avatar
falls
Posts: 1458
Joined: Tue Oct 27, 2009 5:04 pm
Location: Wangaratta, Australia

Post by falls »

Pressed up a new pair of skis yesterday.
A 178cm slalom ski. 67mm waist. Maybe 13m radius, can't remember.
The topsheet is a tiled design from an Australian aboriginal artwork.
Probably get time to finish them off next weekend, but really should be out skiing.
Image
Image
Don't wait up, I'm off to kill Summer....
User avatar
falls
Posts: 1458
Joined: Tue Oct 27, 2009 5:04 pm
Location: Wangaratta, Australia

Post by falls »

I also came across a new way of marking a centre line on the ski for mounting bindings without a jig.
Just a sheet of wood with 2 dowels 10cm apart, then a series of holes drilled through on the centre line midway between the 2 dowels that you can put a fine point sharpie through.
You put a wide piece of masking tape on the topsheet and run the dowels along the sidecut with the pen in place. It marks a line parallel to the sidecut on the tape. Then repeat on the other side of the ski and where the 2 arcs intersect is the centre of the ski. You just need to use a hole far enough out that the arcs do intersect, and not so far out that they intersect too far apart on the ski to mark a centre line between the 2 intersections with a 1 metre ruler
Image
Don't wait up, I'm off to kill Summer....
User avatar
falls
Posts: 1458
Joined: Tue Oct 27, 2009 5:04 pm
Location: Wangaratta, Australia

Post by falls »

made a bit of a layup and finishing video from the last build for the "customer" to check out
https://vimeo.com/110041209
Don't wait up, I'm off to kill Summer....
pmg
Posts: 480
Joined: Sat Dec 01, 2012 8:59 am
Location: Sonthofen

Post by pmg »

falls wrote: Image
Hey, nice Idea, will use it in the future. Was also thinking of constructing a complicated tool that marks the middle right away, but your version takes so little time to build - will go for it.
User avatar
falls
Posts: 1458
Joined: Tue Oct 27, 2009 5:04 pm
Location: Wangaratta, Australia

Post by falls »

Just finishing off a new model based on the Nordica Soul rider for a "customer".
134-97-124 178cm model. Some tip and tail rocker and about 4mm camber underfoot.
First pair with 2 heat blankets for me. Heated bottom blanket 5C hotter and started its heating 5 minutes before top blanket on a flat camber mold. Seems to have come out exactly what I wanted luckily!
Bamboo core, VDS, triax 22oz under core, 65mm uni carbon + triax 22oz above core and a 45mm long binding retention mat of 22ox triax. sublimated clear nylon from miller
I had a lot better luck with the razor blade topsheet bevelling of the nylon on this pair, just need some practice for a steady hand
here is blister's review of the soul rider
http://blistergearreview.com/gear-revie ... soul-rider
and my attempt to replicate the customer's favourite ski (matte topsheet film is still on until they get a base grind)
Image
Image[/img]
Don't wait up, I'm off to kill Summer....
gozaimaas
Posts: 663
Joined: Fri Feb 10, 2012 4:17 am
Location: Nagano Japan

Post by gozaimaas »

Looks good. It seems to me that when pulling camber with heat the time difference is more important than the heat difference.
User avatar
SHIF
Posts: 280
Joined: Sat Jul 14, 2007 7:43 pm
Location: Wasatch Mountains
Contact:

Post by SHIF »

Very nice skis indeed. Excellent top sheet registration side to side, not easy to do with a geometric pattern like this.
User avatar
falls
Posts: 1458
Joined: Tue Oct 27, 2009 5:04 pm
Location: Wangaratta, Australia

Post by falls »

Thanks Shif. Topsheet placement is tough. Last thing in layup and usually all the cassette marks for centres have wet fibreglass obscuring them. Unfortunately it's the most visible thing in the finished pair. These are not perfect but reasonably good.
I have seen in production settings the topsheets have holes at their corners that seat over a pin on the cassette to ensure straightness.
Don't wait up, I'm off to kill Summer....
pavelbozak
Posts: 57
Joined: Tue Jun 10, 2014 6:18 am
Location: Europe

Post by pavelbozak »

Hi! Nice job :)

I have just seen the new pairs above and the video. I like the minimalistic tools! it is very familiar to me :D ! And the best about it is that the result looks absolutely perfect!

Do u use core exactly cut to dimensions of basese with edges? It could be fine for core centering from sides how it is possible to see from your pics. I was a bit experimenting with "ghetto" core centering and I ended up with screws in tip and tail areas ( don t have full wrap around edges so I can let the bases a bit longer for screws) and it holds pretty well. But now I would like to order heating blanket and I have to change this centering system. I ve seen plenty of skibuilding videos even from factories like moment act. and it is not possible to see how they fix the core above base. I suppose bases are superglued to alu plates but not shure if there is any fixtion of cores. If not I would be really scared of shifting when putting the pressure onto it...I was thinking about supergluing some kind of bordering (4pieces like you) exactly around the core but I am not sure how it could hold when putting fibers and vds around it (minimally the fibers are always wider then cores).

May I ask u for some more detailed photo of that "bordering" system of core fixation? Or some explanation how it behaves with fibers laying over it? Thanks a lot :)
User avatar
falls
Posts: 1458
Joined: Tue Oct 27, 2009 5:04 pm
Location: Wangaratta, Australia

Post by falls »

Thanks pavel.
The core is 2.5mm wider than the base with edges attached for a small amount of insurance against core shifting.
I cutout the base and attach the edges then use spray adhesive (eg 3m super77) to stick the base to the cassette. I then place and centre the core over the base/edges and hold in place (either clamp or another person). I superglue the core alignment blocks onto the aluminium cassette using a 0.65mm wide metal washer between the core and the block to allow for the fibreglass to fold up and over during layup. I did use 1mm washer but found it too much. Alternately you can not use the washers and cut a notch out of your fibreglass sheets to go around the block but it is more fiddly before and during layup. The superglue seems to be enough to hold the blocks firmly and I haven't had any core shift since doing it this way. At the end the blocks just peel off with the skis. You can usually clean off the superglue residue with alcohol but the spray adhesive after heating I have found needs acetone to remove it
Don't wait up, I'm off to kill Summer....
User avatar
falls
Posts: 1458
Joined: Tue Oct 27, 2009 5:04 pm
Location: Wangaratta, Australia

Post by falls »

Image
Image
Image
Don't wait up, I'm off to kill Summer....
pavelbozak
Posts: 57
Joined: Tue Jun 10, 2014 6:18 am
Location: Europe

Post by pavelbozak »

thank you so much for your tips and photos, falls! :)

To use adhesive spray to attache bases looks fine. But do you spray the whole bases or only for example 3 places to attache it? I looked up the spray and it is pretty expensive in here. If spraying it only on few spots, it will last for several layouts but if spraying it all over the base it could be quite expensive bondage...

I also use core cca 2-3 mm wider (in fact sidewalls) from each side to prevent any shifts, but I use hardwood sidewalls and then it is pain in the neck to cut out the hard wood together with fibers....if I use hardwood jig plate, it is ruined by fibers and if I use fiber plate (which is better sollution) it is ruined after one pair cutting by heat from wood cutting. I had "jig-plate consumption" like one plate for one and half pairs of skis... Last pair I tried some expensive carbid stuff....this plate looks really massive according to previous and I ve cut one pair with it and it seemed there were no issues on that plate... I hope I will see next summer when cutting next pairs how this plate works....

And just one more question - you put a separator right after bases and blocks are attached? That would have to be very unconfortable. I got some original separator for my epoxy system and it is very liquid so I have to be very careful when doing layup and not to touch it with ski materials.... Maybe I should find some hard wax separator....

btw: not sure if this video was posted or if you have already seen it but, I am really curios about the easy going layup... That guy probably use adhesive spray for base attachement but what about attaching cores...it looks like he is loading the cassette then without any bigger care into press so he must be shure it will not shift :) (layup starts cca at 8:45)

https://www.youtube.com/watch?v=izx2wmPxkEE

In Europe (especially here in Czech rep.) moment skis or the other amarican big "garage" born skis are not common, but last winter I could see one pair from moment (Belafonte I think) and these planks looked really solid and I liked them very much, so I think the guys from moment must know very well what they are doing :)
User avatar
falls
Posts: 1458
Joined: Tue Oct 27, 2009 5:04 pm
Location: Wangaratta, Australia

Post by falls »

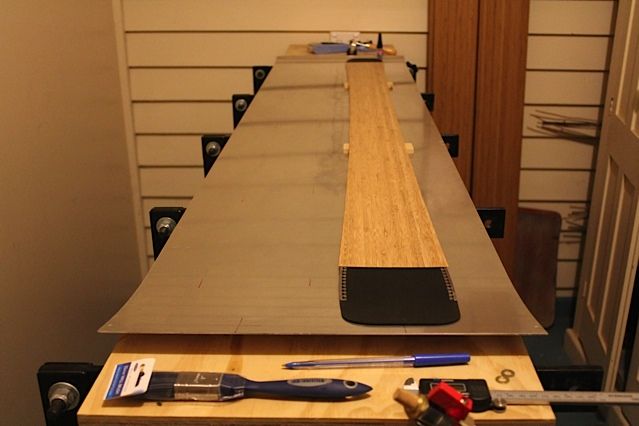
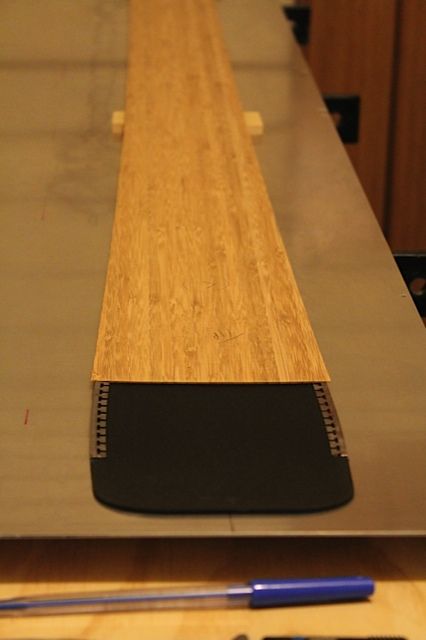
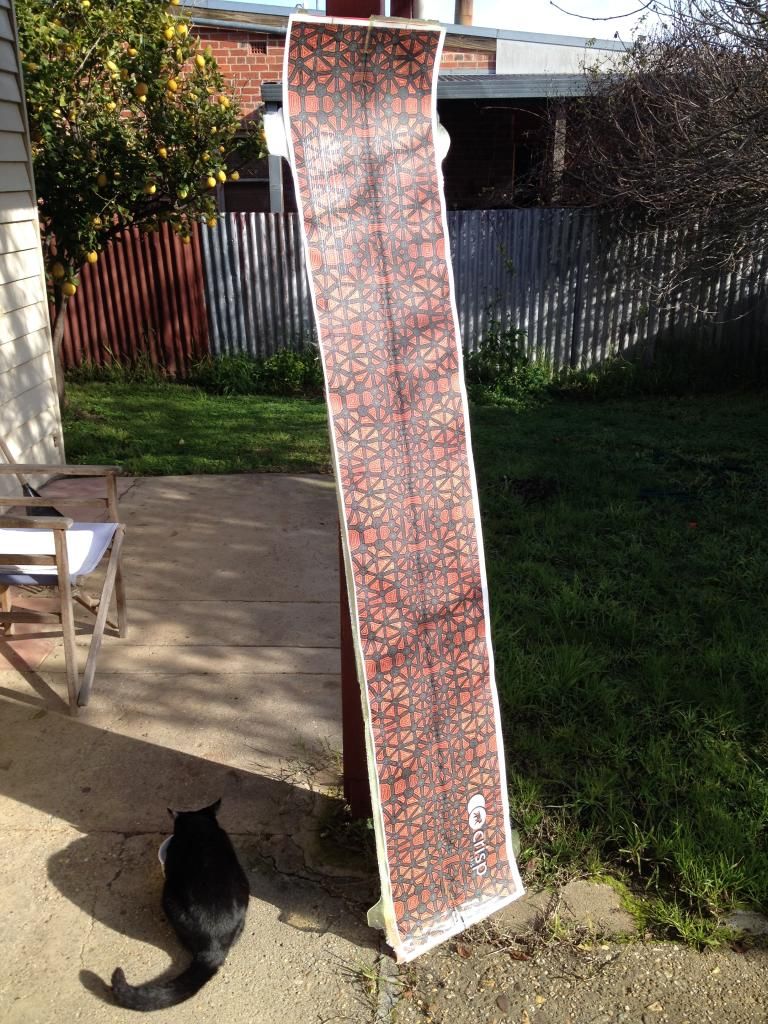
The 3M brand super 77 spray glue is about $30 a can in australia. I use a Selleys brand (local brand) that was about $10 a can. I think I will get about 20 or 30 pairs of skis out of the can. I hold the base with edges up in one hand and spray from about 15cm away in one stripe tip to tail down the centre, wait for it to go tacky and then stick it to the cassette. Make sure not to get any on the bonding surface as it doesn't mix well with epoxy.
This spray glue is commonly used in scrapbooking or crafts. It shouldn't be expensive.
You can sort of see the guy do it in this video at Moment skis at 8 min 50 seconds in. (just realised you linked the same video). I always think of it like I am holding up a large fish I just caught then spray a continuous line from tip to tail.

Jig saw blades I use a blade for metal - probably go through 1.5-2 blades per pair cutting out. I think the teeth are spaced about 1.5-2mm apart on the blade.

I'm not sure what you mean by a "separator" - do you mean mold release wax?
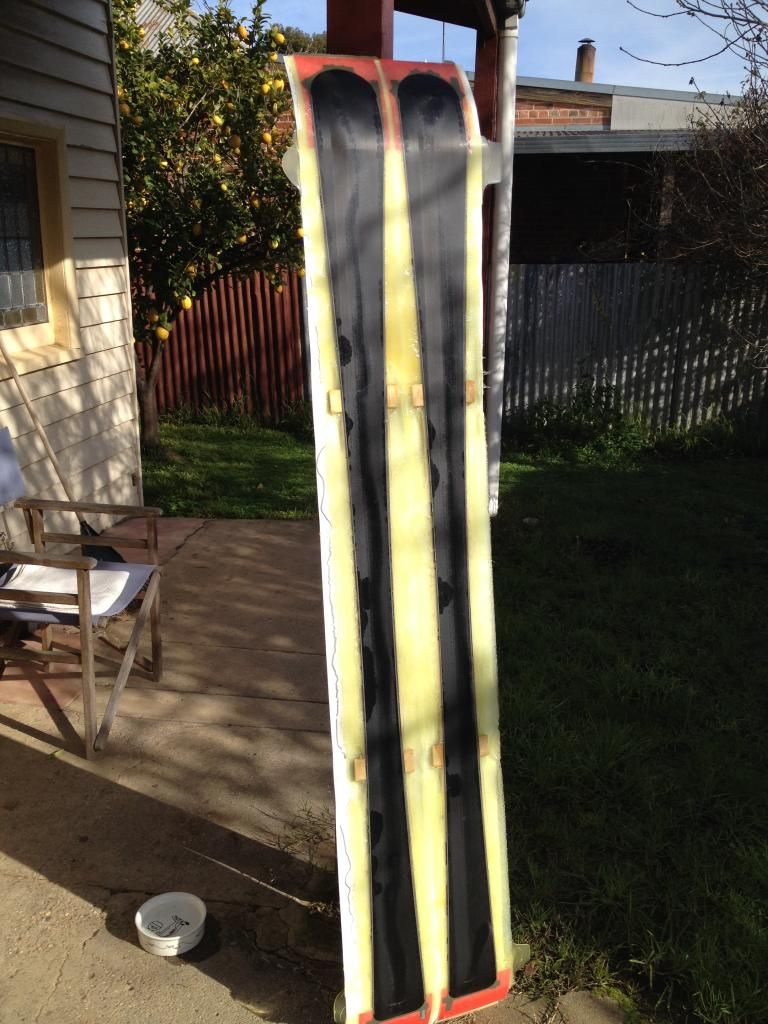
I wax the cassette aluminium with maguires mirror shine (http://www.meguiars.com.au/mirror-glaze ... lease-wax/ or something like that. I apply it let it set up and buff off. Usually do 4 coats on the bottom cassette sheet and then buff to high shine at the end. I do this every time as I use the acetone to clean off the spray adhesive glue after a build and worry it also washes away my mold release.
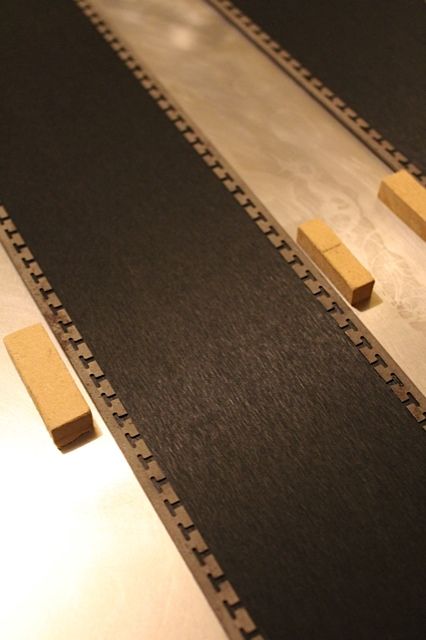
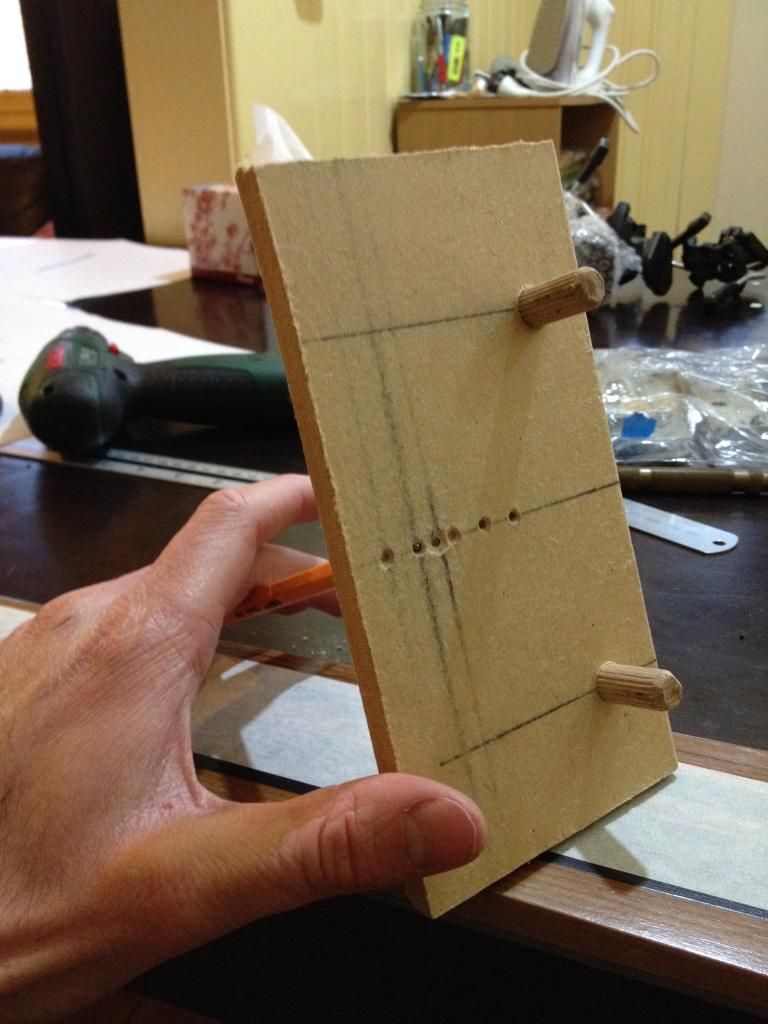
I have found the core allignment blocks stick to the aluminium fine even with mold release applied. The same is true for the spray adhesive. I wax the whole aluminium sheet and stick the base/edges down onto the waxed sheet, that way any epoxy that gets under the base won't stick to the cassette.

Hopefully that clears it up for you
Don't wait up, I'm off to kill Summer....
Post Reply