Pressing a nice Cap - first try

Document your personal work here. Show photos, movies, and share your secrets.

Moderators: Head Monkey, kelvin, bigKam, skidesmond, chrismp

pmg
Posts: 480
Joined: Sat Dec 01, 2012 8:59 am
Location: Sonthofen

Pressing a nice Cap - first try

Post by pmg »

Hey all,

as I don't want to use sidewalls (don't want to produce waste in the planer, if its only wood its not waste but put to good use) but still want to protect the woodcore, cap is the way to go for me.

So, 2 pressing cycles:
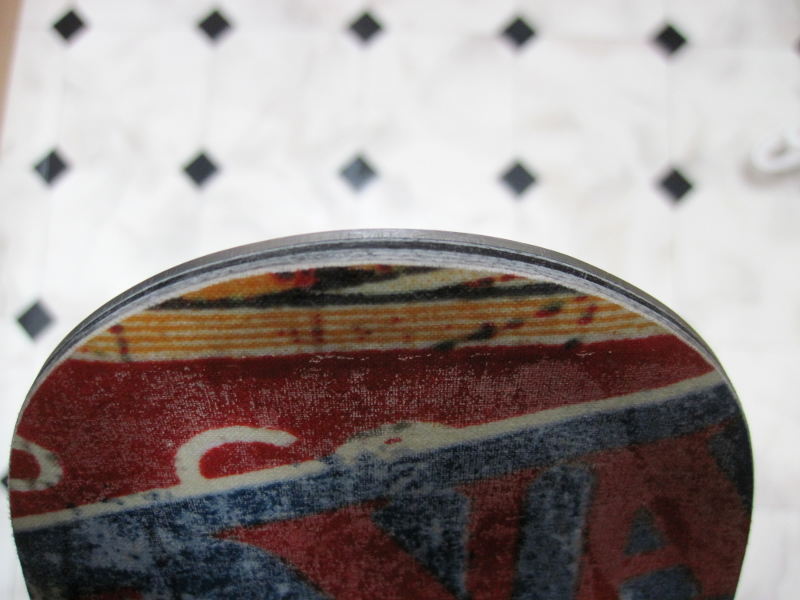
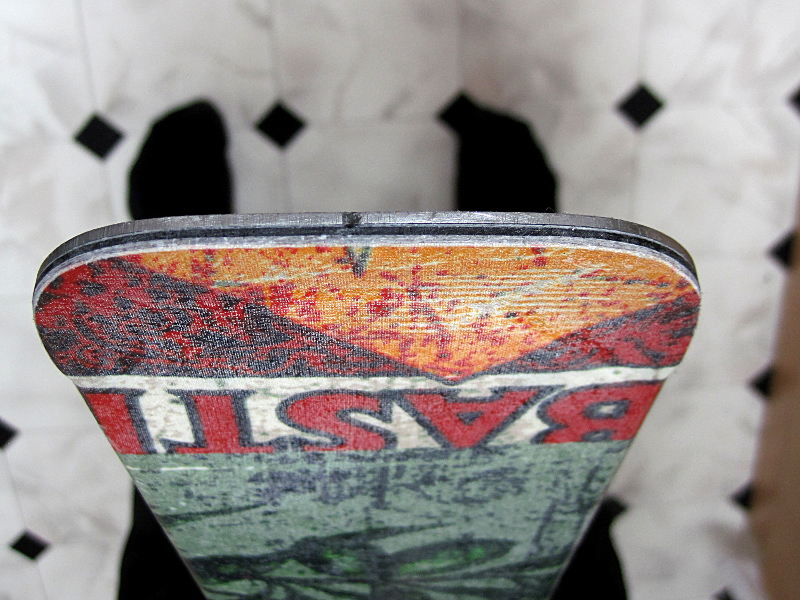
1) Normal ski pressing, afterwards routing and sanding the sides and the top edges to take the cap nicely.
2) Press the cap over it.

In my current project I was lucky I did it like this: A miscalculation led to a too weak tip. Just put some extra fibreglass over it, now its fine.

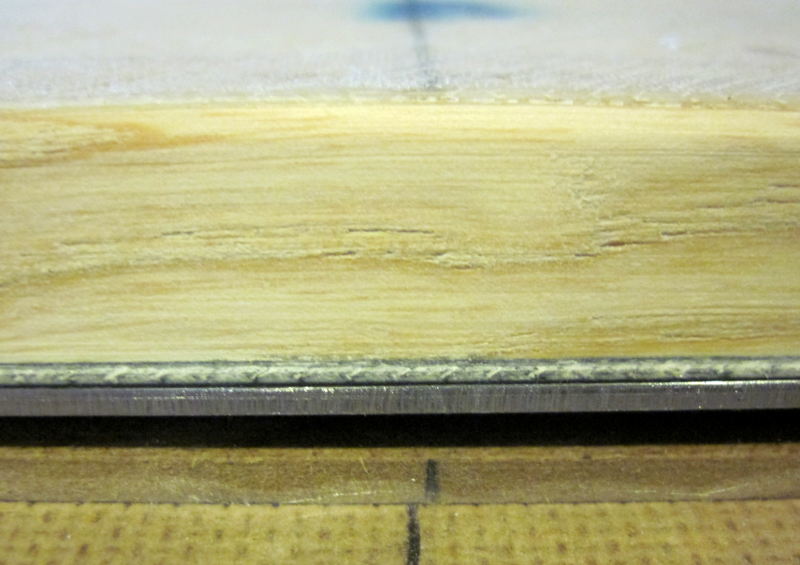
Of course cap only makes sense if the edge sticks out a bit, otherwise the cap side protection is gone after some edge grindings. To achieve that we modified a "Zinkenfräser" a bit. It now takes away about 1.5mm above the edge and bevels the side at the same time:

Image

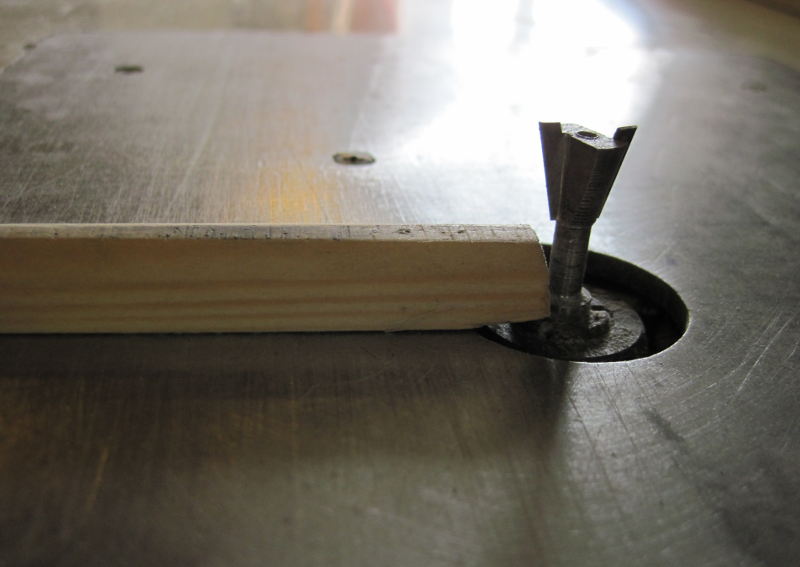
In this pic you can also see my easy way of routing a camber ski: the half round piece of wood. So much easier than pressing down the camber while routing ;)

Well, tomorrow we will press the cap on it, hope we get enough pressure on the sides. Well, the vacuum bag is very very elastic, so with a little hand guiding while the vacuum gets stronger it should work.


Image[/img]
twizzstyle
Posts: 2204
Joined: Tue Mar 07, 2006 8:25 pm
Location: Kenmore, Wa USA

Post by twizzstyle »

The top of the skis in these pictures - does your resin have white pigment in it? Or is the fiber just that dry? Hopefully it's not just dry!

Years ago I shaped a core to accept a cap topsheet, stuck the mold/ski in a vacuum bag first, and THEN stuck it in my press. Same basic idea that you're doing, but all in one step. It worked ok, but I never did it again. I think splitting up the operations like you're doing gives you a little more control and it should turn out great.
User avatar
falls
Posts: 1458
Joined: Tue Oct 27, 2009 5:04 pm
Location: Wangaratta, Australia

Post by falls »

Maybe the glass has been sanded ready for rebonding?
Don't wait up, I'm off to kill Summer....
gozaimaas
Posts: 663
Joined: Fri Feb 10, 2012 4:17 am
Location: Nagano Japan

Post by gozaimaas »

You can still see the fold marks where the glass was folded in half. That tells me the glass you can see on top of those skis was never wet out, perhaps intentionally so as to soak upthe resin when the cap goes on?
pmg
Posts: 480
Joined: Sat Dec 01, 2012 8:59 am
Location: Sonthofen

Re: Pressing a nice Cap - first try

Post by pmg »

pmg wrote: In my current project I was lucky I did it like this: A miscalculation led to a too weak tip. Just put some extra fibreglass over it, now its fine.
Thats where the strange looking FG comes from. The tip half of the ski got an extra layer of FG because it was just too soft after the first press. Quickly laminated it over the original FG. The point that looks like a fold is where the extra biax starts. Underneath is an extra layer of uni FG starting with a triangle cut, if you look very hard you might see a bit of it.

The top of the FG always looks like this after we remove the peel ply. The one we have from R-G leaves a very uneven surface, nice for putting the next layer on top without sanding too much.
pmg
Posts: 480
Joined: Sat Dec 01, 2012 8:59 am
Location: Sonthofen

Post by pmg »

:( :( :( :(

Pressed the Cap today. Everything set up, the fabric pressed nicely to the sides, good pressure, so I put the heat box on and went away. When I came back to check about a good hour later all the pressure was gone. A big hole was in the vacuum foil where I never would have expected it. Put some tape over it and put pressure and heat on again, but I suspect resin was already cured. Damn, buy cheap buy twice, always the same. We have been using a cheap vacuum foil for now because the vac table was new (and you always figure some problems you didn't expect then), but now its really time to buy some good stuff.

Will see tomorrow morning if all was for nothing... hopefully not!

A closeup of the ski prepared for getting the cap: All wood routed away, but the lower layer of FG and the VDS are still there:

Image
gozaimaas
Posts: 663
Joined: Fri Feb 10, 2012 4:17 am
Location: Nagano Japan

Post by gozaimaas »

Never walk away!!!
pmg
Posts: 480
Joined: Sat Dec 01, 2012 8:59 am
Location: Sonthofen

Post by pmg »

Not so easy with a hungry pregnant girl at home ;)
pmg
Posts: 480
Joined: Sat Dec 01, 2012 8:59 am
Location: Sonthofen

Post by pmg »

Success ;)

I obviously came back in time, was lucky. What i don't know is if the resin was already cured a bit when we put the pressure back up, only time can tell... if the cap falls away after 2 days of skiing...

So, time for pictures:

Image


The camber/rocker line. The ski got more Rocker than I expected. will do nice in soft snow.
Image


The transition of the cap construction to tip/tailspacer
Image


Image


Closeup of a cap side
Image


Full edge wrap around the tip (made from a single 4 meter edge)
Image


And also full edge wrap around the tail
Image


In the last 2 pictures you can see a lot of little white voids in the surface, thats where some air was caught under the cover. The ski will get some nice 2K surface finish anyway so it doens't bother me much.
SleepingAwake
Posts: 175
Joined: Mon Oct 11, 2010 11:06 pm
Contact:

Post by SleepingAwake »

sweeeet!
twizzstyle
Posts: 2204
Joined: Tue Mar 07, 2006 8:25 pm
Location: Kenmore, Wa USA

Post by twizzstyle »

I'm impressed, that turned out great!

You might try some sublimated nylon next time, you won't have to do any surface finishing after it's done.
pmg
Posts: 480
Joined: Sat Dec 01, 2012 8:59 am
Location: Sonthofen

Post by pmg »

Well, for now I got enough of this fabric for another 3 pairs :) But it will be gone soon, will build at least 2 more pairs during summer. Makes the time till october pass much faster!
User avatar
MontuckyMadman
Posts: 2395
Joined: Fri Jun 20, 2008 9:41 pm

Post by MontuckyMadman »

Looks great but im not sure why you want cap. Edge will just slice right through that and then the entire laminate is exposed. All the cap skis i ever had sucked for durability. The hybrid cap/vert sidewall is the newest step up. Shoot for that i would say.
sammer wrote: I'm still a tang on top guy.
pmg
Posts: 480
Joined: Sat Dec 01, 2012 8:59 am
Location: Sonthofen

Post by pmg »

Hi MM,

I want cap because I can't figure a good way to have precise sidewalls and still have usable planer chips at the same time. If I attach the sidewalls before having the core in the planer all the planer chips are just waste.
And for having precise sidewalls after the core has been planed i lack a good idea. Pouring could work...

I also don't like the idea of having too much plastic in the ski when I could have wood there - ash just rides great. So if I find a good way of having a lasting cap construction I have everything I want :)

In the current ski the cap is a 80q/m² glass fiber linen and the solid fabric on top. So you have to scratch away quite a bit of material before the wood comes out. And it will also get some 2k finish on top, further increasing the material covering the wood core. I have to figure how durable it is, hopefully it can take some. As I really like the moguls I'll find out quite soon.

And last but not least - I just like the look of cap!
twizzstyle
Posts: 2204
Joined: Tue Mar 07, 2006 8:25 pm
Location: Kenmore, Wa USA

Post by twizzstyle »

If you find durability is a big issue, you could always put a layer of lightweight bi-ax kevlar under the top sheet. Ski edges would have a pretty hard time slicing through that and it wouldn't add much weight.
Post Reply