Page 4 of 6
Time to build number 2
Posted: Sun Dec 04, 2016 2:05 pm
by pmg
After riding this Ski for 2 years a lot, its time to rebuild it improving it:
- Lighter
- A bit softer, especially the tip
- bend the tail up more
- a little bit shorter (2cm less at the end).
Some progress is done already, if you want to see how the mould was built look here:
http://www.skibuilders.com/phpBB2/viewtopic.php?t=5185
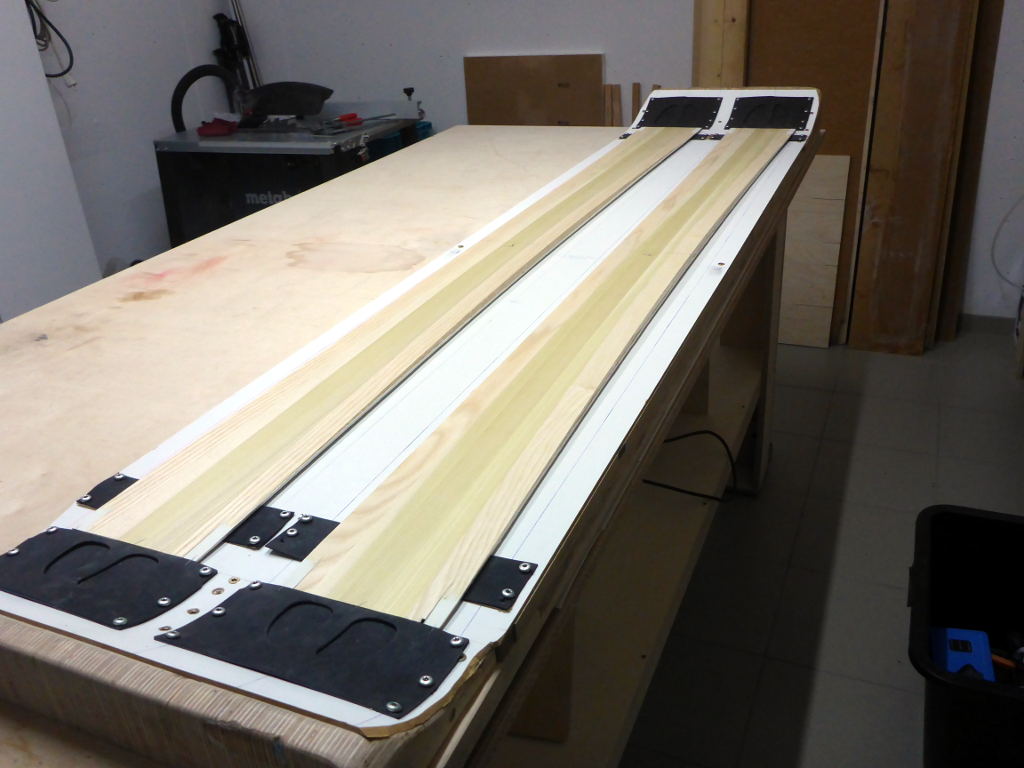
Ok, bases are attached to the mould using scrap base pieces, packing tape and screws:#
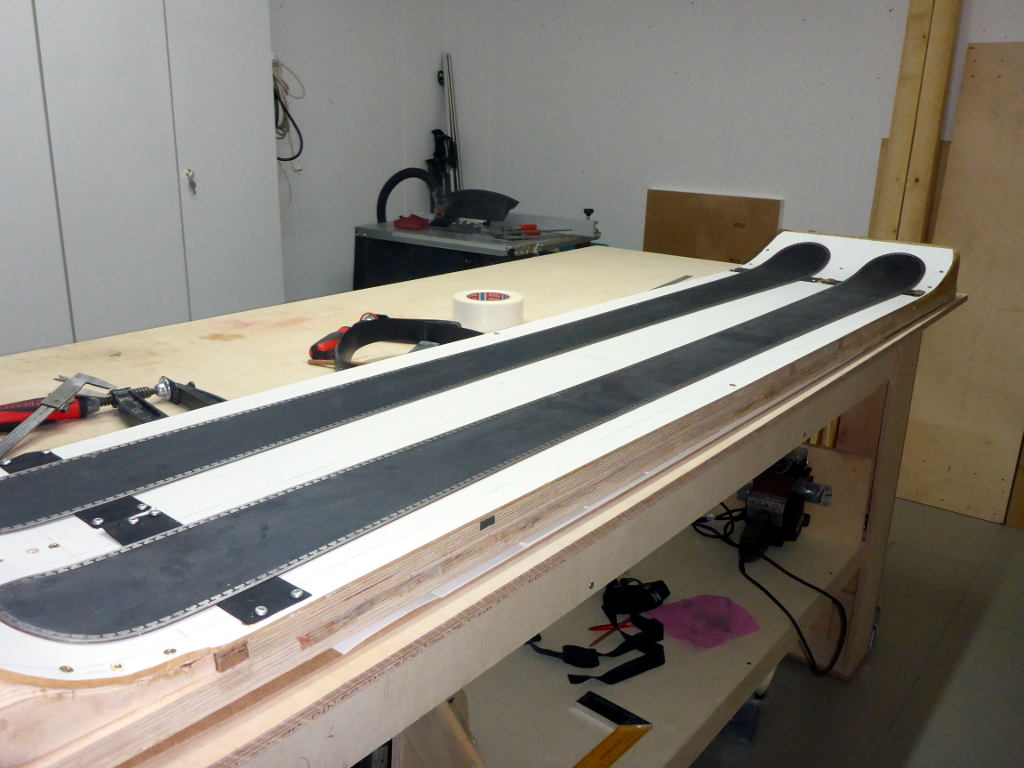
Detail of the tip section, hope you like my pre-bend of the tip and tail sections :)
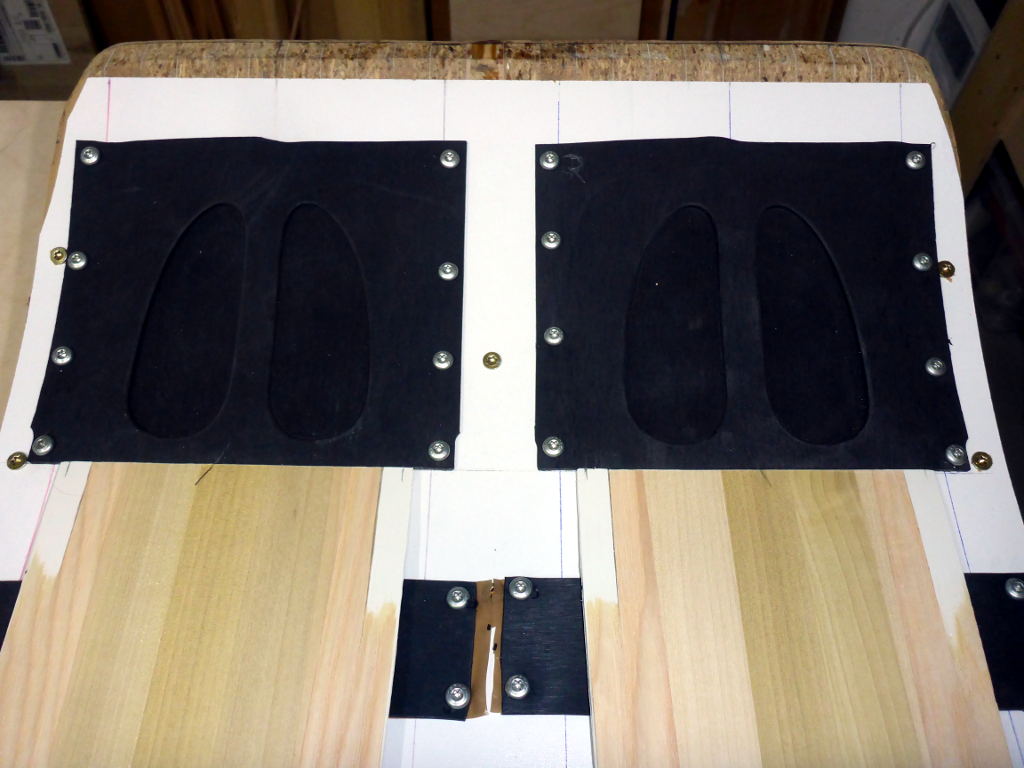
Next is the tip and tailspacers. The ski will get hollow Tip and Tail, saving 25-30g per Ski. Built some templates for the spacers to rout them exactly:

Posted: Sun Dec 04, 2016 10:33 pm
by Akiwi
If you are attaching your ski to the mould with an extra piece of base, Isn´t this going to mess up your profile by lifting the ski up at that point??? Maybe I can't understand what you are doing there.
I like the look or the hollowed out tip and tail spacers.. Saw that on your plan picture on thhe other thread. Though It took me a little to work out what I was looking at in picture three.
Posted: Mon Dec 05, 2016 12:47 am
by pmg
Hi Akiwi,
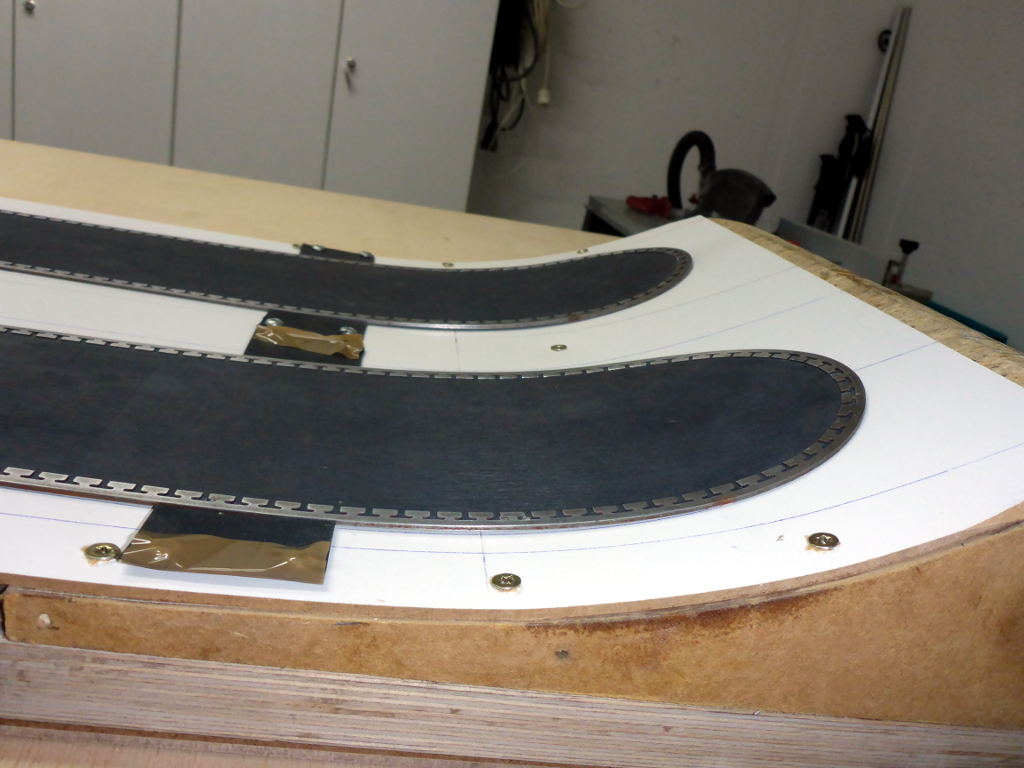
the scrap base pieces are only on the sides - its connected to base and edges by packing tape (much thinner than any other tape I have) on the bottom of the base.
Posted: Tue Dec 06, 2016 7:54 am
by mammuth
Good idea. How do you align the core then?
Posted: Tue Dec 06, 2016 8:49 am
by pmg
Hi mammuth,
I also screw the tip- and tailspacers to the mould. Before layup, I put markings on spacers and core so I can align the core by using the markings on the tip spacers.
Posted: Tue Dec 06, 2016 10:43 am
by Hannes
I don't get it.
You screw the tipsavers in during layup? The edge between core and tipsaver is straight? Or is it rounded or triangular? Don't you get any coreshifting? Up until now the core is not secured and only guided by te tipsavers so it still can ove sideways.
Posted: Tue Dec 06, 2016 12:30 pm
by pmg
Hi Hannes, some pictures tomorrow will clarify it - spacers are much bigger than the base. Thats why I can screw the spacers to the mould.
And yes youre right the core could shift sideways, but I always jam the core in between the spacers a bit, and together with the sticky resin thats enough. There'd be ways to secure the core more, but until now I never needed it. Will change when core finally shifts :)
Posted: Wed Dec 07, 2016 12:07 pm
by pmg
Made the spacers today. They are screwed to the mould (the fibres below are thin enough so the screw holes remain open during layup):
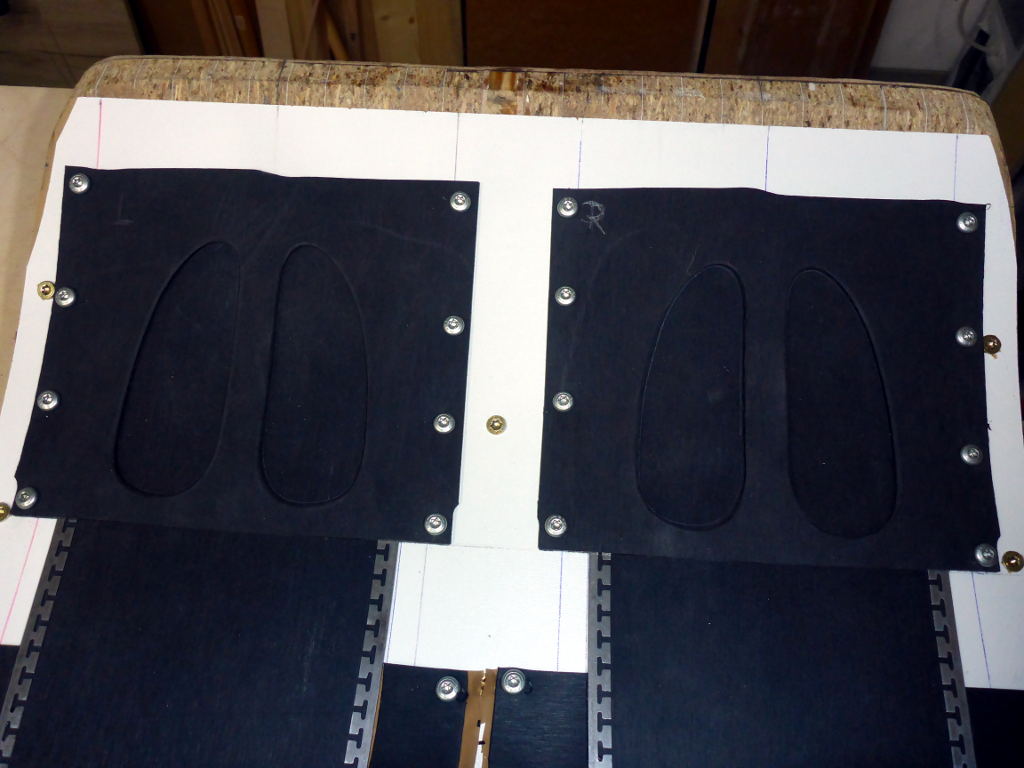
The woodcore is trimmed to just fit into the spacers. It is a bit jammed in and hard to move;
Some markings will make it easy to align the woodcore during layup. The spacers will be in the very same spot thanks to all the screws,
Posted: Mon Dec 12, 2016 10:44 am
by pmg
Prepared everything for layup tonight, will layup tomorrow morning. Learned that this is one of the most important steps in the whole skibuilding process. If something goes wrong during layup, its always a big mess as everything is covered with resin. So I changed to preparation in the evening, layup next morning.
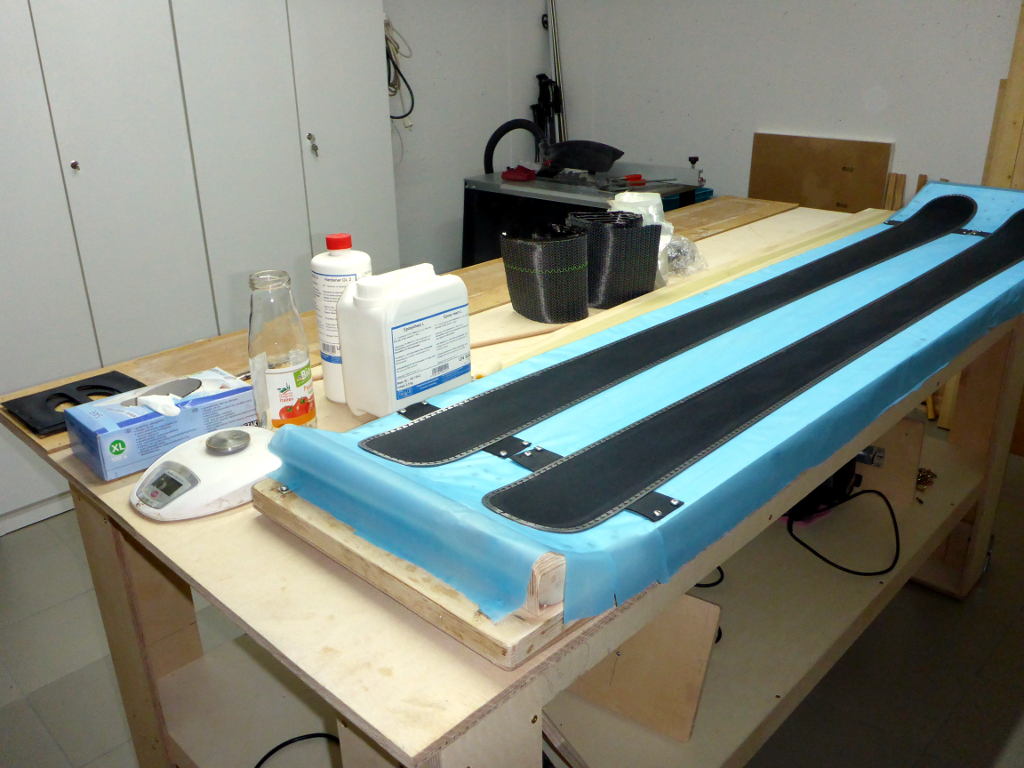
Posted: Tue Dec 13, 2016 4:02 am
by pmg
Pfff.... sometimes mistakes happen you wouldn't ever think of.
Ok, the skis are still in the press, and hopefully they will turn out great. When doing my regular checks every 15 minutes I noticed a pressure drop and the air smelling bad. So there must have been a leak somewhere.
Took away the heat box to find it, thought the silicone sheet got torn on some corner of the mould or so. But no, way more stupid:
Usually I press my Skis at 60°C. This time I forgot to turn the power of the heatbox down in time and it reached 70°C already. No problem, resin holds that, silicone, the insulation and whatever else is built in there. Thats what I thought....
The bottom of the press (where the mould is put on) is made airproof by a epoxy coat, made that years ago. Well, that was a different epoxy :) That one only holds 60°C over a long time and it seems it dissolved now - am really interested how the mess will look. Luckily I got a strong vacuum pump that holds up enough pressure. I only took the heat away half an hour earlier than planned, hope the resin was cured already.
Posted: Tue Dec 13, 2016 12:12 pm
by Hannes
Scheisse!
I hope the skis had enough pressure.
Posted: Wed Dec 14, 2016 1:28 pm
by pmg
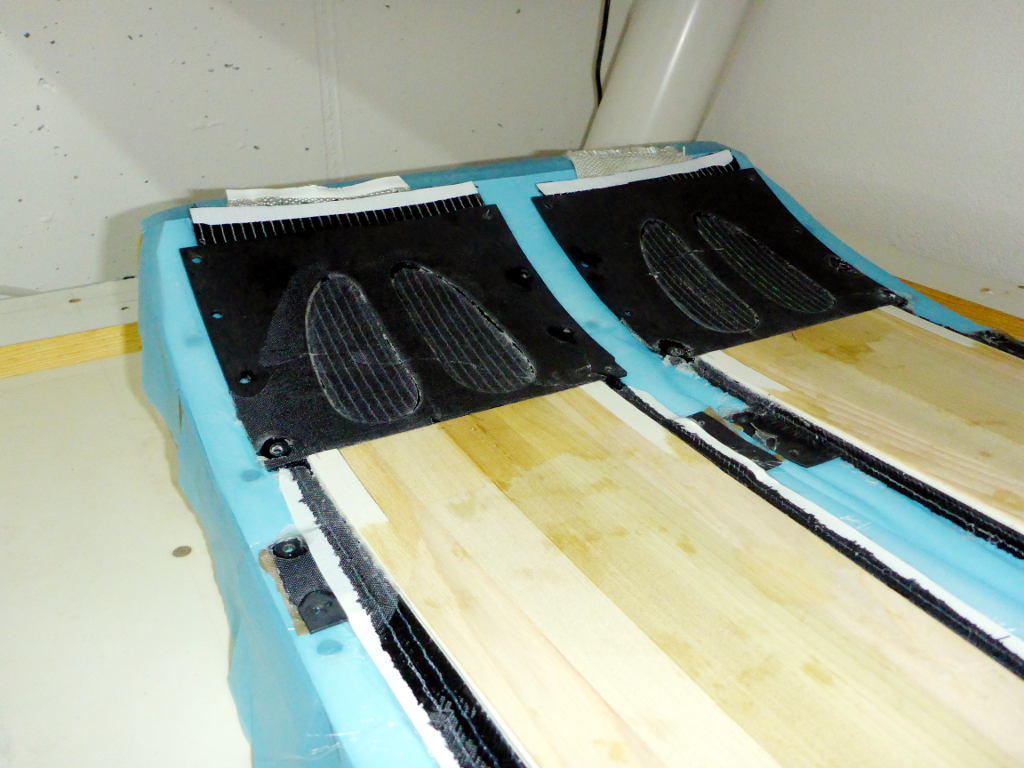
I was lucky, ski seems intact and the old resin strangely looks good. o idea what went wrong...
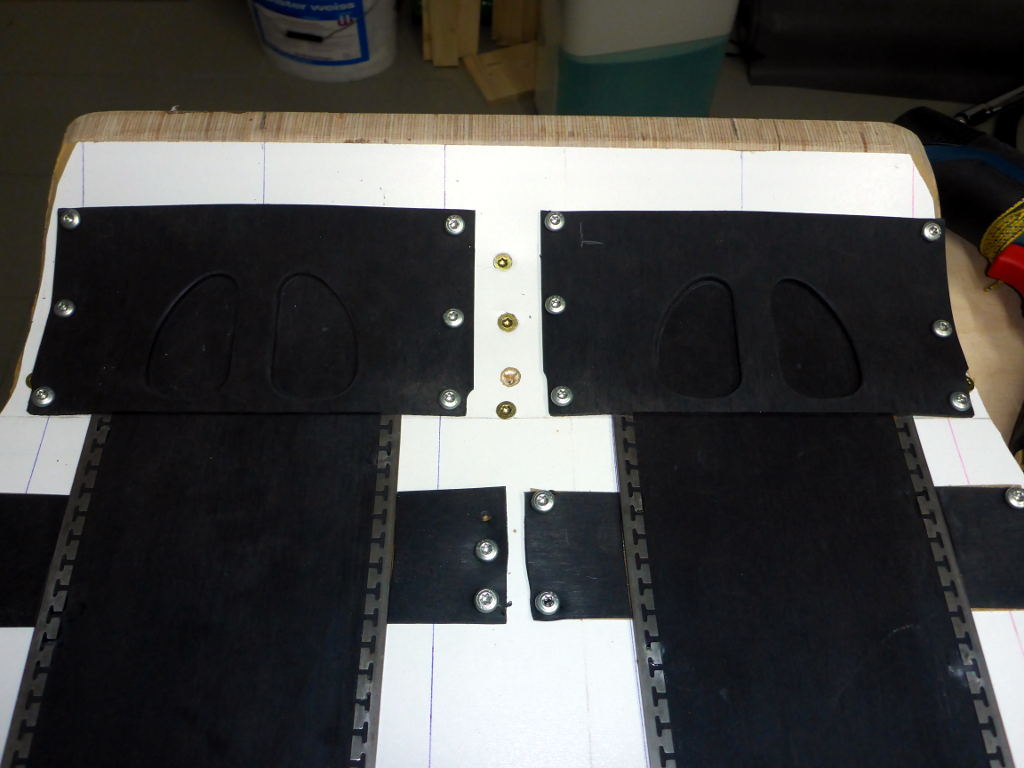
Here's a pic of the hollow tips, tomorrow or the day after I will cut away all the exess material, more pics then.
Posted: Wed Dec 14, 2016 11:29 pm
by Akiwi
Ooooh Pretty.
Do you drive BMW?

Posted: Thu Dec 15, 2016 10:03 am
by pmg
Akiwi wrote:Ooooh Pretty.
Do you drive BMW?
;)
No? Don't really get the joke :)
Posted: Thu Dec 15, 2016 3:45 pm
by Hannes
The holes in your tipspacers are similar to the front of s BMW (Kühlergrill).