Page 5 of 6
Posted: Fri Dec 16, 2016 7:14 am
by Akiwi
No idea why I thought to ask that.

Posted: Sun Dec 18, 2016 11:25 am
by pmg
@Akiwi:Now I get what you mean :)
Small progress:
Made the mould ready for pressing the cap top of the ski. Put 3mm hardboard below the skis to get enough pressure everywhere when pressing cap.
Posted: Sun Dec 18, 2016 2:09 pm
by Akiwi
Why don't you do it all in one pressing?
Posted: Mon Dec 19, 2016 2:36 am
by pmg
Most of all because I can't think of a proper method to align the cores so damn damn precise. If they just shift by 0.1mm it makes a 0.2mm difference from left to right side of the ski already, and more than 0.4mm difference I will definitely see. So max. core shift I could live with is 0.2mm, and so far I haven't found a proper way to achieve this.
Thats the problem with pressing cap...
Posted: Mon Dec 19, 2016 4:20 am
by Akiwi
I drill 2 holes in the core and insert a dowel in each.
I put the dowel in the core and a spot of superglue on the end of it and place the core exactly where I want it. Remove the core leaving the dowel attached to the ski base.
In the layup you have to fit the cloth around the dowel, but you are guaranteed perfect core position and no shift.
On snowboards I use the same method but do it with 2 of the binding inserts.
Works for me at least.
Posted: Wed Dec 21, 2016 11:57 am
by pmg
Thought about using the dovel method, but there is so much trouble I can think of that I kept away from it until now. Then next Ski I build will have wooden sidewalls, this will make everything much easier in terms of labour. But I have tons of other ideas that cause extra work again :) Well thats me, a perfectionist!
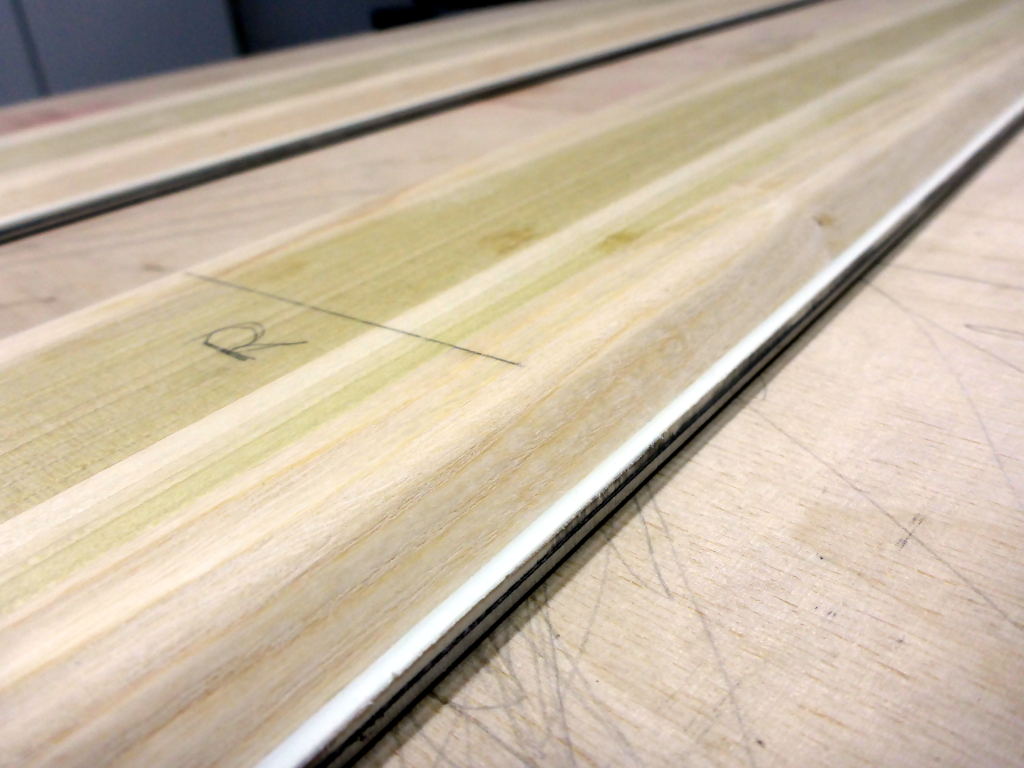
Ok, today I made some progress. First, I used my new Bandsaw to cut the excess material away. Did this with a jigsaw so far. Bandsaw is sooo much better for doing this. A quick runover with the belt sander makes the sides nice and even:
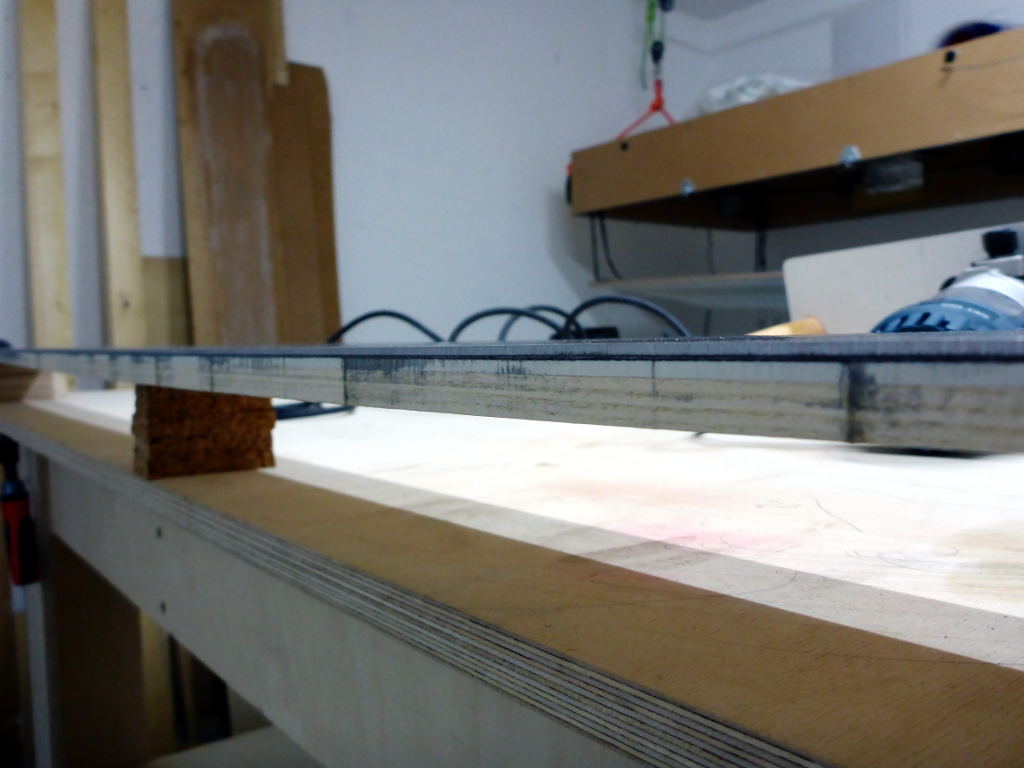
In this picture, the skis are already in place for routing the bevel on the sides. I use a simple selfmade attachment for the router. A 15° doveltail router is tilted more so the total angle is about 35-40°:
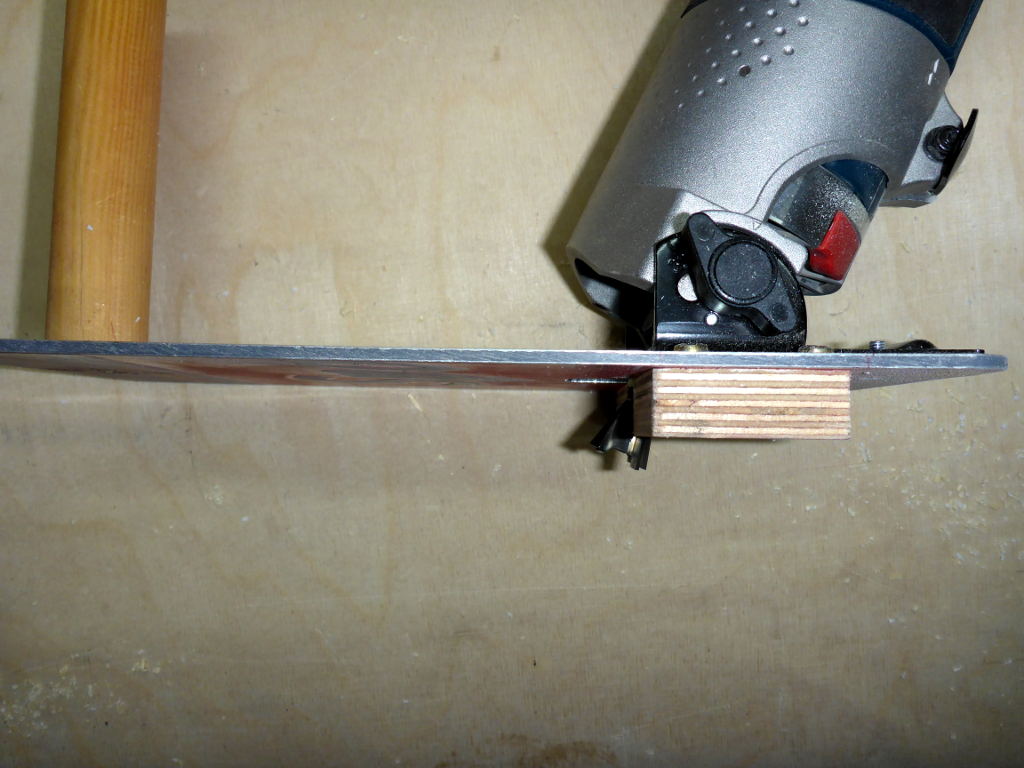
The result is great, unfortunately the pic is not too good:
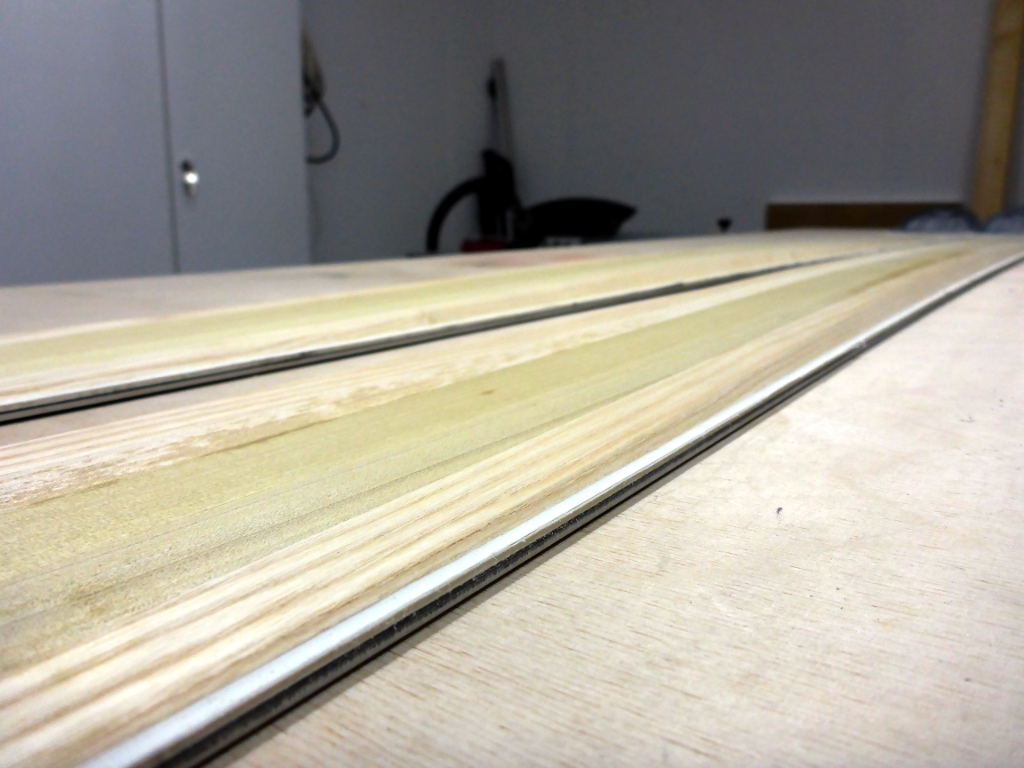
The top edge is rounded by hand so the topsheet can bend over it well:
Posted: Wed Dec 21, 2016 12:02 pm
by pmg
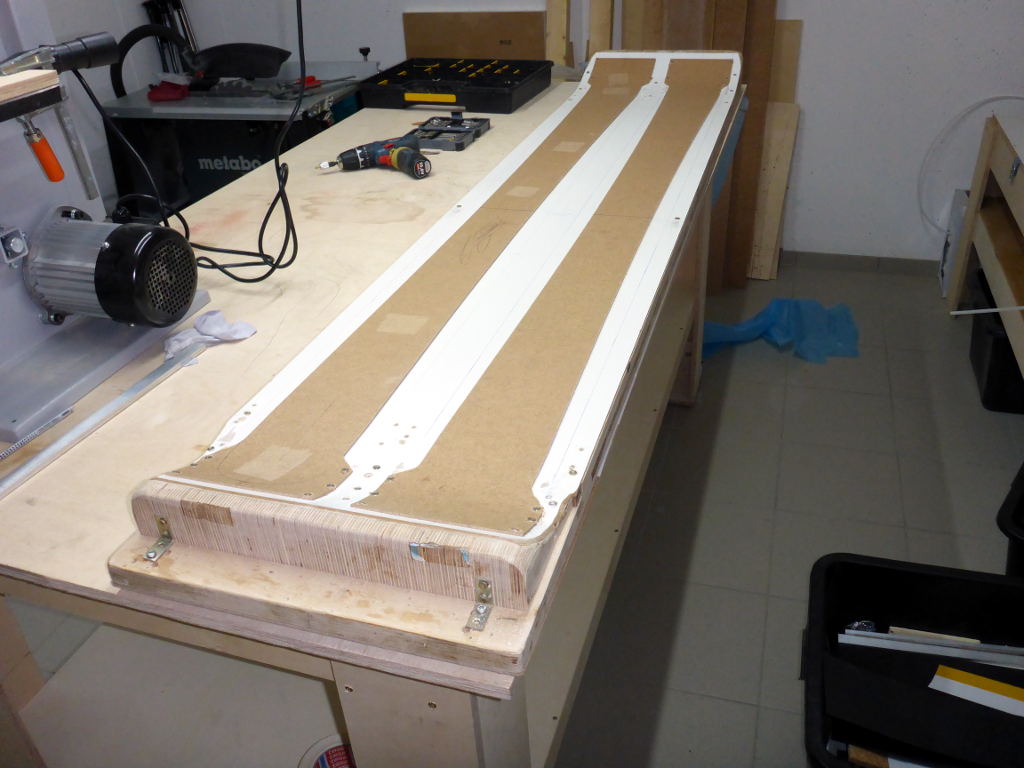
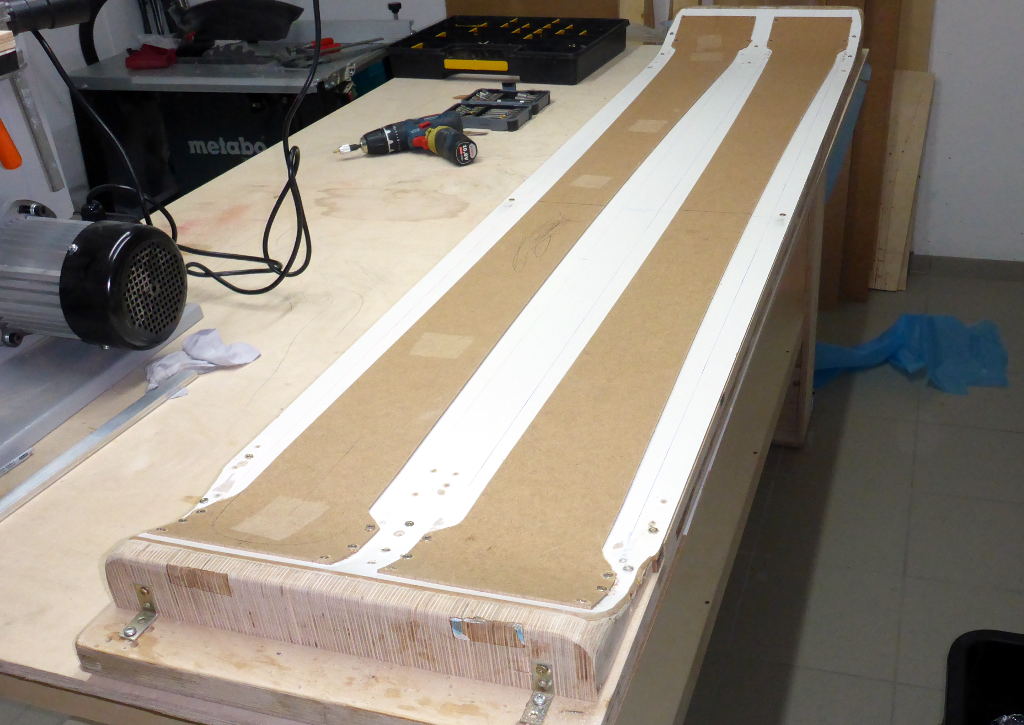
Also made some quick work on the mould:
3mm hardboard cut in ski shape (except ends) to help the topsheet bend over better when pressing cap. Like this, the sides of the cap get enough pressure everywhere.
Posted: Wed Dec 21, 2016 2:28 pm
by Akiwi
Your attention to detail is very inspiring.. I feel like a bit of a hack when I see how perfect your skis are. ;-) Respect!!
What is the white layer under your core? Is that a PU layer or something. I sawi it in your earlier pictures from above where there is a white stripe where the core gets thinner and was wondering what that is.
I used my new band saw also for the first time on Monday and was also amazed as to how fast and easy it was... and almost no dust with the dust extractor on.
Posted: Wed Dec 21, 2016 2:56 pm
by pmg
Thanks for the flowers :)
The white stripe is 3mm thick ABS, normally used for tipspacers. Its above the edge, approx. 10mm deep into the core. Its my mini sidewall.
Posted: Wed Dec 28, 2016 3:43 am
by pmg
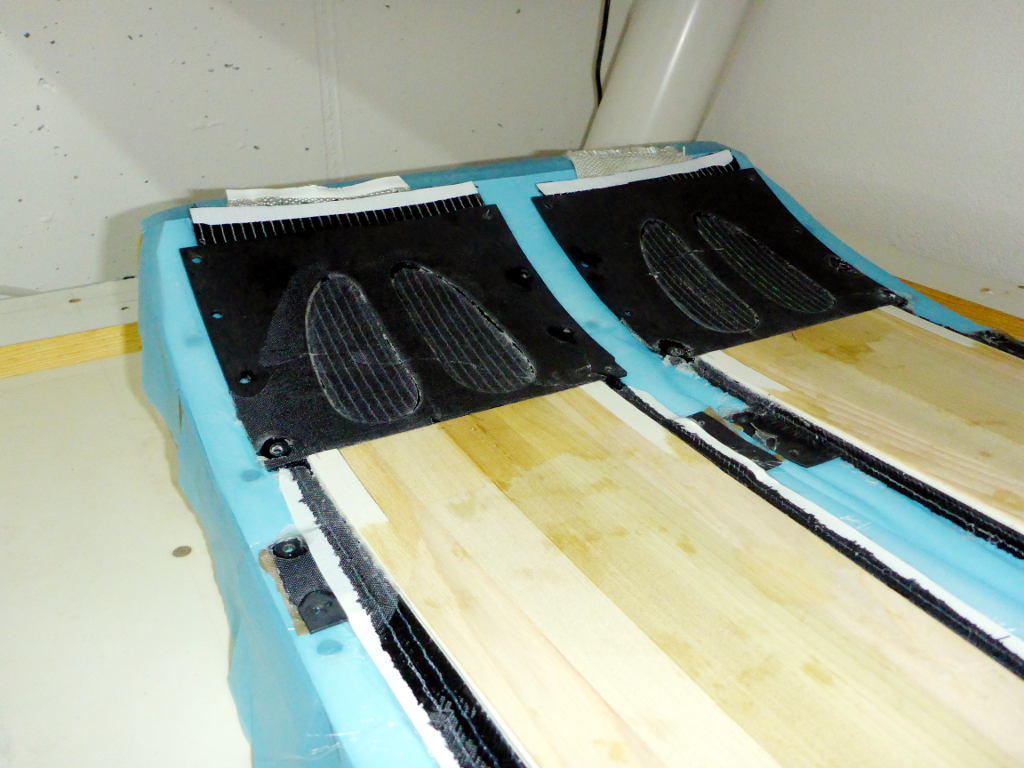
Prepared everything for 2nd part of layup yesterday:

Posted: Wed Dec 28, 2016 12:34 pm
by pmg
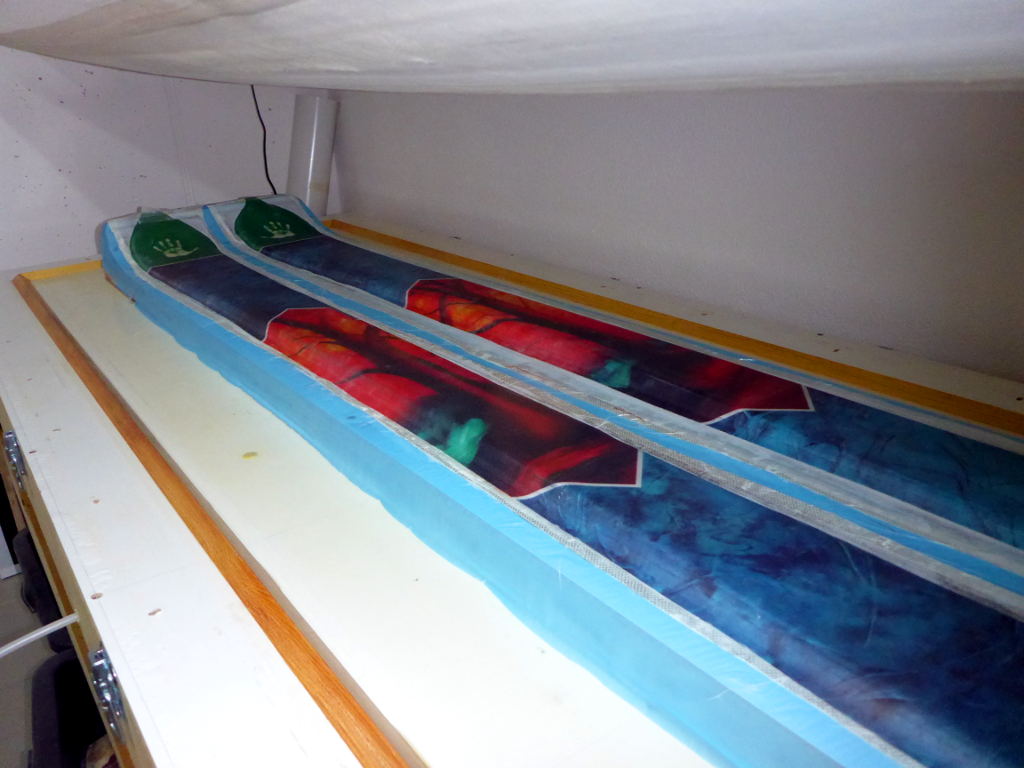
Pressed today, seems good so far:
Posted: Thu Dec 29, 2016 6:18 am
by Akiwi
Been looking forward to seeing how they came out. They look pretty nice.
Posted: Thu Dec 29, 2016 6:27 am
by Hannes
Looking great! How thick is your topsheet? E
Posted: Thu Dec 29, 2016 12:17 pm
by pmg
It's 0.5mm thick. Would like to have a thinner one like 0.3mm, but didnt find it anywhere yet.
Posted: Thu Dec 29, 2016 12:18 pm
by pmg
Akiwi wrote:Been looking forward to seeing how they came out. They look pretty nice.
At the moment they look pretty dull, as the protection sheet is still on top. Will remove it after drilling the binding holes, that will take some days.