Page 12 of 15
Posted: Sun Dec 11, 2016 9:57 am
by pmg
Hi, nice to see your workshop grow. Wish I had so much space, 15m² is all I have :)
I used to have a similar planer crib for years, works fine. But I changed it because it is pretty limited in making different cores: Mine used to have holes every 3 cm and also distance pieces in 0.5mm steps, but it wasn't modular enough. But if you want to build only pretty similar skis, it works well!
2 things regarding this method that can bring uneventies in the cores:
1) Setting of the planer blades - if they're not 100% perfectly aligned with the planer table it will cause 1 core to be thinner than the other (if both of them are on the crib at once)
2) The MDF and the plywood plate may have thickness differences in themselves. I measured poplar plywood once, a 16cmx200cm piece, and found thickness differences of 0.3mm in that piece.
Luckily, there is a damn simple and nice solution to get rid of both possible uneventies in one run:
Set the planer crip flat, and run the crib through the planer until the whole surface of the crib was touched by the planer blades. And thats it! As long as you run the crib through the planer the same way (always the same side first :), you will get thickness uneventies of way less than 0.1mm.
Hope that was well enough explained to understand.
Posted: Sun Dec 11, 2016 12:53 pm
by mammuth
Imbus screws for the crib and akkuschrauber + bit = more quick to change

Posted: Sun Dec 11, 2016 9:56 pm
by Akiwi
mammuth wrote:Imbus screws for the crib and akkuschrauber + bit = more quick to change
I made a change yesterday. Used the Akkuschrauber, and it went fast.
Posted: Tue Dec 13, 2016 3:29 pm
by Akiwi
Hmmm, I made a small error. I profiled my cores down to 6.5 mm the same as the last board I made..
But I forgot that my new inserts are 8mm long..
So I decided to get creative. We will see how it goes.
I will make up the 1.5 mm by making a 3D core.
I have cut out some ply wood, and am laminating it to the existing core.
I'll put it through the Planner to get it ti the correct depth. and see how we go from there.

Posted: Wed Dec 14, 2016 9:32 am
by pmg
Nice Idea! Will surely look rad when its finished
Posted: Wed Dec 14, 2016 11:37 pm
by Akiwi
Frustrating night in the workshop last night.
Reducing the height of the Ply wood turned out to be a problem.. The horrizontal orientated wood comes off in long strips with the planer, and this completely blocked my dust extration system. So I constantly had to stop to unblock everything.
I needed to get the tips thinner, and the bamboo seems to have blunted the planer to the point where it doesn't seem to cut any longer.
I can't turn the blades as I need a blade setting tool which didn't come with the planer.. and my crib is cutting crooked, so I tried to plane it flat, and now it doesn't slide through the planer any more.
All solveable problems... But was a frustrating night just the same..
Like so often.. everything seems to take longer than you expect.
I guess if board building was easy... everyone would do it.
Posted: Thu Dec 15, 2016 12:53 pm
by pmg
Trouble trouble :)
Why doesnt the crib slide through any more?
And what ist a blade setting tool? Never heard of that.
Posted: Fri Dec 16, 2016 3:32 am
by SleepingAwake
I know different carpenters who are super particular about not planning any plywood as the glue joint seems to kill planer blades...
Posted: Fri Dec 16, 2016 7:10 am
by Akiwi
Hmm, My that could be the problem, as I realy noticed a difference after planing the Plywood.
But I suspect it is the bamboo.
Posted: Fri Dec 16, 2016 7:36 am
by Akiwi
Last night things wen t a bit better.
Though I do tend to over engineer things.
I wanted to do the Rabbet for my edge. Up till now I have always done it manually which can be tricky and prone to slips, so I decided to build a Rabbetter.. Er Rabbet machine...
It worked very well, though I will make a small adjustment in that I lower the bearings to below the surface of the tabletop as my core managed to slide under the wheels.

Here you can see I need to recess the bearings about 1mm into the table. Not a problem.

Result.

Posted: Sun Dec 18, 2016 8:37 am
by Akiwi
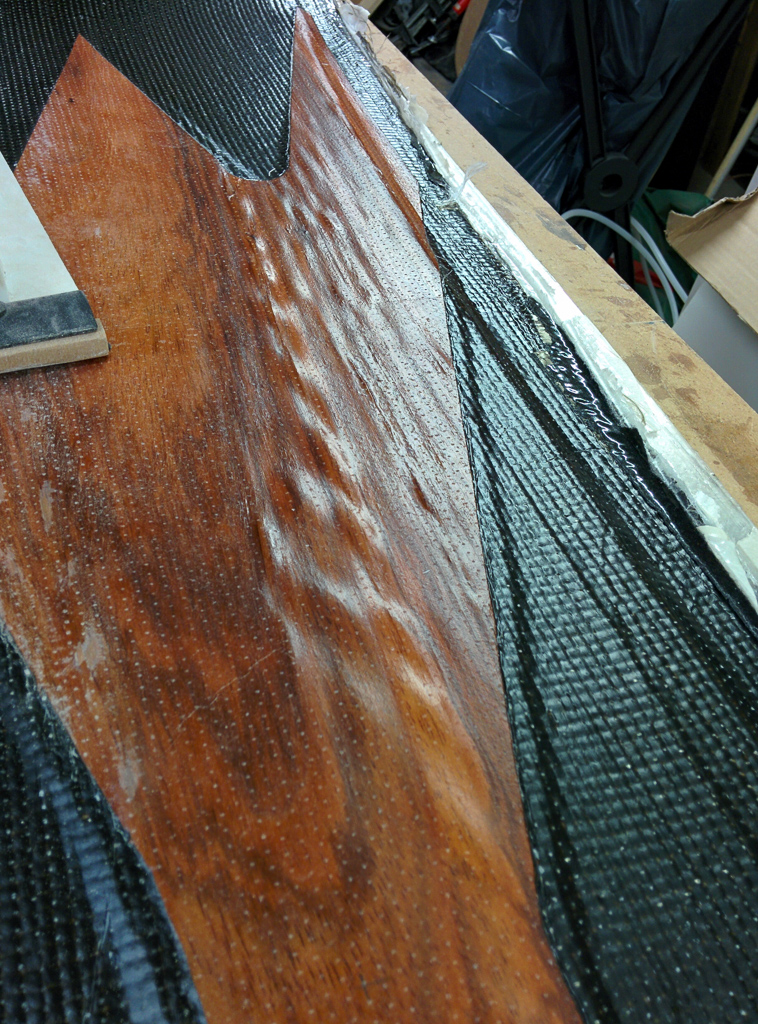
Did the layup yesterday.

Today was like an early Christmas.. Unpacking.
Board looks pretty good.. but not perfect.

I have a bit of trouble with waves in the Veneer topsheet.
The veneer wasn't flat, and I hoped it would flatten out in the press..
I guess a firehose press might have been better here.
Not 100% sure if the problem is due to the waves in the veneer, or too much epoxy, though I suspect it is more the veneer as I have never had a problem like this before.
I tried squeezing them out.. but no luck.
It's not too serious as it is mostly under the binding, so I can sand them pretty flat..
Posted: Sun Dec 18, 2016 12:50 pm
by Hannes
It looks nice. I didn´t see the waves
Is it just bare carbonfibre? Will you paint it afterwards? What are you doing with those little pimpels coming from the perforated foli?
I am planing doing something similar on my next ski.
Posted: Sun Dec 18, 2016 2:07 pm
by Akiwi
This is 600mg Basalt.
I am going to leave it bare.
I'll sand the pimpels off and give it a 2 component car clear coat to make it nice and shiny.
I'll post a picture when it is finished.
Posted: Wed Dec 21, 2016 12:59 am
by Akiwi
Ok, it is finished.
Came out pretty well.
Maybe a little stiff, But I need a board my son can't break, so I overengineered a little. ;-)
I loved the magnetic cap inserts.. made drilling out the holes a breeze!

Posted: Wed Dec 21, 2016 1:01 pm
by Hannes
Your board looks graet like always.
Basalt sounds interesting. Did you work with it before? How does it perform? Where can you buy it in small amounts for just a few skis? A few months ago I didn´t find any at the regular suspects r-g, hp-textiles and timeout had only 150g or 235g woven.


