Page 1 of 2
2 new snowboards from hydrant71
Posted: Thu Mar 29, 2007 9:08 pm
by hydrant71
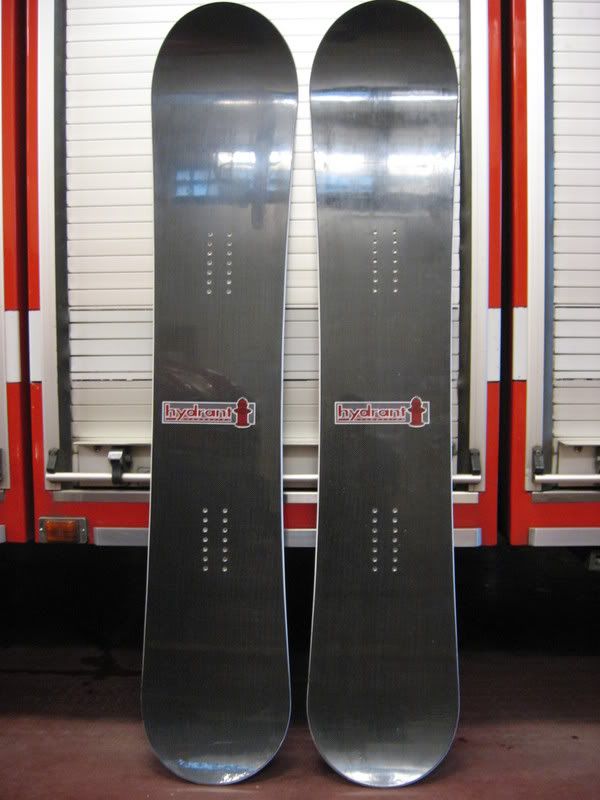
just finished these boards last week. look mom no plastic topsheets!
carbon top laminates over triax glass with a sanded and polished two part clear PU topcoat. the topcoats were a lot of work until i figured out what i was doing and figured out a process that worked. same glass layups on both with different carbon strip orientations for different flex characteristics. overall i am very pleased with the fit and finish of these
boards. have yet to ride them, can't wait.
jason
Posted: Thu Mar 29, 2007 9:21 pm
by freestyleskier
Wow, those are some very professional looking boards! Hope they ride as well as they look.
Posted: Thu Mar 29, 2007 9:21 pm
by G-man
My goodness, those are sweeeeet! Very impressive and inspiring work.
G-man
Posted: Thu Mar 29, 2007 10:54 pm
by plywood
huuuuuge!
they look so noble with the carbon. and your logo print kicks ass

Posted: Fri Mar 30, 2007 12:15 am
by LordGlassbot
That just looks awsome, great work
Posted: Fri Mar 30, 2007 5:52 am
by RoboGeek
very nice.. gonna get to ride them this year?
Posted: Fri Mar 30, 2007 6:49 am
by beansnow
wow those look sick, congrats man.
I havent tried any spray on coatings yet on our boards. Did you have to get a special PU that can withstand the bending or does it not crack at all?
Posted: Fri Mar 30, 2007 7:35 am
by skiguy
Nice, very Professional looking. Could you give us details on your topcoat? Which PU? What process did you use to get such a glossy finish?
My dream is to have a finish product that looks as good as your..
Posted: Fri Mar 30, 2007 10:43 am
by beansnow
yea and if possible i'd love to see how you get your sidewalls looking so clean. We do it with a hand router right now and its pretty shady, we thought a router table would help but wondering if you have some other ideas. Thanks
Posted: Sat Mar 31, 2007 11:58 am
by hydrant71
thanks guys for all the comments. i am really really happy with these boards. for the sidewall profile i used a 20deg. router bit from lindbe i ordered
online. the graf site has a post by headmonkey that details the setup
needed. there is a 45deg and 20deg cutter avail.
the topcoat is a two part clear PU for marine applications. brush, roll or spray. to get the high gloss it takes a lot of wetsanding with very fine grit
paper then polished with a highspeed buffing pad. took me a while to get
the system down and still have a bunch of bugs to work out. the surface hardness is incredible so i hope it works out in the long run, as far as
cracking when subjected to constant flexing, only time will tell.
thanks to everyone on this forum.
jason
Posted: Sat Mar 31, 2007 3:15 pm
by bigKam
Jason:
first off, the hex "d" is a very nice touch in your logo! as for the craftsmanship, it appears better than a mass-produced ride -- nice work! i would like to give your topsheet variation a try on some skis.
btw, let us know if you need help with your heater system this summer. at the very least we can at least point you in the right direction...
Posted: Sun Apr 01, 2007 2:22 pm
by rockaukum
Jason,
By the looks of things you must be a truckman. Boards look great! Tell me about the grafic on the boards. Is it a sticker on top of the board or is it something else?
rockaukum
Posted: Sun Apr 01, 2007 4:51 pm
by hydrant71
rockaukum,
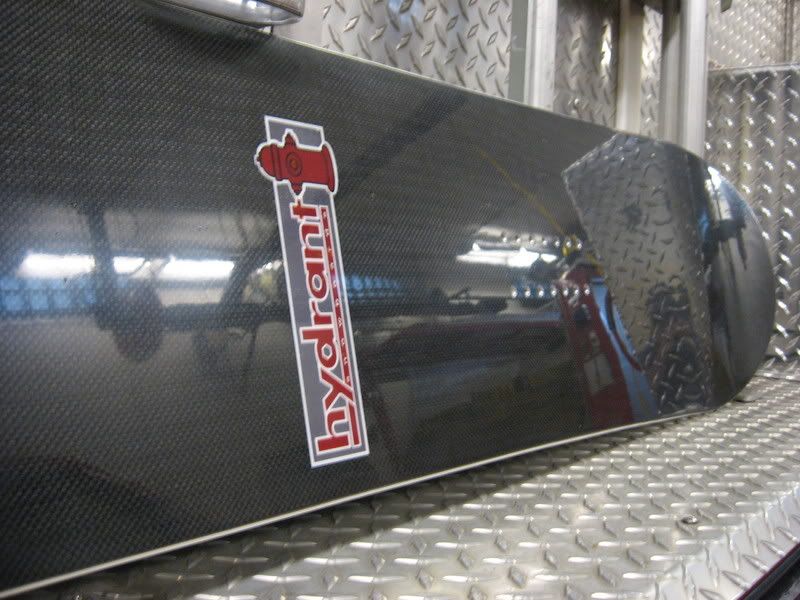
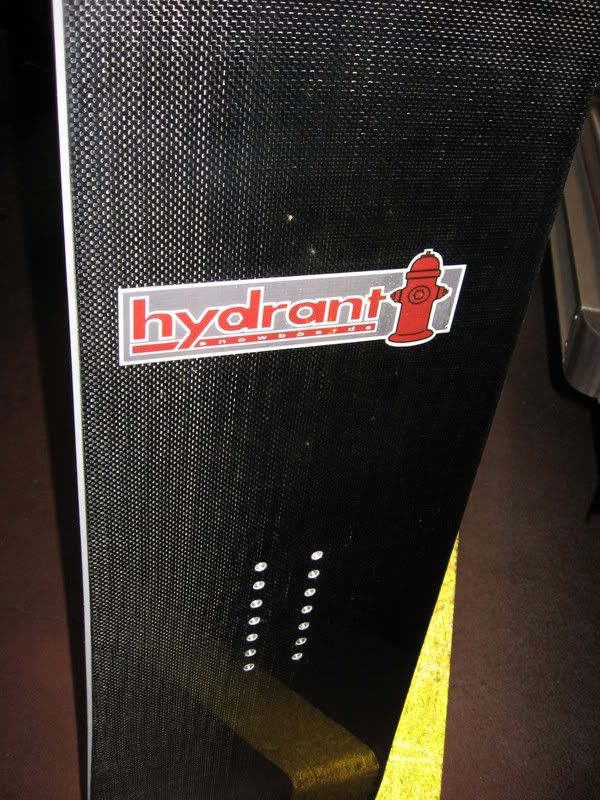
yes, managed to get a truck spot. the graphic is a piece of lazerjet paper
laminated in the board during layup. its a dan graf method that he used
on one of his first boards. i take a sheet of smooth uhmw with mold release applied to it. before i start the layup (a couple hours) i brush
some epoxy on the uhmw where the graphic will be located and lay the
graphic face down, then apply more epoxy over the paper working the air
bubbles out. by letting the epoxy partialy cure it will keep the graphic
where you want it and not move. place the uhmw sheet on top of the layup before the top cassette. when it comes out of the press the graphic
is flush with the rest of the board under a layer of epoxy.
you can use the same "precure" method when using clear topsheets to prevent the graphic from floating and to eliminate bubbles. dan details
both these methods on his website on a couple of his boards. i've done
both with great results. hope i made sense.
jason
Posted: Sun Apr 01, 2007 4:57 pm
by bigKam
i've used small dabs of superglue in spots to secure the graphic to the base layer to keep from floating. for example, if i have a cloth background with die-cut graphics on top, i superglue the die-cuts to the cloth.
Posted: Sun Apr 01, 2007 5:52 pm
by hydrant71
i bet that works pretty well. i knew you had to be doing something special because the first tests i did the graphics were swimming around like little
fish and yours look nice and centered. i love superglue.
jason