
the first router bridge i built was for ski cores and only measured 30cm or so in width. as i needed some new parts for a wide mold (40cm wide) i had to build a new, wider router bridge. so i came up with a new idea:
you need:
- 1 piece of angle iron, 20x20mm, 2mm thick, 2m long ...... 10$
- 4 bolts and nuts (M5 oder so) ........................................ 2$
- router with squared base
and here we go:
step 1: cut angle iron in 1 pieces of 1m lenght each.
step 2: drill 2 holes into each piece of angle iron.
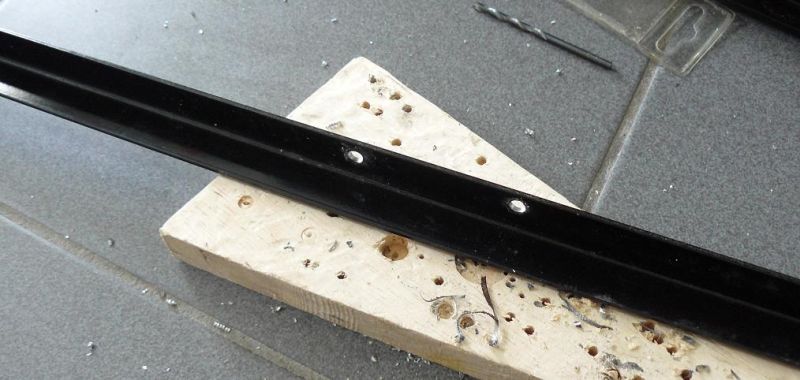
step 3: drill 2 coresponding holes into the baseplate of the router, on each side of course.
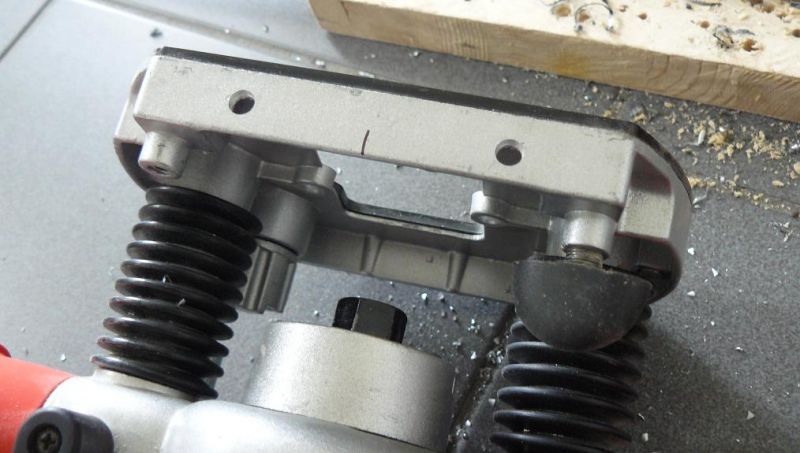
step 4: screw the angle iron to the base plate - and make sure to either use those self-locking screws or locktite or something like this. the router vibrates quite much which can result in loosening of screws. and you really don`t want screws, bolts or router bits flying through the air.
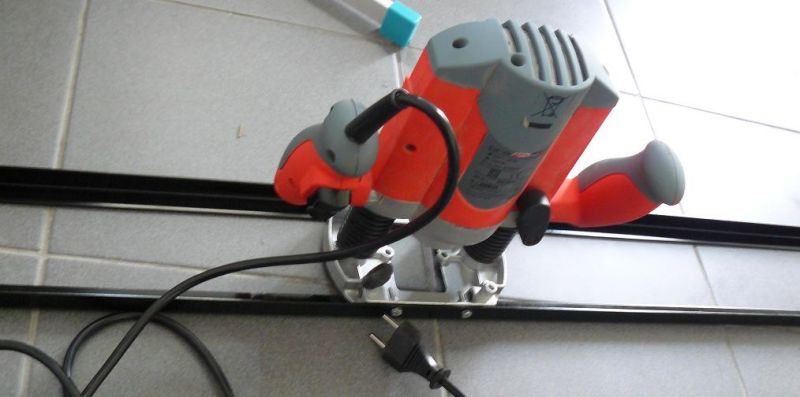
all this can be done in about 10min and you`ll be able to profile stuff up to 50cm of width approx.
advantages:
- cheap and fast
- you`ll get the baseplate close to the "bridge" than if you yoused a wooden router bridge. there you need at least 1cm thick wood to build a stable bridge.
- you don`t have to worry about slipping off the router bridge as it`s screwed to your router - bombproof.
disadvantages:
- you have to drill holes in the router baseplate
