
Yeah it is old tech, but this guide is how to make the whole silk screen press, frame, how to expose, and print. This project was on longboards I made. The process could simply be transferred to printing directly on to topsheet plastic or maybe even under the glass(?).
Some of my photos got jacked up, so I'll retake a few in the future. And this is my first Tut, so no hate, but discussion and improvement helps everyone.
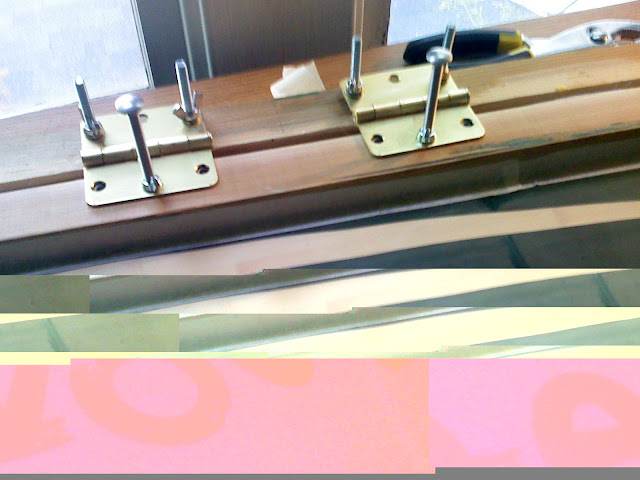
1. Press
The base of the press is some nice flat plywood and needs to be at least as big as the surface you are printing on. Also a 1x2 and some regular door hinges (I got mine from my neighbors front door). The 1x2s act as spacers if you are printing on an elevated surface and so the hinges allow the frame to lay flat. The hinges attach to the printing frame so it can flip up/down to easily transfer to your next printing surface and it helps line up the artwork.
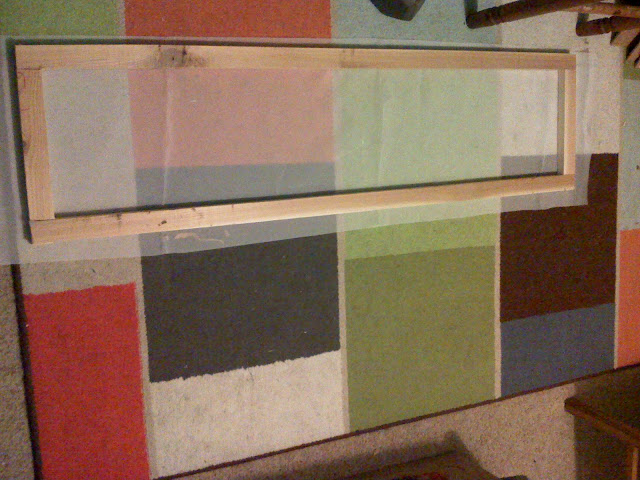
2. Frames and Screens
To make frames the printing frames for my longboards, they should be larger than the board itself. I’m kind of assuming you know how to build a frame here. Jointing the corners for the hardcore woodworkers choose your joints, I just used simple lap joints using 1"x2"x8' cherry from the hardware store. Depending on your craftsmanship, the key here is to get them square and lay completely flat. Since I don't have some of the correct tools, my craftsmanship for these frames wasn't great. What I did to make sure they were square and flat; I used a T Square and let the frames dry on flat cement (without clamps).
I picked up some 110 mesh screen from the local art store it usually costs $10 to $15 bucks per yard. After the glue dries, attach the screen with a heavy duty stapler. It is good to get the screen tight, but as I found out, there is no need to really torque it down. I start by stapling 2 corners and for the first staples I pull it pretty tight. I finish 1 side and then staple the opposite side. At the end, check for any loose spots. If you find any try to pull the screen tight and staple the loose section.
You may want to make a small screen for an exposure test listed in step 7. This does not have to be fancy, cheap, simple and small work. An 8x10 frame is plenty.
(One thing that might allow you to save time and $, use picture frames from goodwill or steal that killer office art your buddies wife bought for their house. They are really cheap and work well for smaller prints)

3. Emulsion
This is where the goods start. Emulsion works like photo development as in it is a light sensitive process. When it is exposed to light it is no longer washes out with water. So coating, storing, and lining up the screens has to be done in the dark or at least the light has to be pretty low. They make special lights for this if you are a dorkbag. The emulsion used was from the local art store, the brand is speedball, and it is a 2 part, emulsion and activator.
Next we have to apply the emulsion on the screen. I'd bring a mixing device, a rubber squeegee, the emulsion, and activator. Now that you have your screens made, get into that dark place and mix your emulsion, I used a pencil, but I'm sure your mom's kitchen mixer would work well too. Pour a small amount of emulsion on the screen and spread it around with your squeegee until you cover the entire screen that lies within the printing area of your frame. You'll need squeegee it from both sides to get it to spread out. It takes a few minutes. I like to hold it up to a small amount of light for a few seconds to make sure it is covered and there are no thin/thick spots. Expect that you won’t get coating along the edge near the frame, which is okay. After you get the screen coated let it dry for a few hours in a cool dark place. I used the basement. (sorry, no pics from the dark process)
4. Graphics
For my graphics I used adobe and took it to the local office supply store to have it printed. Your finished artwork needs to be printed, in black, onto clear transparency paper. Also, if you are planning on printing more than 1 color you will need to print it onto a separate set of transparencies (this also means a separate frame to develop. For the longboard I had to print the graphic onto several 8.5x11 sheets, line up the image on each consecutive sheet, and tape them together with clear tape. I then made sure the image lined up by placing it onto the deck (along with the other color's transparencies if you are doing more than 1 color).
5. Back to the Screen
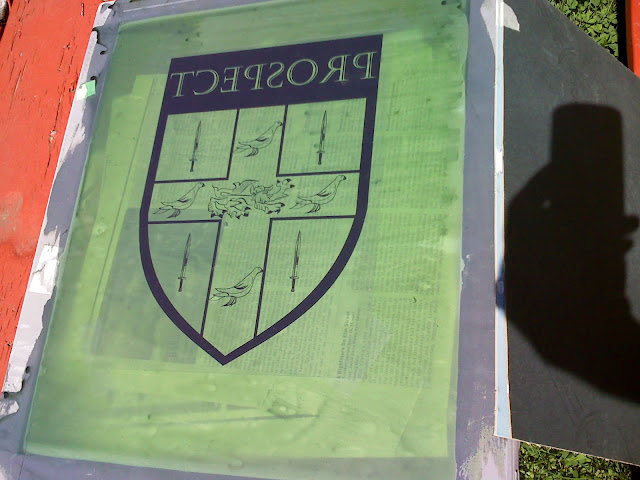
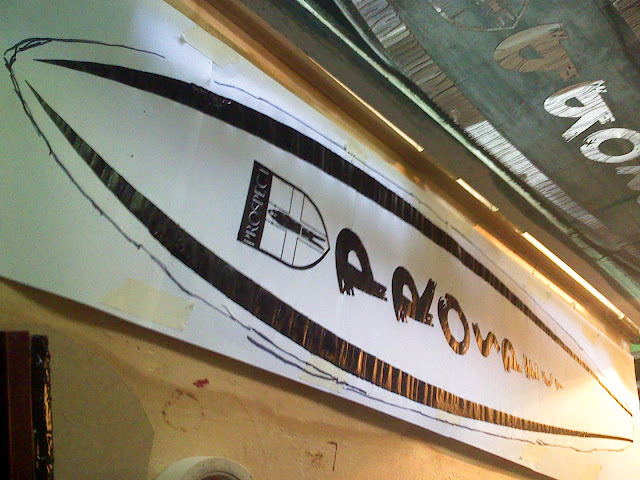
Next we have to tape the graphics to the screen to prep it for development. It is a good idea to think about how this might work ahead of time or you might find your print backwards. Now take your graphics and place, flipped on a vertical axis, on the underside of your screen. So any text you have will read reverse. Other notes, you'll want to line up your graphics within the printable area inside the frame and try to lay the transparencies flat so that no light can sneak under the black print.
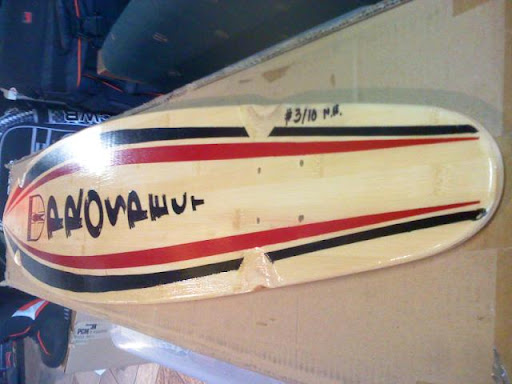
From another project
6. After lining up the art
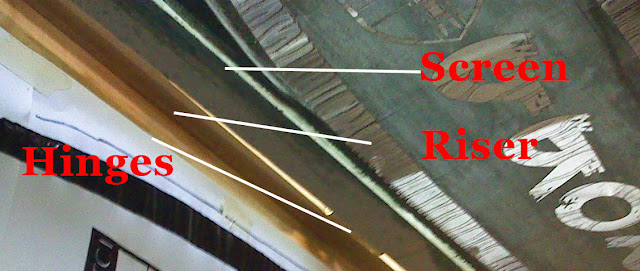
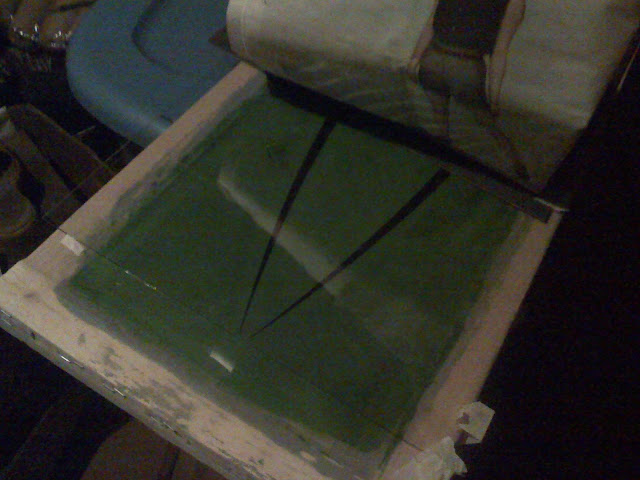
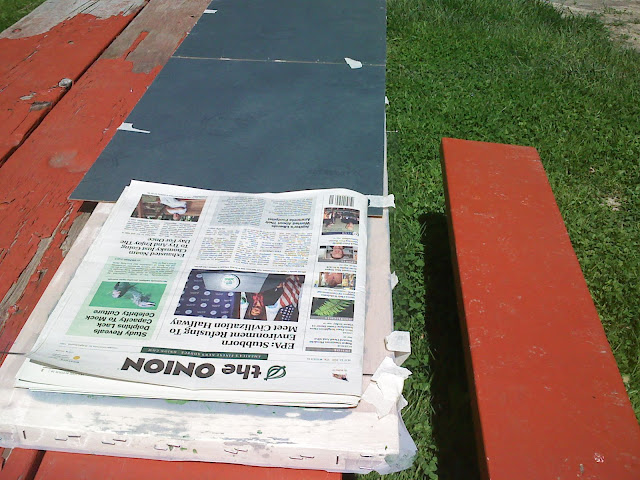
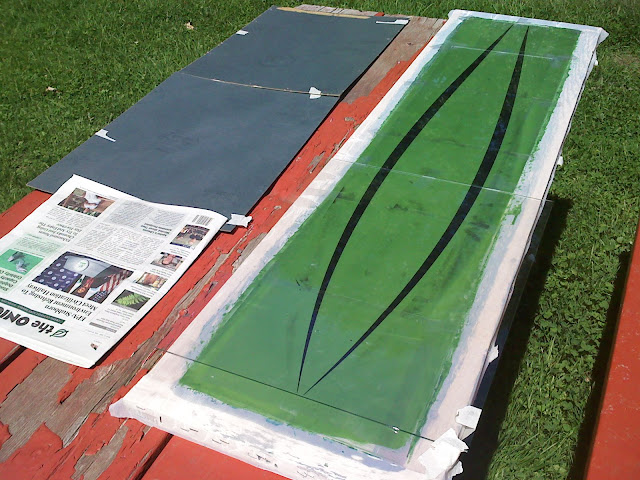
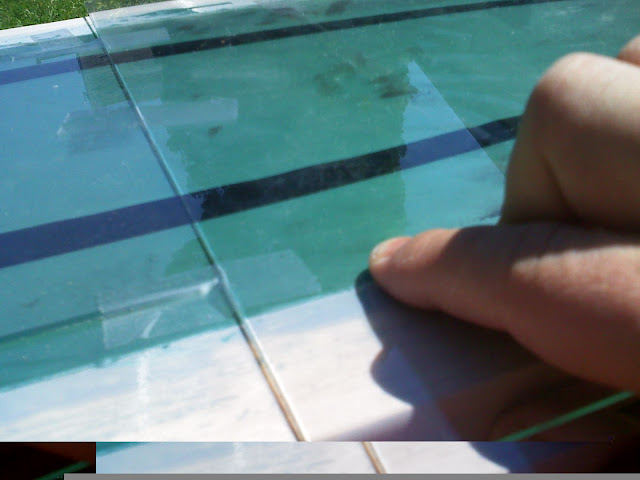
There are a few things you’ll want to have for this step: clear glass or plastic to lay over your transparency, cardboard or newspaper to lay inside the printing area, and more cardboard to lay on top of the glass to block the sun until you are ready to expose. This step also needs start in at least a dimly lit area. The key in this step is making sure no light can get under your transparency. To do this you need the transparency to lay as flat as possible so I put glass (from picture frames I bought) over the top of the transparency. Also something to block the sunlight from seeping in on the reverse side I use either newspaper or cardboard. You can see the newspaper on the reverse side in the photo above. Finally, put something over the top of the glass, like cardboard or newspaper so light doesn't get through until you are ready to expose. Make sure this is all taped down because you’ll need to carry this outside and it you don’t want the artwork to shift while moving it.
The picture below shows some of the layers. Top layer blocks the sun, 2nd layer is glass, 3rd layer is the screen, 4th layer is the newspaper/cardboard backing to block the light.
7. Exposure Test (Optional, kinda)
This tutorial exposes outside in the sunlight and is considered to be the ghetto method this day in age. So you guessed it we are setting the print outside. Now different locations/days have different light conditions so testing out exposure times is a good idea. I found about 2.5 minutes of exposure, on a sunny day; with the speedball products works well. Anything more than 1 minute and less than 5 minutes works well.
I'll give you a quickie on how the test works. The point of this test is to expose a number for one minute longer than the next. So what you need to do is expose the number 1 to 1 minute of light, the number 2 for 2 minutes and so on. After each minute you stop the exposure by putting the small block of wood over the number. This stops the exposure so that you can test out a 10 minute range to find the “sweet spot”..
You'll need a separate test screen, stickers 1 to 10 work well, and a couple small blocks of wood(or something that will cover the number and not let light through; Oreo cookies will work too). Stick the numbers to the screen in order, stick in a decent backing, newspaper like I mentioned before, and toss something to block the light on top, again a newspaper. Now take the contraption outside in the sun and perform the test I described above. Take the newspaper off the top, let the screen sit in the sun, and block the number 1 after 1 minute.
After the 10 minute process you'll need to cover it back up, run inside, take off the sticker and wash the screen. A low light place is best. You should be able to see the numbers when you take off the stickers in the emulsion.
Now you need to rinse the screen with water. Run some water over the screen and give it scrub with your hand or a soft scotchbright pad. It'll take some work, but you should see the numbers start to wash out. A pressure washer would work here too, but don't use too strong of a setting, start soft. I found using 2 scotchbrite pads to scrub each side is effective.
Now, take a look at your numbers, and choose the number that is looks the sharpest. If it washes out too much it is underexposed, if it washes out too little it is overexposed. Like I said, 2 and 3 minutes look the best to me.
Here is a youtube of some wank that is good, but he certainly needs to smoke a J and loosen up.
8. Back to your screen
Now back to your board print. It is time to take it outside and expose it for the time that worked best in your test print. This one is more important so as you are counting the minutes also look for raised spots where the transparency isn't flush with the screen. I hold it down with my hand if there is a spot. After it sits for your pre tested time cover it back up and take it to your rinsing station. Remove the glass, backing, transparency and start scrubbing and spraying. A large print will take a while to scrub so that is why I like to do it in low light. You'll find you need to scrub both sides to get all the emulsion off, but start scrubbing with the side you had the transparency on. I suggest this because the underside isn’t always totally developed and you can scrub off too much emulsion.
After some scrubbing hold it up to a little light to make sure you got all of the emulsion out of the print. Corners and edges of the print are always trouble spots that need some extra scrubbing. I'm guessing you'll find spots like this, so you might need to give some spots a little more elbow grease and it should be okay to scrub it a little harder. When you are pleased with the rinse, let it sit out to dry.
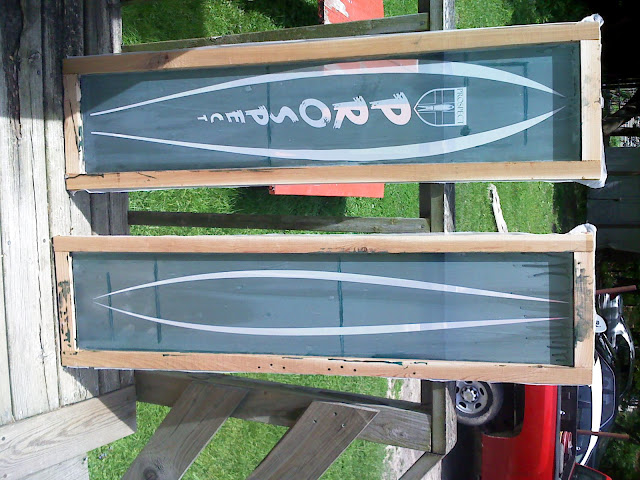
9. Finish the screen.
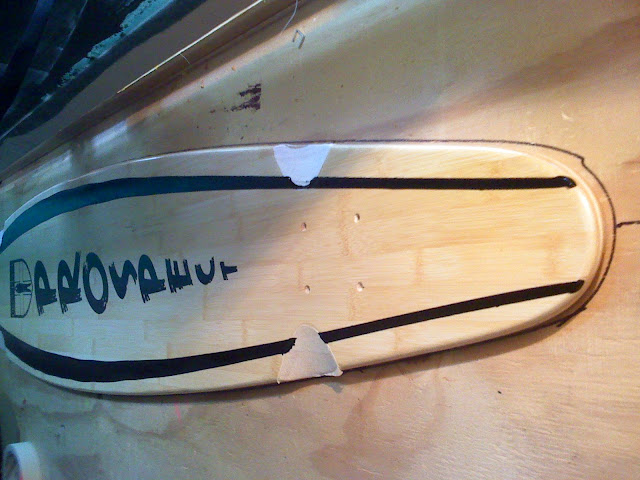
You probably have some rad looking screens at this point. To finish the screen you want to look for any holes in the emulsion outside of where you want to print and cover them. For the finished product I patched it with more emulsion (this can be seen in the finished screens above), but I found covering the holes with masking tape works well. Then you also want to line the edges with tape so that no paint can creep under the frame where there might not be emulsion.

10. Line up the print
I’m going to assume you can manage a large part of this process, but if you have questions I’ll add in answers.
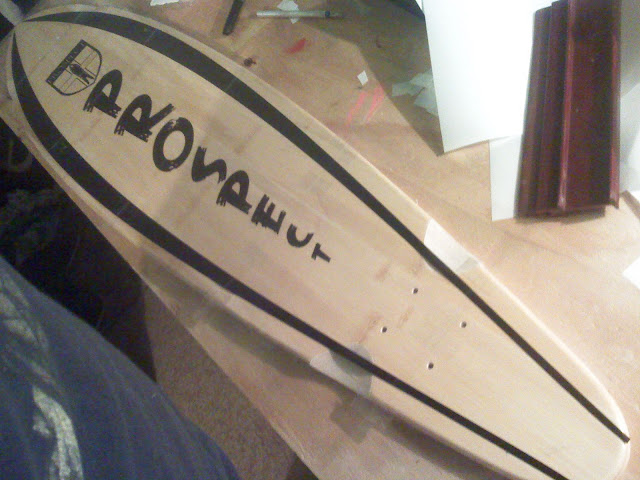
Now you want to line up the artwork to your print subject, your board/glass/topsheet. I did a trace around with a marker and tried a print on paper first until I was comfortable printing on the actual board. Then I did a trace on the plywood backing to give myself a good point of reference for each additional board. Here is where I could use some of your ideas. Getting the artwork to line up consistently is pretty tough because 2mm can make a big difference. Can anyone think of a good jig that will help me line this up quickly? Maybe a few small V blocks?
I think this point would be the best time to attach your hinges to the frame. I probably didn't use the best method, but I drilled some holes and hand tightened a nut and bolt. This can be observed in the first pictures under the press section.
11. Time to print
I picked up the ink at my local art supply store. There are a few brands, but make sure it is water soluble. Now you have your print surface lined up, the ink is on the screen, squeegee in hand and plenty of beer in the gut. Set the squeegee so you can pull some ink and swipe down the screen making sure ink is saturating the entire unexposed screen. If it doesn't, go back up, collect some more ink and swipe again. Then swipe back both with a firm, but not hard pressure. Keep the squeegee tall and don't use a TON of ink.
Now if the print has some bare spots you are in luck if you attached the hinges. You can set the screen back down carefully and line up the ink to the screen to give it another swipe. If you are going freehand that is pretty tough to do.
At this point you can let the ink dry for a day or research heat curing if you want to get technical.

So that is the process. Ask away and I'll add in the answers. I hope people find this useful. Be sure to keep me posted if you do some work with it!


